

When my partner and I embarked on our whole floor reno, we knew the central staircase was the project’s lynchpin. It was the first thing you saw when you walked into our North York home, and frankly, it was an embarrassment. Clad in worn-out, beige carpet from a bygone era, it was dark, creaky, and completely at odds with the bright, modern vision we had for our space. Transforming these dated stairs wasn’t just a line item on a list; it was essential to unifying our home’s new identity.
What started as a necessary update became the most dramatic and rewarding part of our entire renovation. The staircase went from a gloomy corridor to a stunning architectural feature that elevates the entire main floor.
Project Quick Facts
- Project Type: Staircase Refinishing & Railing Replacement
- Location: North York, Toronto, ON
- Scope: Full removal of carpet, replacement of treads, risers, handrail, and balusters as part of a larger main floor renovation.
- Duration: 2-3 weeks
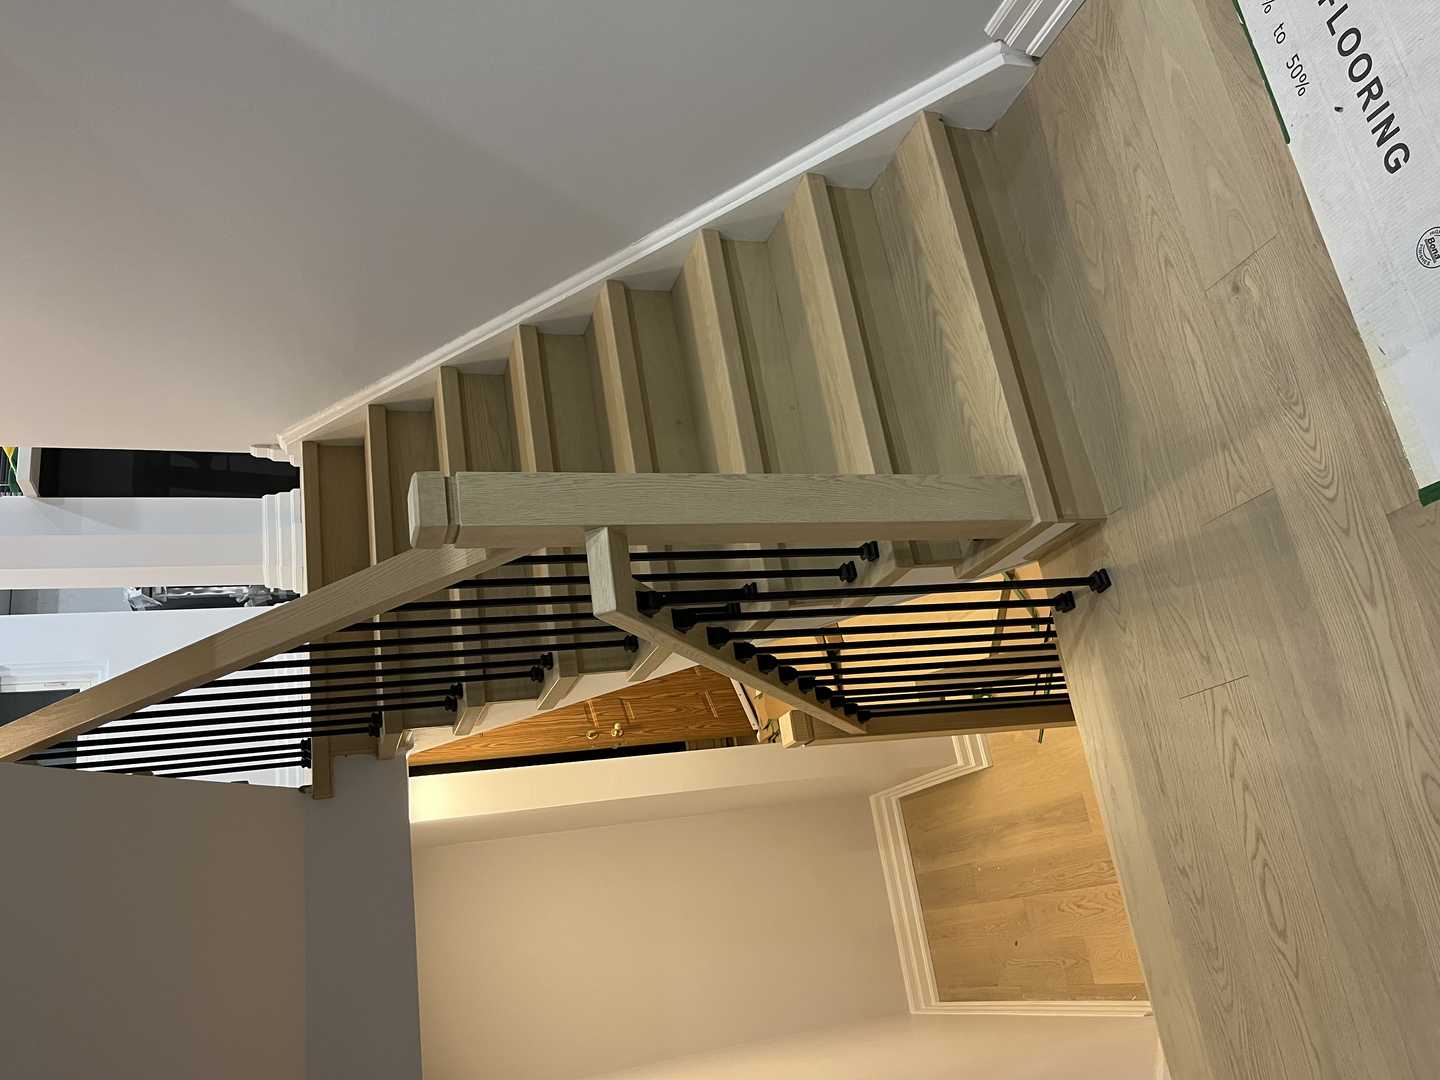
- Key Features: Solid Red Oak treads, custom-stained to match new flooring, modern wrought iron balusters, updated newel posts and handrail.
Our Design Vision: From Functional to Foundational
Our goal was twofold: aesthetics and function. We wanted to banish the beige carpet forever and replace it with something clean, durable, and beautiful. The old staircase, with its bulky, colonial-style wooden balusters and heavy newel post, made the entryway feel cramped and dated. Our vision was to create a sense of openness and flow, connecting the main floor with the upper level in a way that felt seamless and intentional.
We spent hours looking at inspiration online, drawn to designs that balanced classic materials with modern lines. We loved the warmth of natural wood but wanted to contrast it with something sleek and contemporary. The final design concept was clear:
- Solid Hardwood: We wanted the solid, satisfying feel of solid wood underfoot. Red Oak was the natural choice to complement the new engineered hardwood we were installing throughout the main floor.
- Clean Lines: The ornate, rounded profiles of the old railing had to go. We opted for a simple, squared-off handrail and newel posts for a more contemporary look.
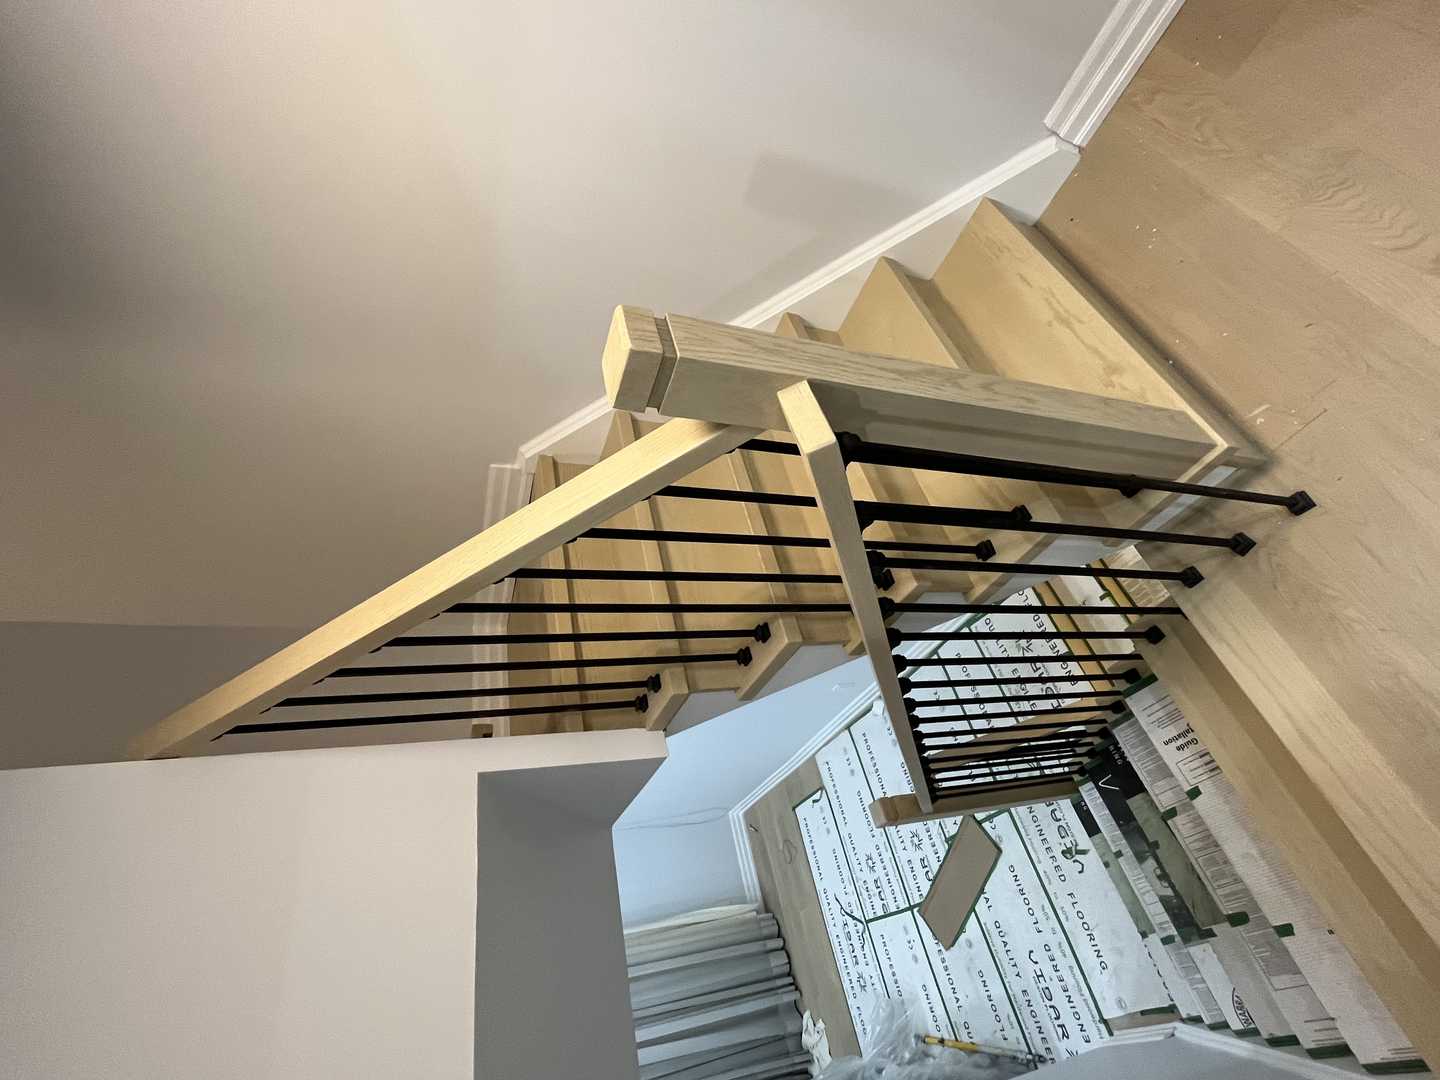
- Light & Air: We decided on simple, vertical wrought iron balusters. They provide the necessary safety and structure while being visually light, allowing sightlines to pass through and making the entire area feel larger and brighter.
Ultimately, we didn’t just want to change the stairs; we wanted them to become a deliberate piece of design, a focal point that would set the tone for our entire Toronto home.
Materials & Specifications
Choosing the right materials was critical for achieving the look and durability we wanted. Every component was selected with care to ensure it not only looked beautiful but would also stand up to years of daily use.
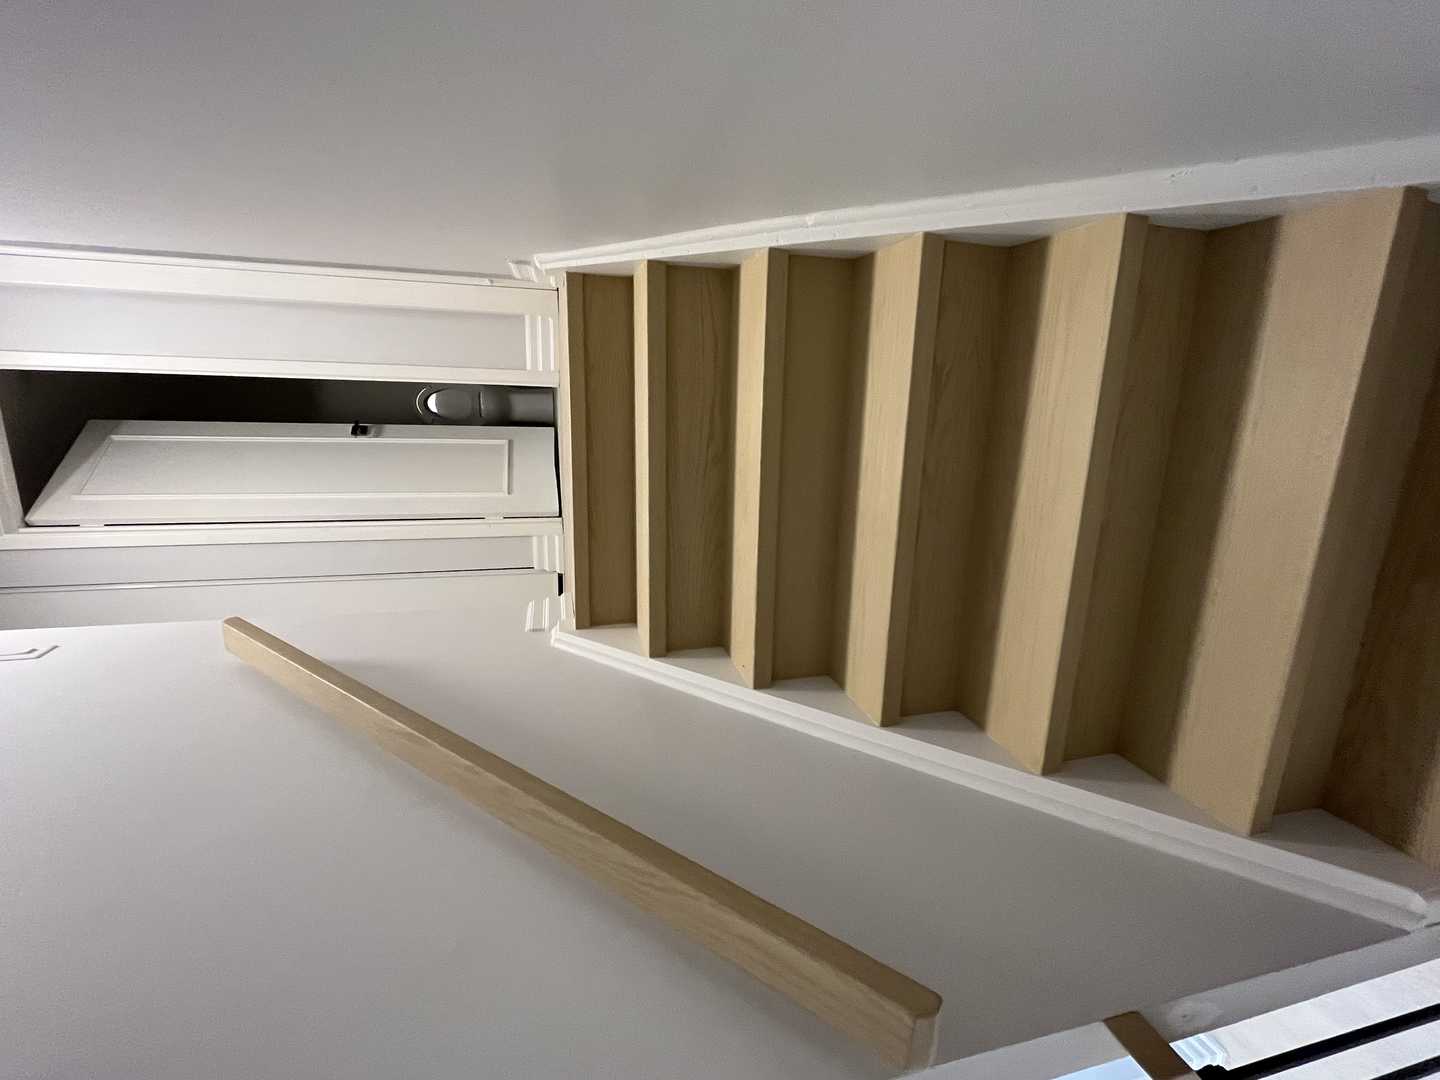
- Treads & Risers: We chose 1-inch thick solid Red Oak for the treads. This provided the sturdiness and quality we were after. For the risers, we opted for paint-grade wood, which we finished in a crisp white semi-gloss to create a classic, clean contrast with the stained treads. This “Hollywood” style (wood tread, white riser) is timeless and helps bounce light around the stairwell.
- Handrail & Newel Posts: To maintain a cohesive look, the newel posts and handrail were also crafted from Red Oak. We chose a simple, modern profile—a 3.5-inch square newel post and a slim, rectangular handrail that felt comfortable and secure in your hand.
- Balusters: Simple, single-knuckle wrought iron balusters in a matte black finish provided the modern contrast we were seeking. Critically, their installation was planned to adhere strictly to the Ontario Building Code, which mandates that the gap between balusters must be no more than 4 inches (100mm) to prevent children from fitting through.
- Stain & Finish: This was perhaps the most crucial detail. The team created several custom stain samples for us to test directly against our new flooring. We settled on a custom blend that perfectly complemented the tones in the hardwood. For the finish, they applied three coats of a commercial-grade, low-VOC polyurethane. This durable topcoat is essential for protecting the wood from the scuffs, scratches, and wear of a high-traffic area like a main staircase.
The Process & Timeline: A 3-Week Transformation
Living through a renovation can be challenging, but having a clear timeline made all the difference. The entire staircase project was completed efficiently within a 2-3 week window.
Week 1: Demolition and Structural Prep
The first few days were the loudest. The crew arrived and began the careful process of demolition. They pulled up the old carpet, padding, and tack strips, revealing the builder-grade plywood structure underneath. The old handrail and balusters were dismantled and removed.
This stage is where a professional team truly proves its worth. They didn’t just tear things out; they inspected the underlying stringers—the diagonal supports of the staircase—for any signs of weakness, squeaks, or damage. They took the time to reinforce the structure, adding screws and adhesive to eliminate the creaks that had bothered us for years. This foundational work is invisible in the final product but is absolutely essential for a solid, long-lasting result. They also prepped the surfaces, ensuring everything was clean, level, and ready for the new materials.
Week 2: Installation of Wood Components
This was the week of artistry. The skilled carpenters began fitting the new solid oak treads and painted risers. Each piece was custom-cut on-site to ensure a perfect, gap-free fit. It was mesmerizing to watch them work with such precision.
Once the treads and risers were in, they installed the sturdy newel posts at the base and top of the staircase, anchoring them securely to the floor joists. This is a critical step for the stability and safety of the entire railing system. The Red Oak handrail was then installed, its height carefully measured to comply with Ontario Building Code requirements for safety and graspability.
Week 3: Finishing and Final Details
With the main wood structure in place, the final details came together. The crew drilled the precise holes for the wrought iron balusters and set them in place with epoxy for a rock-solid fit.
The rest of the week was dedicated to the finishing process. This is something that simply cannot be rushed. The team meticulously filled any nail holes, sanded all the wood surfaces to a silky-smooth finish, and began the staining process. After the stain was applied and had cured, they applied the three coats of polyurethane, allowing for proper drying time between each coat. This patience is what creates that deep, durable, and professional-looking finish. The final step was a thorough cleanup and a final walk-through with us to ensure every detail was perfect.
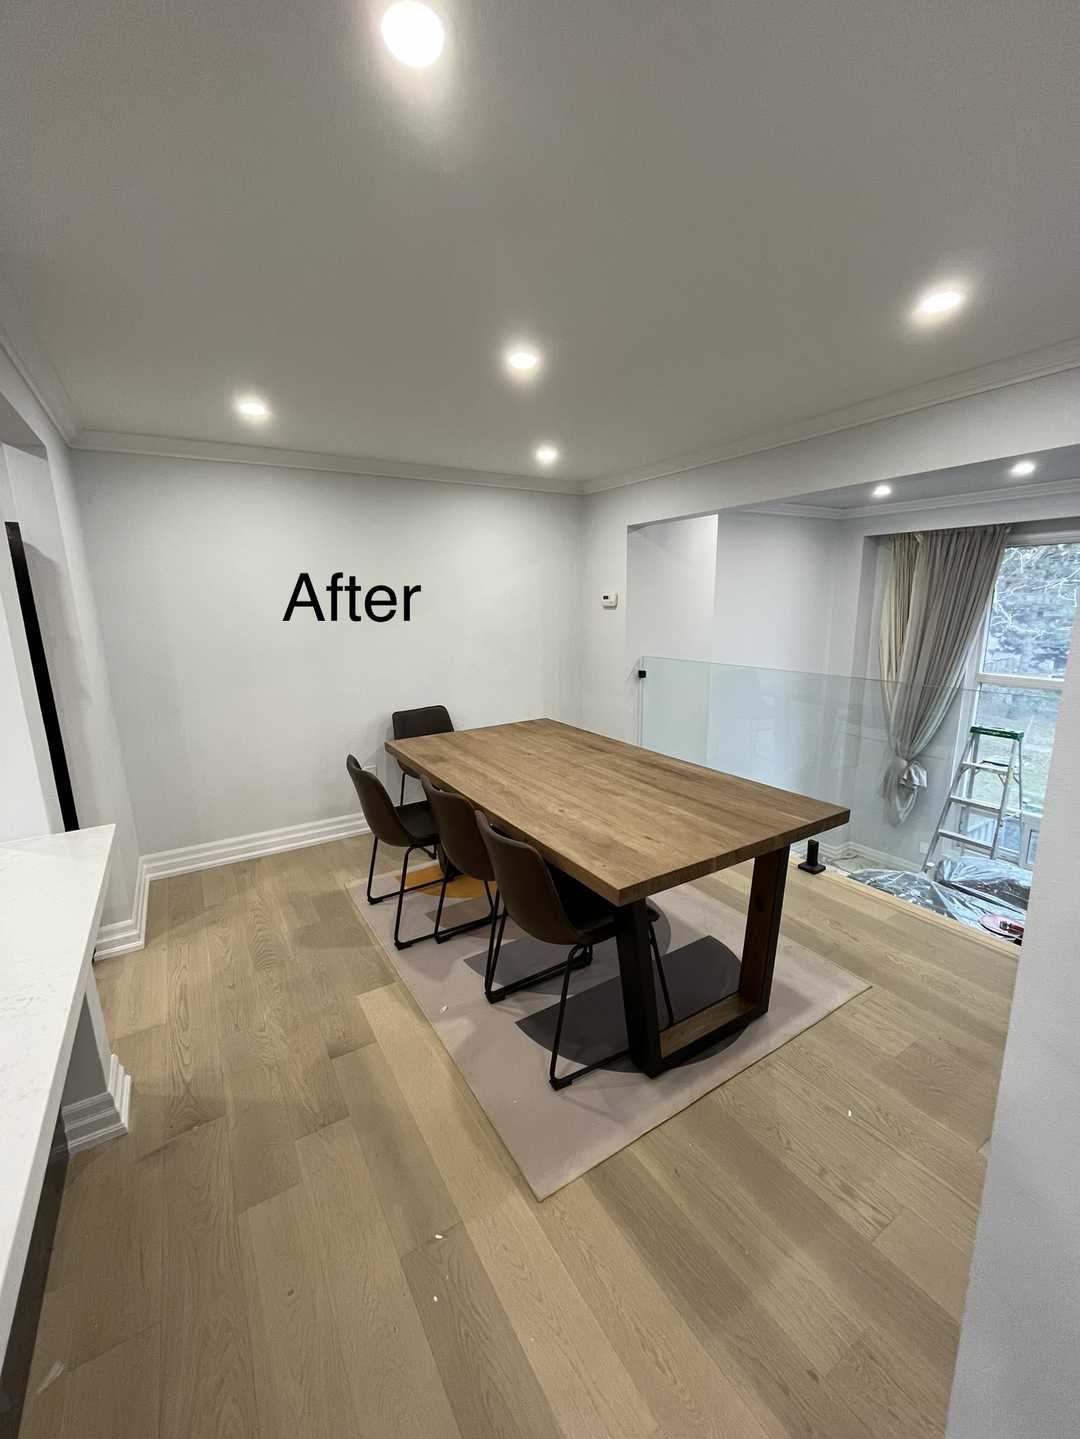
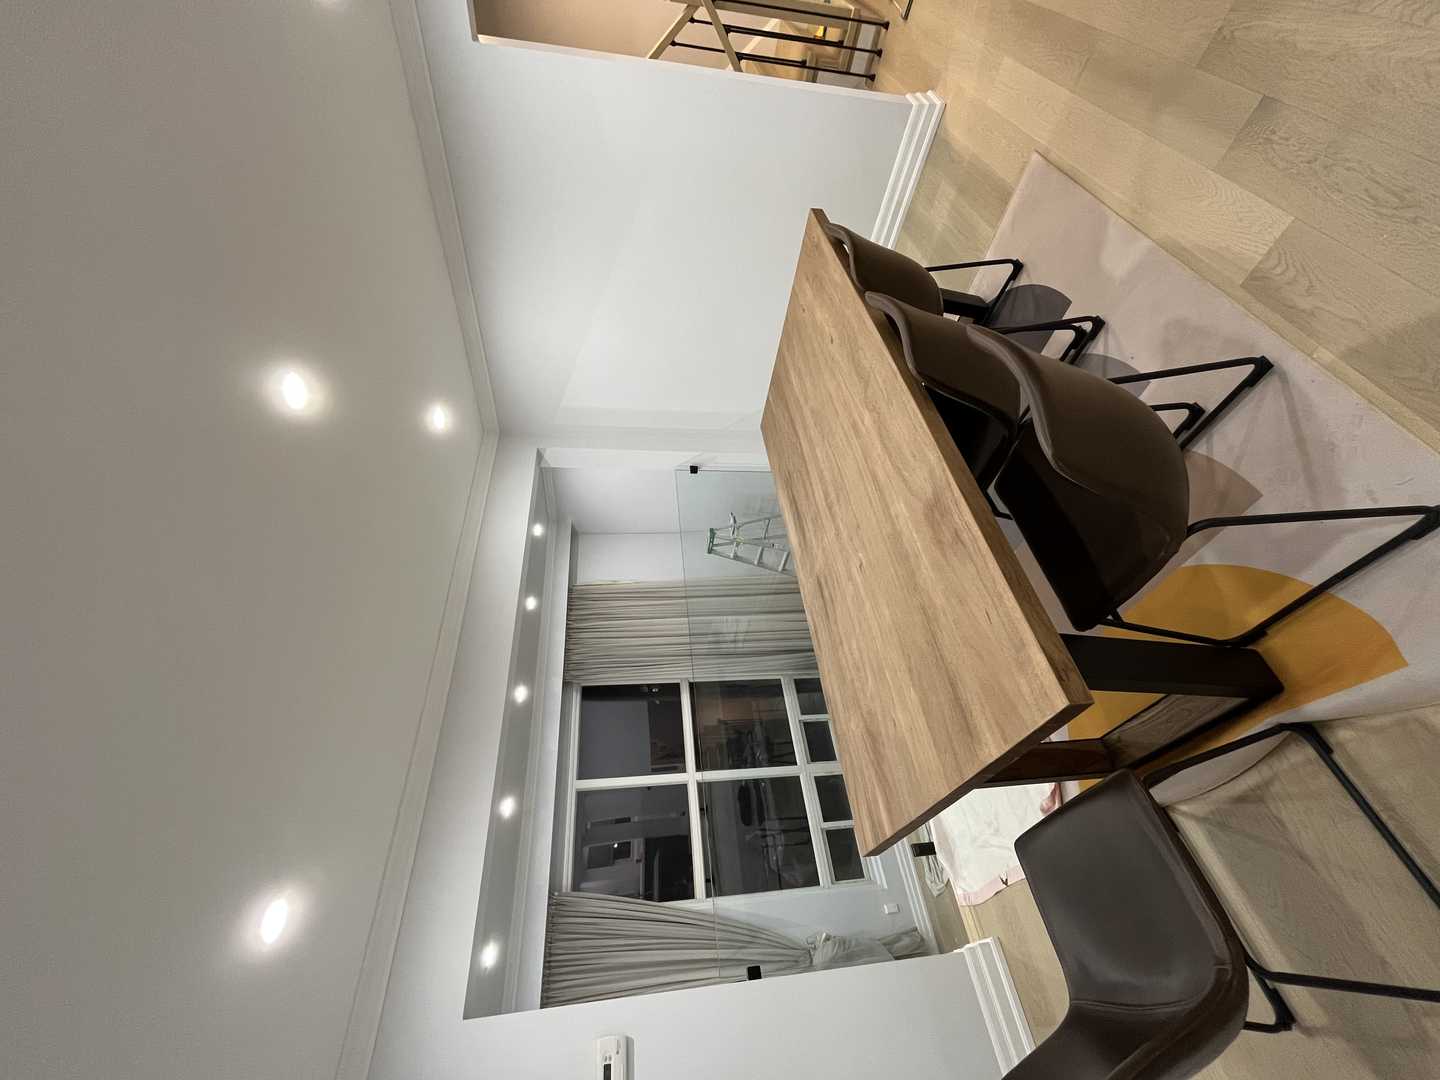
The Final Look: A Breathtaking First Impression
The transformation is, without exaggeration, breathtaking. Where there was once a dark, carpeted tunnel, there is now a bright, elegant, and welcoming feature. The warm tones of the Red Oak treads play beautifully against the crisp white risers and the modern edge of the black iron balusters.
The staircase no longer feels like a separate, forgotten part of the house. It’s now a design element that seamlessly integrates with our new main floor. It feels incredibly solid underfoot—the creaks are completely gone—and the smooth, sturdy handrail provides a sense of security. It has fundamentally changed the character of our entryway and, by extension, our entire home. Friends who have visited since the renovation can’t believe it’s the same staircase.
Design Takeaways for Your Renovation
- Don’t Underestimate Your Stairs: In a whole floor reno, it’s easy to focus on the kitchen or floors, but the staircase can have the single biggest impact on the feel of your home. Treat it as a primary design feature, not an afterthought.
- Consistency is Key: Matching the wood species and stain of your stair treads to your home’s flooring creates a powerful sense of cohesion and flow. It makes the entire space feel larger and more thoughtfully designed.
- Safety and Code are Non-Negotiable: A beautiful staircase is worthless if it isn’t safe. Working with professionals who understand the Ontario Building Code ensures that railing height, baluster spacing, and structural integrity are all up to standard, protecting your family and your investment. If you’re considering adding features like integrated lighting, ensure all electrical work is done by a licensed electrician.
- Invest in Quality Materials: Stairs see an incredible amount of foot traffic. Investing in solid hardwood treads and a durable, professional-grade finish will pay dividends for years to come, resisting wear and maintaining its beauty far longer than cheaper alternatives.
Simple Maintenance for Lasting Beauty
- Regular Dusting: Use a microfiber mop or a soft vacuum attachment to keep dust and grit from scratching the surface.
- Strategic Cleaning: For spills or dirt, use a damp (not wet) cloth with a small amount of pH-neutral cleaner designed for hardwood floors. Avoid harsh chemicals, vinegar, or steam mops.
- Protect the Finish: Place a quality welcome mat at your front door to reduce the amount of dirt and moisture tracked onto the stairs. Consider a stylish runner if you have heavy foot traffic, pets, or young children.
- Annual Check-Up: Once a year, give the handrail and balusters a gentle shake to check for any loosening. It’s a simple five-minute check that ensures continued safety.
Frequently Asked Questions
Do I need a permit to renovate my staircase in Toronto?
For a cosmetic renovation like ours—replacing treads, risers, and railings without changing the location or structure of the stairs—a permit is typically not required in Toronto. However, if you are altering the stringers, changing the staircase’s location, or making significant structural modifications, a building permit is almost certainly necessary. It’s always best to consult with your renovation partner or the city’s building department to be sure.
What is the biggest challenge when renovating stairs in an older North York home?
In many older homes, the biggest unknown is what you’ll find under the old materials. The original framing might not be perfectly level or square. When we removed our old carpet, we discovered some minor inconsistencies in the rise and run of the original builder’s stairs. A professional team knows how to scribe and custom-fit the new materials to correct for these imperfections, ensuring a flawless and safe final product.
How do you match the new stair stain to existing hardwood floors?
Achieving a perfect match is an art form. A professional finishing team won’t just use a pre-mixed stain from a can. They will create custom samples on the same wood species as your stairs (in our case, Red Oak) and test them against your actual flooring in your home’s unique lighting conditions. This allows you to choose the perfect blend for a seamless and cohesive look.
The journey of transforming our staircase was one of the best decisions we made for our home. It redefined our space and brings us joy every single day. If you’re considering a similar project and want to see how a new staircase can elevate your home, we encourage you to start the conversation.
We’d love to help you plan your own transformation. Contact us today for a free quote and let’s create a beautiful first impression together.