When Sarah and Tom first contacted us from their home in King City, ON, their goals were ambitious but clear. They loved their neighbourhood but felt disconnected from their home’s main floor, which was dominated by a dated and inefficient kitchen. Their long-term vision included a complete basement reno to create a family entertainment space, but they knew the heart of their home needed immediate attention. This project became the stunning first phase of their whole-home transformation: a modern, functional, and light-filled kitchen designed for family life.
This is the story of how we turned a cramped, dark kitchen into the bright, welcoming hub of a King City home, setting the stage for future renovations and a new way of living.
Project Quick Facts
- Project Type: Kitchen Renovation
- Location: King City, Ontario
- Key Features: Custom two-tone cabinetry, large quartz island with waterfall edge, integrated appliances, custom range hood, dedicated coffee bar.
- Project Start Date: March 2023
- Duration: 4 weeks
The Design Vision: A Bright and Social Hub
“Our old kitchen was a classic 90s design,” Sarah recalls. “Oak cabinets, a peninsula that cut off the room, and just not enough functional counter space. We love to host, but everyone would always be crammed into the family room because the kitchen just wasn’t inviting.”
Their vision was centered on three key principles: light, flow, and function. They dreamed of an open-concept space that seamlessly connected the kitchen to the dining and living areas. The goal was to create a social hub where Tom could cook while still being part of the conversation, the kids could do homework at the island, and guests could gather comfortably with a glass of wine.
The aesthetic was “modern warmth.” They wanted the clean lines and sophistication of a contemporary design but without the cold, sterile feeling it can sometimes evoke. This meant blending sleek, flat-panel cabinetry with natural textures, a neutral colour palette, and strategic lighting to create a layered, inviting atmosphere. A large central island was non-negotiable—it would be the anchor of the new space, serving as a prep area, casual dining spot, and the primary gathering point.
Materials and Specifications: A Study in Texture and Tone
Achieving the “modern warmth” aesthetic came down to a carefully curated selection of materials. Every finish was chosen to contribute to the overall feeling of calm sophistication and durability.
-
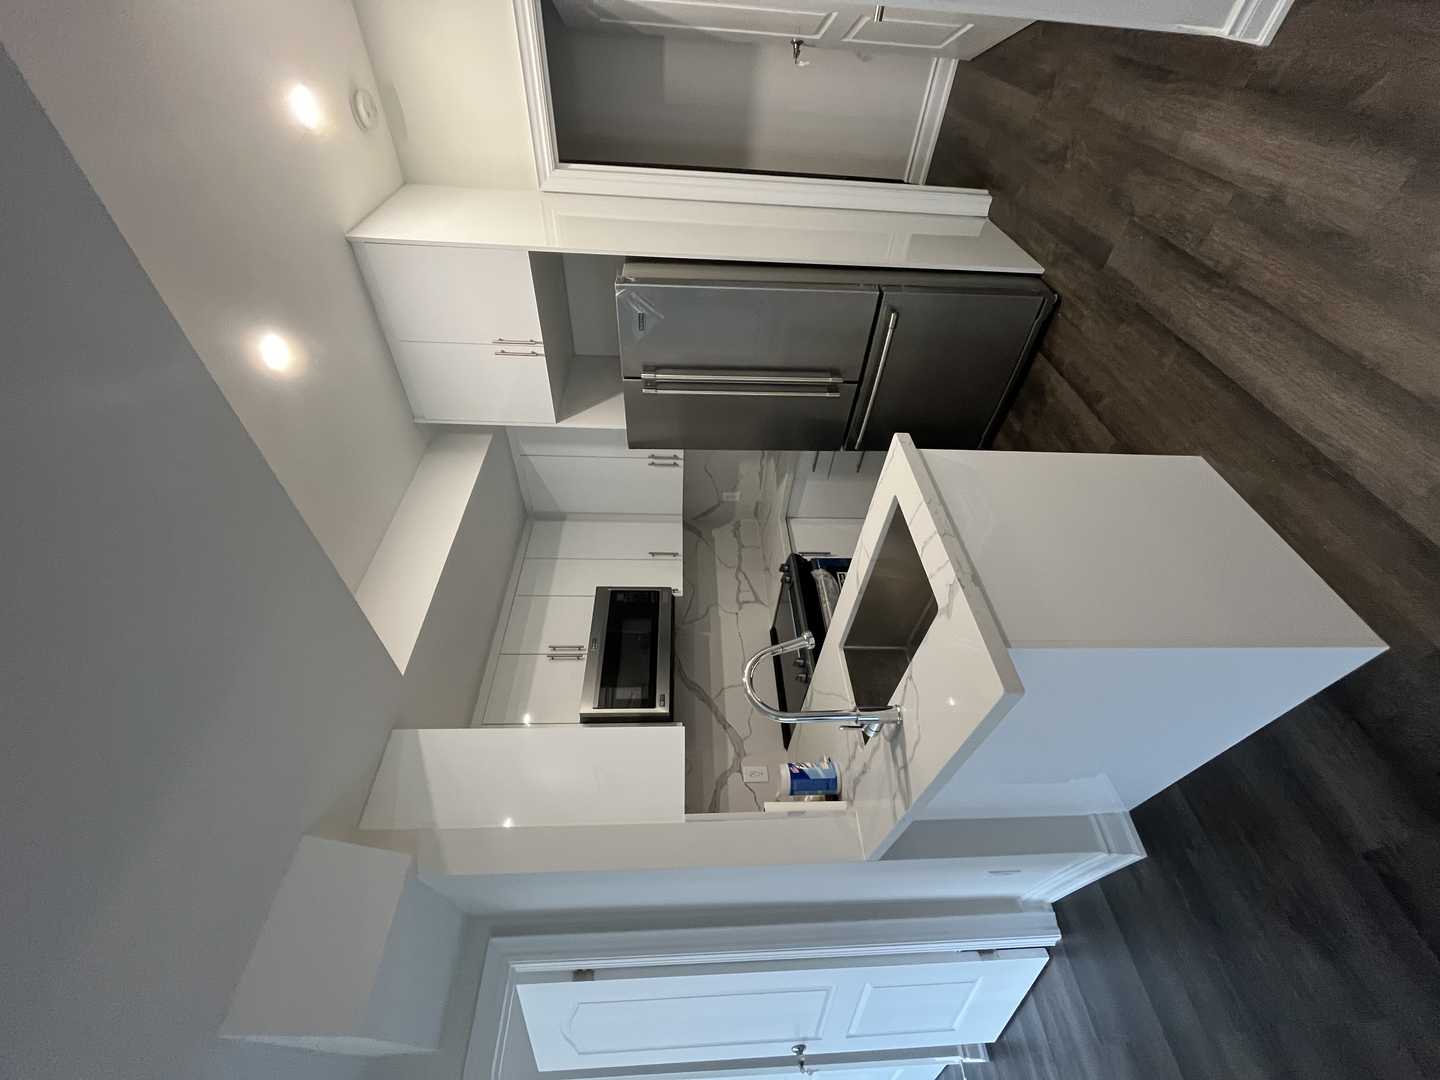
Cabinetry: We opted for custom-built, full-height cabinetry to maximize storage and create a seamless look. The perimeter cabinets feature a soft, matte white finish, which reflects light and makes the space feel larger. For the island and the tall pantry units, we chose a textured wood-grain laminate in a warm grey oak. This two-tone approach adds visual interest and depth, with the wood grain providing that crucial touch of natural warmth. All doors and drawers are soft-close for a touch of quiet luxury.
-
Countertops & Backsplash: To maintain the bright, airy feel, Sarah and Tom selected a durable quartz countertop with subtle, delicate grey veining. This provides the timeless look of marble without the maintenance concerns. For the island, we created a dramatic waterfall edge, where the quartz cascades down the sides to the floor, creating a stunning focal point. The same quartz slab was run up the wall as a full-height backsplash behind the range, making a bold statement and creating an easy-to-clean surface.
-
Appliances: The appliance package was fully integrated to maintain the kitchen’s clean lines. The refrigerator and dishwasher are concealed behind custom cabinet panels, disappearing into the surrounding millwork. A high-performance induction cooktop and a sleek, built-in wall oven complete the modern, functional setup.
-
Flooring: The old tiled floor was replaced with wide-plank engineered hardwood that runs continuously throughout the main floor. This decision was key to achieving the open-concept flow, visually connecting the kitchen with the adjacent living and dining areas.
-
Lighting: A multi-layered lighting plan was essential. We installed recessed LED pot lights for general ambient lighting, under-cabinet LED strips for task lighting on the countertops, and two beautiful, oversized pendants above the island to add a decorative, sculptural element. All lighting is on dimmers, allowing the homeowners to adjust the mood from bright and functional to soft and intimate.
The Process and Timeline: An Organic Transformation
One of the unique aspects of this King City renovation was its timeline. When we list the duration as “nan” (not a number), it’s because the project unfolded in distinct, carefully planned phases that flowed organically based on the family’s decisions.
“We didn’t want to rush the final details,” Tom explains. “The main demolition and construction happened in a concentrated burst, but we took our time selecting the exact backsplash tile and the perfect cabinet hardware. It felt less like a rigid construction schedule and more like we were crafting the space together.”
The process began with a detailed plan and securing the necessary permits from the Township of King. The first step was demolition, which involved removing the old cabinets, flooring, and, most importantly, the non-load-bearing wall that separated the kitchen from the dining room. Our structural engineer confirmed the wall wasn’t essential, allowing us to create the open-concept layout the homeowners desired.
Next came the rough-ins. This is a critical stage where all the behind-the-scenes work happens. Our licensed electricians re-wired the space, ensuring all new outlets met the Ontario Electrical Safety Code, including dedicated circuits for major appliances and GFCI (Ground Fault Circuit Interrupter) outlets near the sink for safety. Our plumbers re-routed the water lines for the new sink and dishwasher placement. This stage concluded with thorough inspections to ensure everything was perfectly up to code before any drywall was installed.
With the foundational work complete, the new flooring and custom cabinetry were installed, and the space truly began to take shape. The countertops were templated and fitted, followed by the installation of the appliances and plumbing fixtures. The final phase involved the meticulous work of painting, installing the backsplash, and fitting the final hardware and lighting fixtures.
The Final Look: Effortless Elegance
Stepping into the finished kitchen is like a breath of fresh air. The space is unrecognizable. Light pours in from the large windows, reflecting off the white cabinets and quartz countertops, making the entire main floor feel expansive and bright.
The large island is, without a doubt, the star of the show. It’s where the family starts their day with breakfast, where friends gather during parties, and where countless meals are prepped. The waterfall edge gives it a sculptural quality, elevating it from a simple piece of furniture to a central design feature.
The two-tone cabinetry works beautifully, with the warm wood grain of the island grounding the space and preventing the white from feeling too stark. The integrated appliances give the kitchen a clean, uncluttered European aesthetic, while the custom-built coffee bar, tucked into a previously unused nook, is a small touch of everyday luxury that Sarah says has “completely changed her mornings.”
Design Takeaways for Your Renovation
Sarah and Tom learned a lot during their renovation. Here are their top takeaways for other Ontario homeowners:
- Invest in a Plan: “Don’t underestimate the power of a good design,” says Tom. “Having a detailed 3D rendering before we started allowed us to visualize the space and make confident decisions. We knew exactly how the traffic would flow and where everything would go.”
- Think About Lighting in Layers: “The lighting is one of our favourite parts,” Sarah notes. “Having different types of light—ambient, task, and decorative—and being able to dim them makes the room so much more versatile.”
- Don’t Be Afraid of a Phased Approach: While not for everyone, allowing for pauses in the timeline to make key decisions can reduce stress. It gave them the breathing room to be 100% sure about finishes without feeling pressured by a construction schedule.
Maintaining Your New Kitchen
A beautiful new kitchen deserves to be cared for. Here are a few tips for keeping these specific materials looking their best:
- Quartz Countertops: Clean daily with a soft cloth, water, and a drop of mild dish soap. Avoid abrasive cleaners or scouring pads. While highly stain-resistant, wipe up spills like red wine or coffee promptly.
- Matte & Laminate Cabinetry: Use a microfiber cloth with a gentle, non-abrasive cleaner. For the textured wood-grain laminate, wipe in the direction of the grain to clear any dust from the grooves.
- Integrated Appliances: Regularly wipe down the interior of panel-ready appliances and check the seals to ensure they are clean and functioning properly.
- Engineered Hardwood: Use a dust mop or vacuum (with the beater bar turned off) for regular cleaning. For deeper cleans, use a pH-neutral cleaner designed specifically for hardwood floors.
Frequently Asked Questions
What kind of permits are needed for a kitchen renovation in King City?
For a project of this scale, which involves removing a wall and altering electrical and plumbing systems, building permits are typically required from the local municipality. This ensures that all work, from structural changes to electrical wiring, complies with the Ontario Building Code. We handle the entire permit application process for our clients to ensure a smooth and compliant renovation.
We’re also considering a basement reno. Should we do that or the kitchen first?
This is a common question. Like Sarah and Tom, many homeowners weigh these two impactful projects. The answer often depends on your lifestyle. If your main floor living area feels cramped and dysfunctional, renovating the kitchen first can dramatically improve your daily life. If you need more overall living space for a growing family or a dedicated work-from-home area, a basement reno might be the priority. We often consult with clients to help them determine which project will provide the best return on investment and enjoyment for their specific needs.
How much does a custom kitchen like this cost in the York Region area?
The cost of a custom kitchen renovation can vary widely based on the size of the space, the quality of materials, the scope of structural changes, and the appliance package. A project like this one in King City, featuring custom cabinetry, high-end quartz, and integrated appliances, represents a significant investment in your home’s value and your quality of life. The best way to get an accurate figure for your specific vision is to get a detailed estimate.
This King City kitchen transformation is a testament to the power of thoughtful design and quality craftsmanship. It’s more than just a new room; it’s a new hub for family life, connection, and making memories.
If you’re feeling inspired to transform your own space, whether it’s a kitchen, a bathroom, or that basement you’ve been dreaming of, we’d love to hear about it. Reach out to us today for a free, no-obligation quote and let’s start the conversation.