

Transforming a dated, builder-grade bathroom into a personal sanctuary is one of the most rewarding home renovation projects. For a homeowner in Toronto, the goal was to create a modern, luxurious 3-piece bathroom that felt both spacious and serene. This project, which we call the Milton 871, is a perfect case study in how thoughtful design and expert execution can completely redefine a space. The key to its success was a commitment to a clean aesthetic, achieved with a stunning full wall tile bathroom design that exudes sophistication.
Project Quick Facts
- Project Name: Milton 871 Bathroom Renovation
- Location: Toronto, ON
- Scope: Full gut and remodel of a primary 3-piece bathroom
- Key Features: Floor-to-ceiling large-format porcelain tile, curbless walk-in shower with linear drain, custom floating vanity, heated flooring, and layered lighting.
- Duration: 3-4 weeks
- Timeline: Winter 2023
The Design Vision: From Cramped to Contemporary
The original bathroom was a product of its time: a standard tub-shower combination, a bulky floor-mounted vanity that consumed valuable floor space, and a single, inadequate light fixture. The layout felt cramped, and the finishes lacked personality. The homeowner envisioned a space that felt like a high-end hotel spa—bright, open, and easy to maintain.
Our design process began with two primary objectives:
- Maximize Visual Space: We needed to employ design strategies that would make the room feel larger without moving any walls.
- Elevate the Experience: The new bathroom had to be more than just functional; it needed to be a place for relaxation and rejuvenation.
The core concept revolved around creating a seamless, monolithic look. By cladding every wall, from floor to ceiling, in the same large-format tile, we could eliminate visual breaks and draw the eye upward, creating an illusion of height and expanse. A curbless, glass-enclosed shower would further enhance this sense of openness, allowing light to flow freely throughout the room. A floating vanity was selected to free up floor space, making the room feel lighter and easier to clean. The final touch would be a sophisticated materials palette of marble-look porcelain, matte black fixtures, and warm wood tones to create a balanced, contemporary aesthetic.
Materials & Specifications: The Building Blocks of Luxury
Every material in this Toronto bathroom renovation was chosen for its beauty, durability, and contribution to the overall design vision. Here’s a breakdown of the key components:
Tiling and Flooring
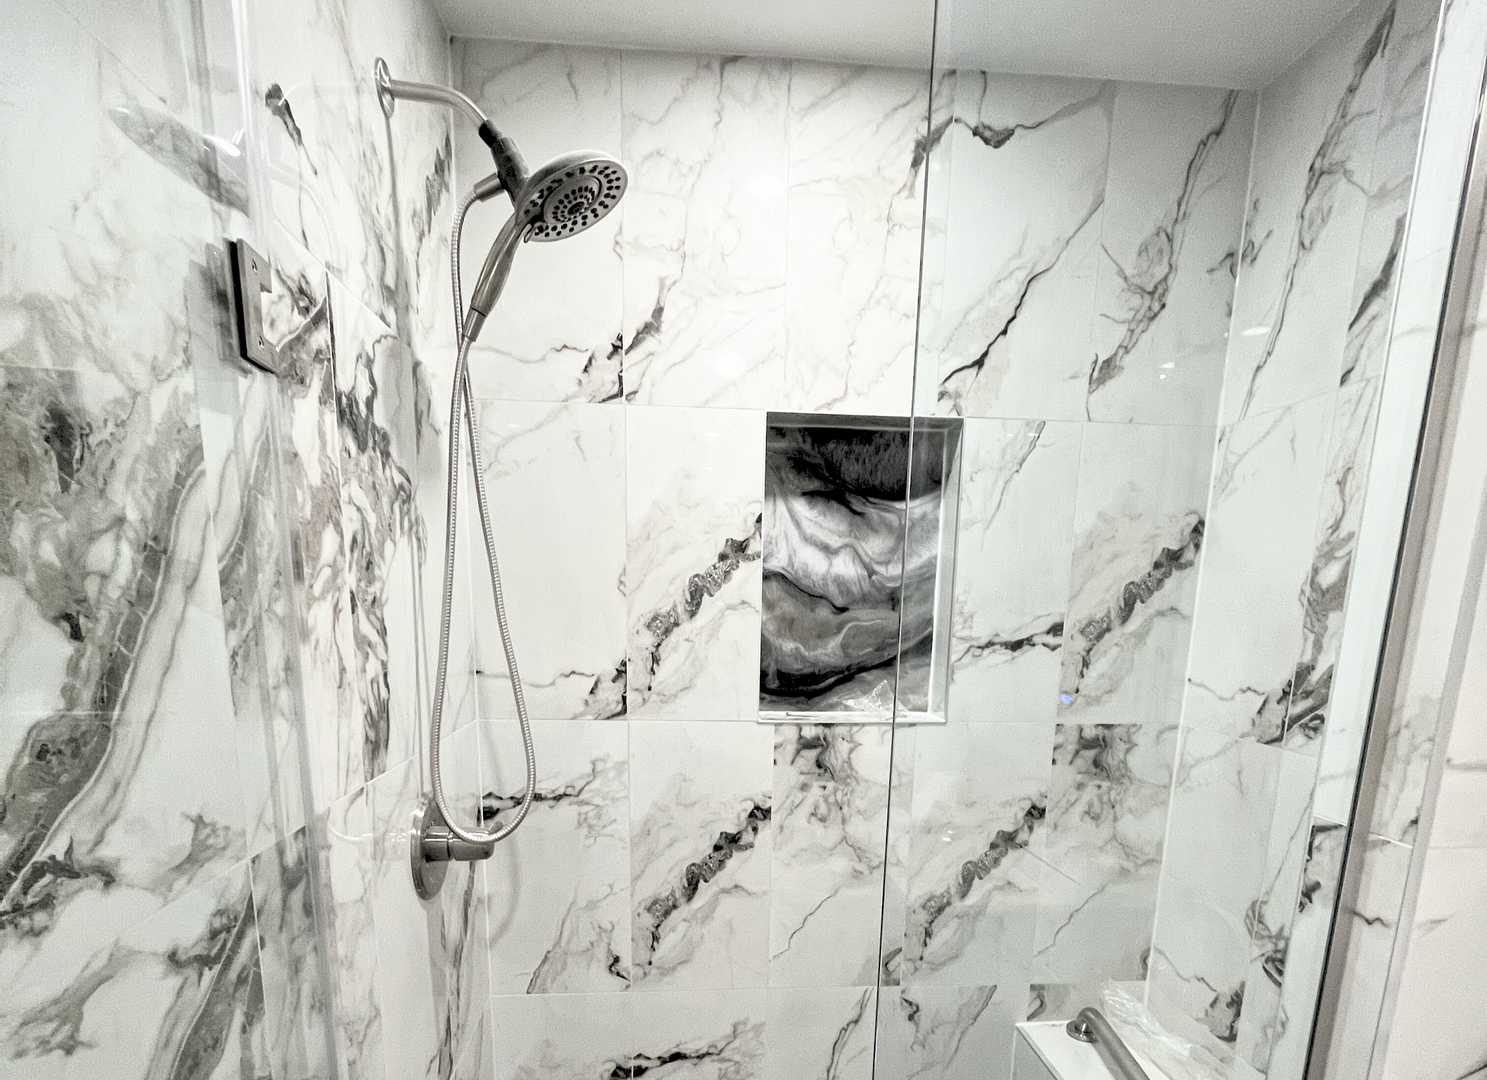
- Wall & Floor Tile: We used 24” x 48” large-format porcelain tiles with a subtle Calacatta marble veining. Using such large tiles minimizes grout lines, which not only looks cleaner and more modern but also makes maintenance significantly easier. The same tile was used on the shower floor, but in a 2” x 2” mosaic format to provide a safe, non-slip surface while maintaining a perfect visual match.
- Heated Flooring System: Underneath the tile, we installed a Schluter-DITRA-HEAT electric floor warming system. This is a must-have luxury for chilly Toronto mornings, providing consistent, comfortable warmth underfoot.
Shower System & Waterproofing
- Curbless Shower: The cornerstone of the design. The shower floor was recessed and sloped precisely toward a sleek, stainless steel linear drain positioned against the back wall.
- Waterproofing: This is the most critical, non-negotiable step in any bathroom remodel. We used the complete Schluter-KERDI system, a bonded waterproofing membrane and vapour retarder. The seamless membrane was applied to the entire shower area—floor, walls, and curb (or lack thereof)—creating a fully sealed, watertight enclosure that far exceeds Ontario Building Code requirements.
- Glass Enclosure: A custom-fabricated 10mm frameless tempered glass panel and door were installed to keep the sightlines clean and open.
Vanity, Fixtures, and Finishes
- Vanity: A custom-built floating vanity in a warm rift-cut oak finish provided much-needed storage without the visual weight of a traditional cabinet. It was topped with a durable, low-maintenance white quartz countertop with an undermount sink.
- Plumbing Fixtures: A suite of high-quality fixtures in a modern matte black finish was chosen for its bold, graphic contrast against the light tile. This included the wall-mounted faucet, the rain shower head and handheld wand, and all accessories.
- Toilet: A one-piece, skirted toilet with a soft-close seat was selected for its sleek profile and ease of cleaning.
Lighting & Electrical
- Layered Lighting: We designed a three-part lighting scheme: four dimmable LED pot lights for ambient overhead lighting, two vertical sconces flanking the vanity mirror for shadow-free task lighting, and a waterproof LED strip light in a shower niche for a soft, ambient glow.
- Electrical Safety: All electrical work was completed by a licensed electrician. This included installing a new, whisper-quiet exhaust fan vented directly outside and ensuring all outlets near the vanity were GFCI-protected, as required by the Electrical Safety Authority in Ontario.
The Process & Timeline: A 4-Week Transformation
A well-planned timeline is crucial for a smooth renovation. This project was completed within the projected 3-4 week timeframe, following a meticulous, phased approach.
Week 1: Demolition and Rough-ins
The first few days were dedicated to careful demolition. We stripped the bathroom down to the studs and subfloor, removing all old fixtures, drywall, and tiling. This allowed us to inspect the framing and subfloor for any potential issues. With a clean slate, our licensed plumbers and electricians began the rough-in phase. This involved relocating the shower drain for the new linear drain, moving water lines for the wall-mounted faucet, and running all new wiring for the heated floors, pot lights, and sconces.
Week 2: Preparation and Waterproofing
This week was all about building the foundation for a long-lasting finish. We installed new moisture- and mould-resistant drywall throughout the bathroom. The subfloor was prepped, and the DITRA-HEAT membrane and heating cables were laid down. The most critical task of the week was waterproofing the entire shower enclosure. The Schluter-KERDI membrane was meticulously applied, with every seam, corner, and screw penetration sealed to create a completely impermeable barrier. This stage is where craftsmanship truly counts; a single mistake here can lead to catastrophic failures down the road.
Week 3: Tiling and Grouting
With the waterproofing complete and cured, the visual transformation began. Our tiling specialists started by laying the floor tile, ensuring the heating system was fully embedded in thin-set mortar. Then, they moved to the walls, carefully installing the large-format porcelain. Working with tiles of this size requires precision and expertise to ensure level surfaces and perfectly aligned grout lines. After the tiles were set, we applied a high-performance, stain-resistant epoxy grout.
Week 4: Finals, Finishes, and Handover
The final week is when all the pieces come together. The custom vanity and quartz countertop were installed, followed by the toilet. Our plumber returned to install the faucets, shower controls, and sink. The electrician connected all the light fixtures, switches, dimmers, and the heated floor thermostat. The custom glass for the shower was installed, and the final coat of paint was applied. After a thorough professional cleaning, we conducted a final walkthrough with the homeowner to present their new spa-like retreat and ensure every detail was perfect.
The Final Look: A Study in Serenity
The completed bathroom is a world away from its predecessor. The floor-to-ceiling tiles create a powerful sense of unity and height, making the room feel significantly larger and more grand. The curbless shower entry is seamless, enhancing both accessibility and the room’s modern aesthetic. The matte black fixtures pop against the light, veined porcelain, adding a touch of drama and sophistication. The warm wood of the floating vanity prevents the space from feeling cold, introducing a natural, organic element. The layered lighting scheme allows the homeowner to adjust the mood from bright and functional for the morning routine to soft and relaxing for an evening soak. It is a space that is not only beautiful but also functions flawlessly.
If you’re feeling inspired by this Toronto bathroom transformation and are considering an upgrade for your own home, we can help. Request your free, no-obligation quote today to get started.
Design Takeaways for Your Renovation
- Embrace Large-Format Tile: Don’t be afraid to use large tiles in a smaller bathroom. Fewer grout lines create a less “busy” surface, which tricks the eye into seeing a larger, more cohesive space.
- Prioritize Professional Waterproofing: It’s the single most important investment you can make in a bathroom renovation. Insist on a comprehensive system like Schluter-KERDI or a similar product, installed by a certified professional.
- Think in Layers of Light: Good lighting is transformative. Combine ambient (pot lights), task (vanity lights), and accent (niche lighting) sources, and put them all on dimmers for ultimate control.
- Float Your Vanity: In any bathroom where space is at a premium, a floating vanity is a game-changer. It opens up the floor, making the room feel airier and more spacious.
Long-Term Maintenance Tips
A beautiful new bathroom deserves to be kept in pristine condition. Here are a few simple tips:
- Daily Squeegee: Use a squeegee on the glass shower doors and tiled walls after each use to prevent hard water spots and soap scum buildup.
- Use the Fan: Always run your exhaust fan during a shower and for 20-30 minutes afterward to properly vent moisture and prevent the growth of mould and mildew.
- Gentle Cleaning: Clean tile, fixtures, and countertops with pH-neutral, non-abrasive cleaners to protect the finishes. A simple solution of water and white vinegar is often effective and safe for most surfaces.
- Check Seals: Periodically inspect the silicone seals around the base of the toilet and where the vanity meets the wall to ensure they are intact and watertight.
Frequently Asked Questions
Do I need a permit for a bathroom renovation in Toronto?
It depends on the scope of work. If you are simply replacing a faucet or a toilet in the same location, you typically do not need a permit. However, for a full gut renovation like the Milton 871 project—which involves moving plumbing, altering electrical circuits, and changing the structure of the shower—a building permit from the City of Toronto is absolutely required. This ensures all work is done to code and inspected for safety. We manage this entire process for our clients.
What’s the biggest challenge when installing full wall tile in an older Toronto home?
Older homes in Toronto often have walls and floors that are not perfectly level or plumb. When installing large-format tiles, even a small imperfection in the wall surface becomes highly visible. The biggest challenge is the prep work. It often requires adding shims to the wall studs or applying a leveling compound to create a perfectly flat, true substrate before any tile can be installed. This meticulous preparation is key to a flawless, professional finish.
Is a curbless shower a good idea, and how is it properly waterproofed?
A curbless shower is an excellent choice for both accessibility and modern design. The key to its success lies entirely in the waterproofing. We use a topical, integrated system (like Schluter-KERDI) that creates a continuous, sealed membrane across the entire shower floor and up the walls. The subfloor is structured to create a gentle, consistent slope towards the linear drain, ensuring all water is contained and drains away effectively. When done professionally, it is a completely reliable and leak-proof system.
Ready to stop dreaming and start planning your own bathroom oasis? Let our team of experts guide you through the process, from design to completion. Contact us today for a free quote and let’s create a space you’ll love for years to come.