Every so often, a project comes along that perfectly encapsulates the power of a well-executed kitchen reno. It’s not just about new cabinets and countertops; it’s about fundamentally changing how a family lives in their home. This was precisely the case for a recent project in a lovely Brampton neighbourhood. The homeowners were tired of a cramped, dated kitchen that felt disconnected from the rest of their house—a common challenge in many Greater Toronto Area homes. Our mission was to perform a complete kitchen reno that would open up the space and create a functional, beautiful hub for family life.
This transformation story is about more than just aesthetics; it’s about smart design, layout optimization, and breathing new life into the heart of a home.
Project at a Glance: The Brampton Kitchen Transformation
- Project: Full Kitchen Renovation
- Location: Brampton, Ontario
- Category: Modern Transitional
- Key Features: Open-concept layout, load-bearing wall removal, custom two-tone cabinetry, 10-foot quartz island with waterfall edge, integrated appliances.
- Duration: 3 weeks
The Design Vision: “86” the Walls
The “before” was a scene familiar to many homeowners in the GTA: a classic U-shaped kitchen, sequestered from the dining and living areas by a full wall. While functional in its day, the layout felt isolating. Cooking meant being cut off from family conversations, entertaining was a disjointed affair of ferrying dishes between rooms, and the overall space felt dark and confined.
The homeowners’ vision was clear: they wanted light, flow, and connection. They dreamed of a space where they could prepare meals while chatting with guests seated at an island, a place where kids could do homework while dinner was underway, and a layout that felt expansive and welcoming.
Our design process began with a single, transformative idea: “86” the wall. The term, borrowed from the restaurant industry, means to get rid of something, and in this case, the wall separating the kitchen from the dining room had to go. By removing this barrier, we could completely reimagine the home’s main floor. The plan was to create a massive open-concept area anchored by a statement-making central island. This new layout would not only solve the issue of isolation but would also dramatically improve workflow, storage, and the home’s overall market value.
The aesthetic goal was “Modern Transitional”—a style that blends the clean, simple lines of contemporary design with the warmth and comfort of traditional elements. This would ensure the new kitchen felt both current and timeless, perfectly suiting the family’s taste and the home’s character.
Materials and Specifications: A Symphony of Style and Durability
A beautiful kitchen is built on the quality of its components. For this Brampton home, we selected a palette of materials that balanced high-end style with everyday practicality.
Cabinetry
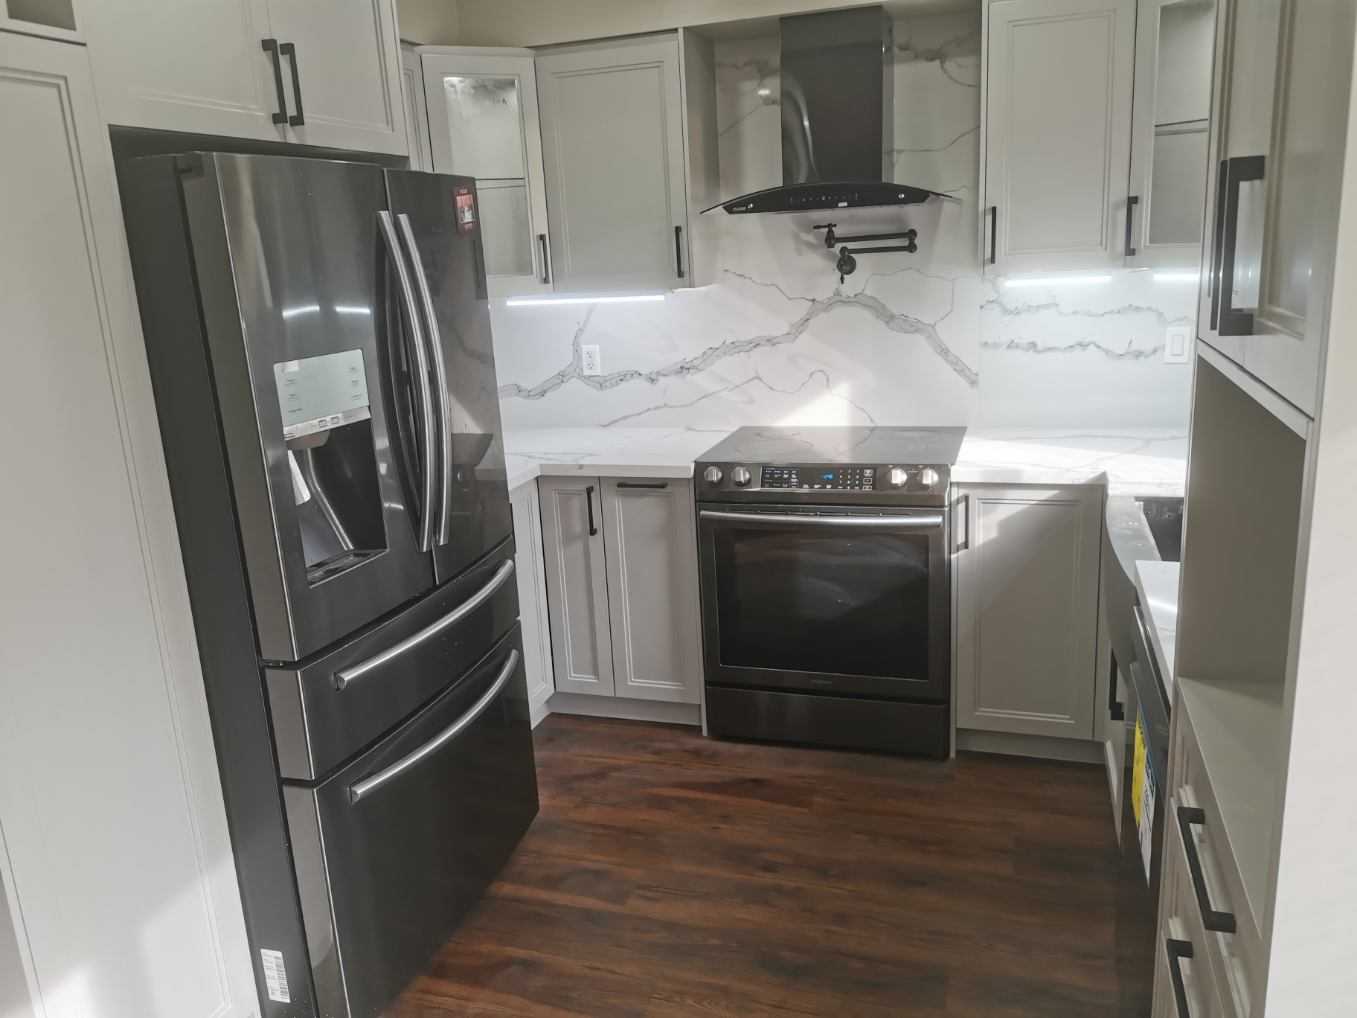
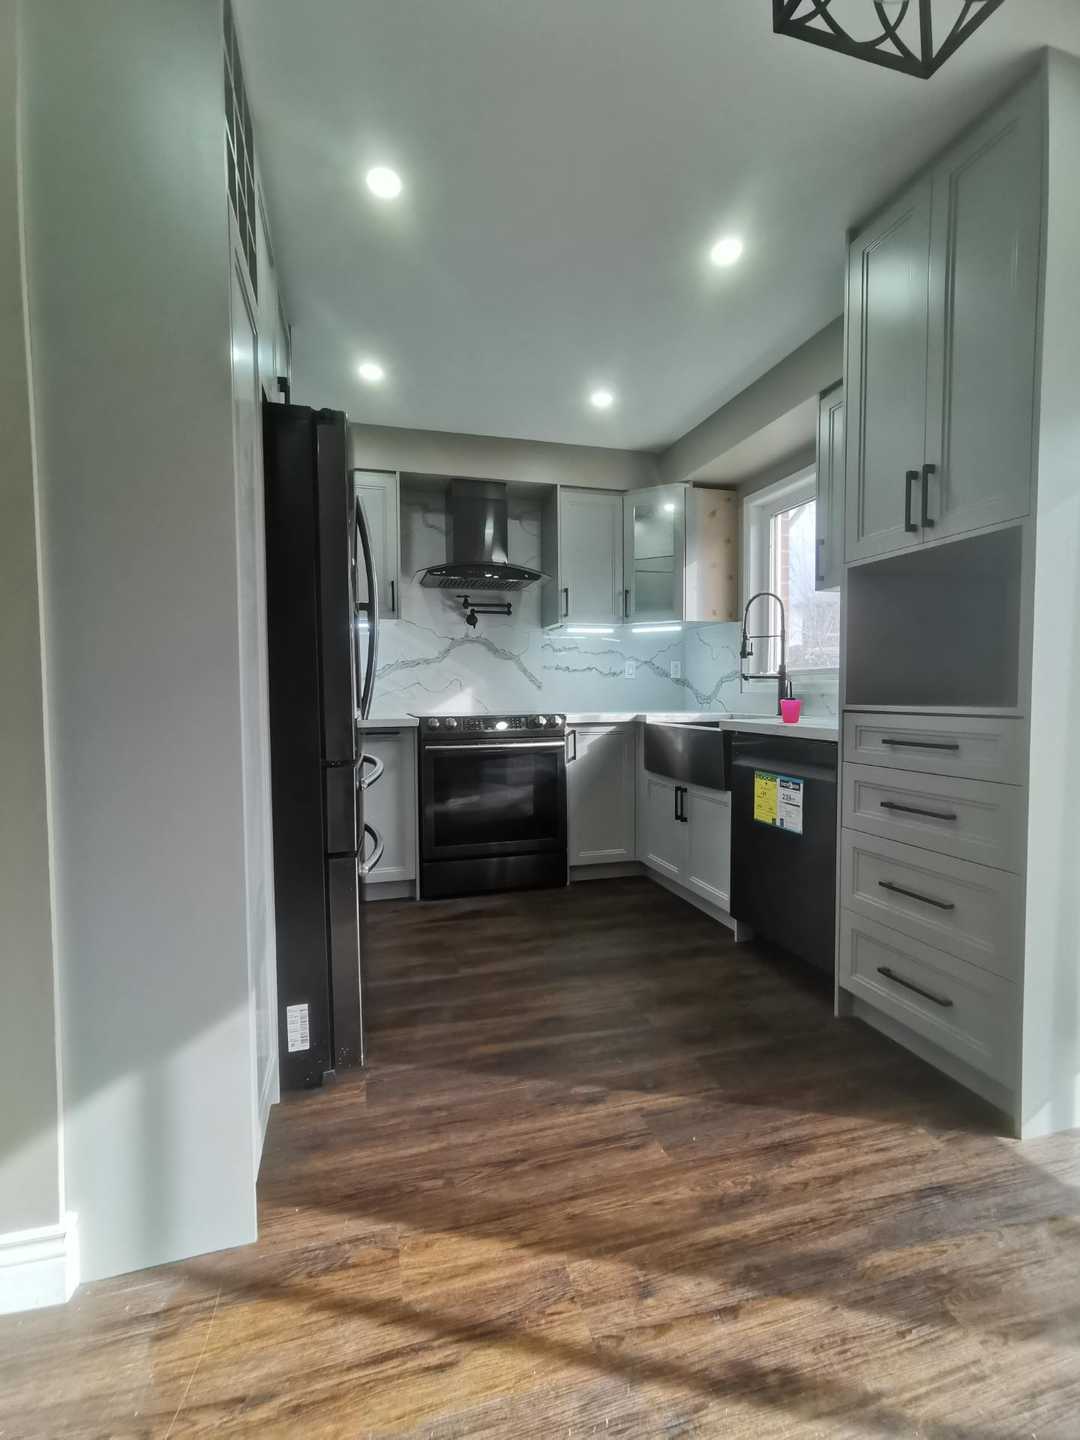
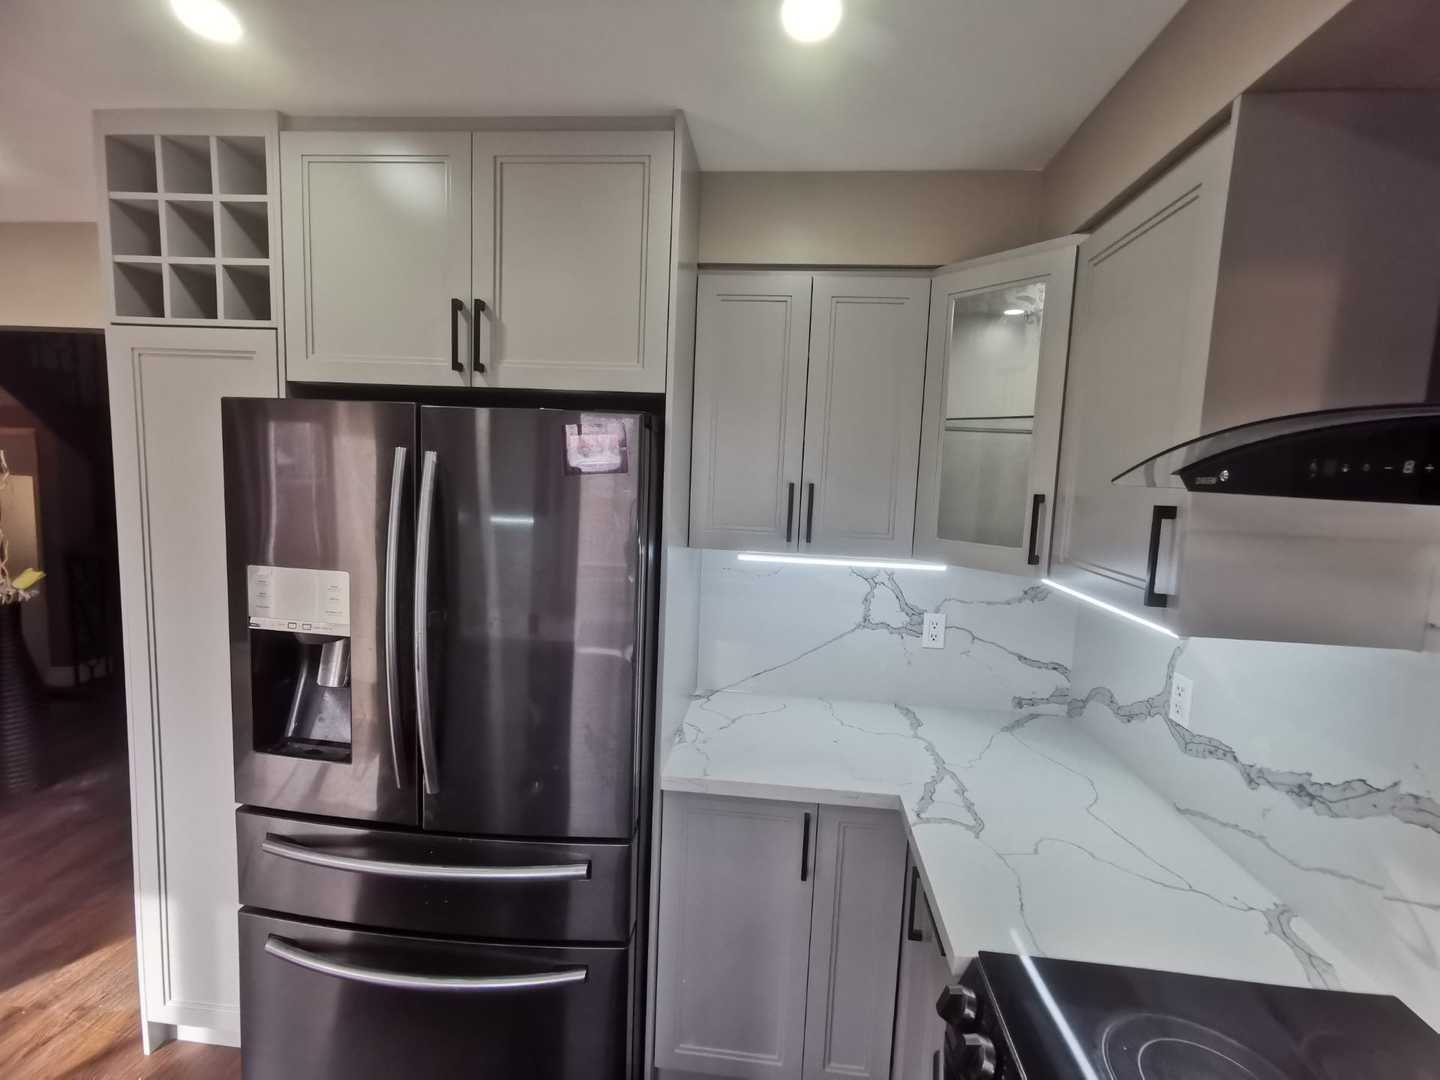
We opted for custom, Canadian-made cabinetry to maximize every inch of storage. The doors are a classic Shaker profile, a hallmark of transitional design. To create visual interest and anchor the space, we used a sophisticated two-tone colour scheme:
- Perimeter Cabinets: Finished in a soft, luminous white (Benjamin Moore’s “Chantilly Lace”), which keeps the space feeling bright and airy.
- Island Cabinets: A deep, dramatic navy blue (Benjamin Moore’s “Hale Navy”) provides a stunning focal point and a touch of elegant contrast.
Countertops & Backsplash
The countertops are the workhorse of any kitchen, and here we chose Calacatta Gold quartz. This engineered stone delivers the luxurious look of Italian marble with its warm gold veining, but without the maintenance headaches. It’s non-porous, stain-resistant, and incredibly durable—perfect for a busy family. The island was finished with a dramatic waterfall edge, where the quartz cascades down the sides to the floor, creating a seamless and sculptural look.
For the backsplash, we installed a white, elongated ceramic subway tile in a herringbone pattern. This adds subtle texture and a classic architectural detail that elevates the entire design.
Flooring
To unite the newly opened space, we laid large-format porcelain tile with a realistic light oak wood grain finish. This choice provides the warmth of hardwood but with the superior durability and water resistance required for a kitchen, ensuring a beautiful and worry-free foundation for years to come.
Lighting & Fixtures
A layered lighting plan was essential for both function and ambiance.
- General Lighting: We installed numerous LED pot lights on dimmers for clean, even illumination.
- Task Lighting: Under-cabinet LED strips provide focused light on the countertops for food prep.
- Accent Lighting: Two large, brushed gold pendants were hung above the island, serving as jewelry for the room and tying in with the cabinet hardware and faucet.
All electrical work, from running new circuits for the island to installing the new fixtures, was completed by our licensed electricians in strict accordance with the Ontario Electrical Safety Code.
The Process: From Blueprint to Beautiful
Transforming a kitchen this dramatically is a phased, meticulous process. While every project’s timeline is unique, the journey follows a proven path from demolition to final details.
Phase 1: Preparation and Demolition The project began in the spring of 2023. Our first step was to seal off the work area to contain dust and protect the rest of the home. Then, the careful demolition of the old kitchen commenced. The most critical part of this phase was the removal of the wall. After a structural engineer confirmed it was not load-bearing, our team carefully dismantled it, immediately opening up the sightlines and revealing the potential of the space.
Phase 2: Mechanical Rough-ins With the space cleared, the “behind-the-walls” work began. Our licensed plumbers and electricians rerouted plumbing and electrical lines to accommodate the new layout, most notably for the island sink and dishwasher. New wiring was run for the enhanced lighting plan, and dedicated circuits were installed for the new appliances, all planned to meet or exceed Ontario’s building codes.
Phase 3: Building it Back This is where the vision starts to take shape. New drywall was installed, taped, and mudded to create flawless surfaces. A fresh coat of primer was applied before the beautiful new porcelain tile flooring was laid. Then came the most exciting day for the homeowners: cabinet installation. Our craftsmen meticulously fitted each piece of custom cabinetry, ensuring perfect alignment and function.
Phase 4: Finishing Touches Following the cabinet installation, precise measurements were taken for the quartz countertops. Once fabricated, the counters were installed, including the stunning waterfall island. The tile setter then installed the herringbone backsplash. Finally, the appliances were fitted, the sink and faucet were connected, light fixtures were hung, and the final coats of paint were applied. The project concluded with a thorough professional cleaning, leaving the homeowners with nothing to do but enjoy their spectacular new kitchen.
The Final Look: A New Heart for the Home
The result is nothing short of breathtaking. Walking into the main floor now, you’re greeted by an expansive, light-filled space that feels both grand and incredibly welcoming. The 10-foot navy island stands as the undisputed centerpiece, offering ample space for meal prep, casual dining, and socializing. The flow between the kitchen, dining area, and living room is seamless, creating the connected family hub the homeowners had always wanted.
The combination of the white perimeter cabinets and the navy island creates a perfect visual balance. The warm gold from the Calacatta veins, cabinet pulls, and light fixtures adds a layer of sophisticated warmth. The integrated, panel-ready appliances contribute to the clean, uncluttered aesthetic, letting the design elements truly shine. This isn’t just a new kitchen; it’s a new way of living for the family.
Key Design Takeaways
This Brampton kitchen reno offers valuable lessons for any homeowner planning a similar project:
- Embrace the Open Concept: If your home’s layout allows, removing a non-load-bearing wall can be the single most impactful change you make, instantly adding value and modernizing your living space.
- The Island is King: A large, well-designed island can replace a formal dining table for everyday meals, provide immense storage, and become the social hub of your home.
- Invest in a Professional Lighting Plan: Don’t underestimate the power of layered lighting. A combination of ambient, task, and accent lighting is crucial for creating a kitchen that is both functional and beautiful at all hours of the day.
- Mix Materials for a Custom Look: Combining two cabinet colours, or contrasting countertop materials, can add depth and personality, making your kitchen feel uniquely yours.
Simple Maintenance for Lasting Beauty
- Quartz Countertops: Clean spills with a soft cloth and a gentle pH-neutral cleaner. While very durable, always use cutting boards and place hot pots and pans on trivets to protect the surface.
- Cabinetry: Wipe down cabinet faces with a slightly damp microfiber cloth. For tougher spots, use a mild soap and water solution, drying thoroughly afterward.
- Grout: The backsplash grout was sealed upon installation. We recommend re-sealing it every couple of years to prevent discolouration and keep it easy to clean.
Frequently Asked Questions
What is the first step to planning a kitchen reno in the Brampton or Toronto area?
The best first step is to define your goals and budget. Think about what isn’t working in your current kitchen and what your dream kitchen would include. Once you have a clear vision, the next step is to consult with a professional design-build firm. We can help you refine your ideas, create a realistic plan, and provide a detailed estimate for your project.
Do I need a permit to remove a wall for my kitchen renovation?
It depends. If the wall is load-bearing, you will absolutely need a building permit, which requires plans from a structural engineer. Even for some non-load-bearing walls, a permit may be required depending on the scope of the electrical and plumbing work involved. As part of our service, we manage the entire permit application process with the City of Brampton or your local municipality to ensure everything is done to code.
How important is hiring a licensed electrician for a kitchen renovation in Ontario?
It is critically important and legally required. Kitchens have complex electrical needs, from dedicated appliance circuits to specific requirements for outlet placement (like on an island). All electrical work must be performed by a Licensed Electrical Contractor and inspected by the Electrical Safety Authority (ESA). This is non-negotiable for the safety of your family and the compliance of your home.
Ready to say “86” to your old, outdated kitchen and create a space that truly works for you? We’d love to hear about your vision. Reach out to our team today for a free, no-obligation quote, and let’s start designing the kitchen of your dreams.