


A Symphony of Wood and Stone: The Woodbridge L-Shape Kitchen Transformation
Welcome to the project diary for one of our most rewarding recent transformations, right in the heart of Woodbridge, ON. This project, which we’ve fondly nicknamed “Kitchen 151,” was all about creating a space that feels both modern and deeply inviting. We took a standard layout and infused it with high-impact design elements, including a stunning L-shape kitchen configuration with warm wood panel cabinets, a dramatic black fluted coffee bar, and a show-stopping waterfall for the island. This is the story of how we turned a dated kitchen into the functional and textural heart of a beautiful Woodbridge home.
Quick Facts
- Project: Kitchen 151
- Location: Woodbridge, ON
- Category: Full Kitchen Renovation
- Key Features: L-shape layout, flat-panel wood cabinets, custom fluted coffee bar, quartz waterfall island, integrated appliances.
- Duration: 3 weeks
The Design Vision: Merging Warmth with Modern Edge
When we first met with the homeowners, their existing kitchen was functional but lacked personality. The layout felt closed off, the finishes were tired, and it didn’t reflect their contemporary taste. They dreamed of a space that was open, bright, and perfect for both quiet morning coffees and entertaining friends and family. The core of their vision was a design that felt organic and warm, yet clean and sophisticated.
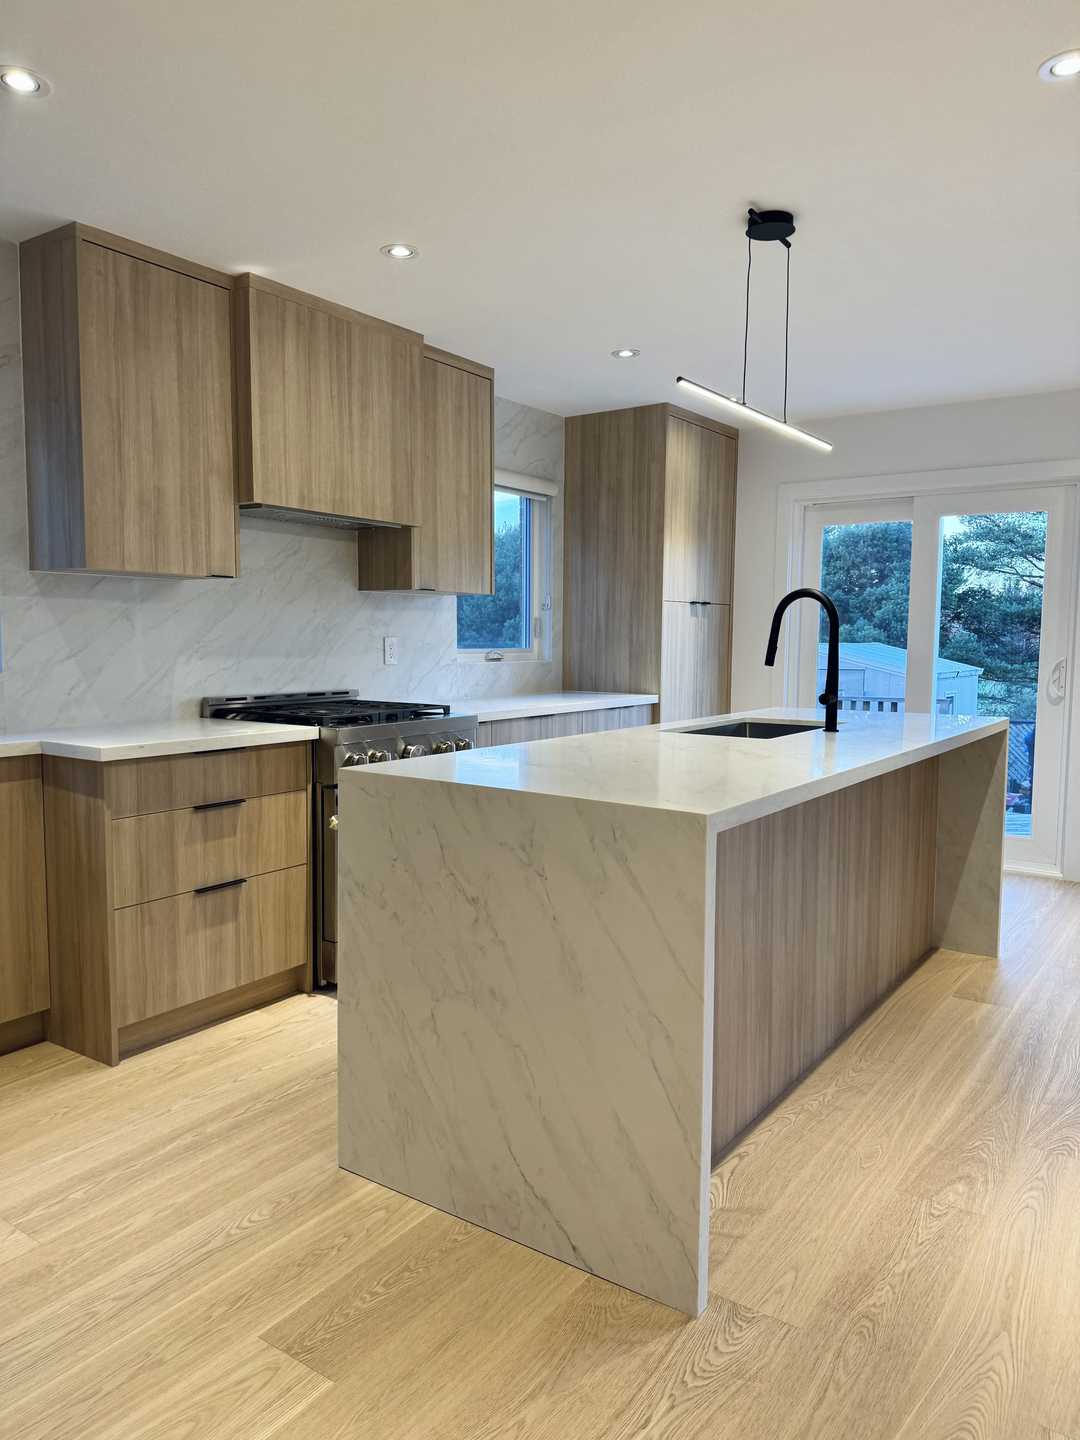
Our design process began by addressing the layout. An L-shape configuration was the clear winner for this space. It maximizes corner utility, opens up the central area for a generous island, and creates an intuitive workflow between the sink, cooktop, and refrigerator—the classic kitchen triangle. This layout immediately made the room feel larger and more connected to the adjacent dining area.
The aesthetic direction was driven by a love for natural textures. The clients were drawn to the timeless appeal of wood but wanted to avoid a look that felt rustic or heavy. This led us to select sleek, flat-panel wood cabinetry. To counterbalance this warmth and add a touch of modern drama, we proposed a dedicated coffee and beverage station. This wasn’t just a nook; it was designed as a full-height, black fluted feature wall, creating a stunning focal point that anchors the entire design.
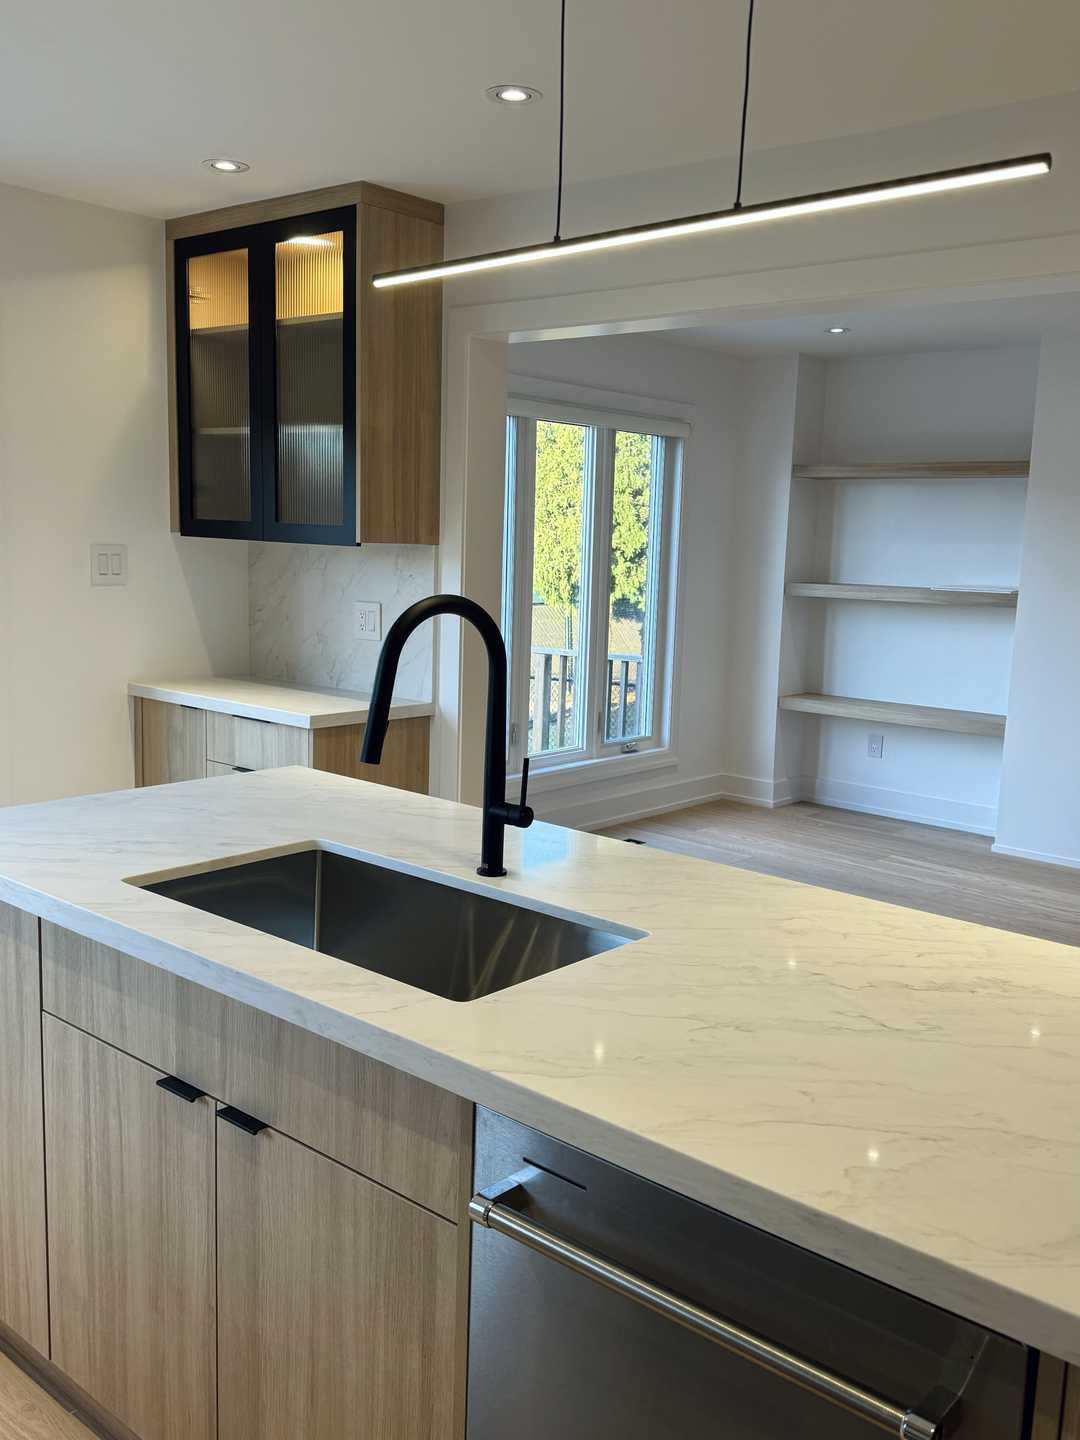
Finally, the island. It needed to be more than just a prep surface; it had to be a statement. A large island with a quartz waterfall edge on both sides would provide that sculptural, high-end feel they were looking for, seamlessly blending durability with breathtaking design.
Materials & Specifications: A Curated Palette
Every material in this kitchen was chosen for its beauty, performance, and ability to contribute to the overall design narrative.
-
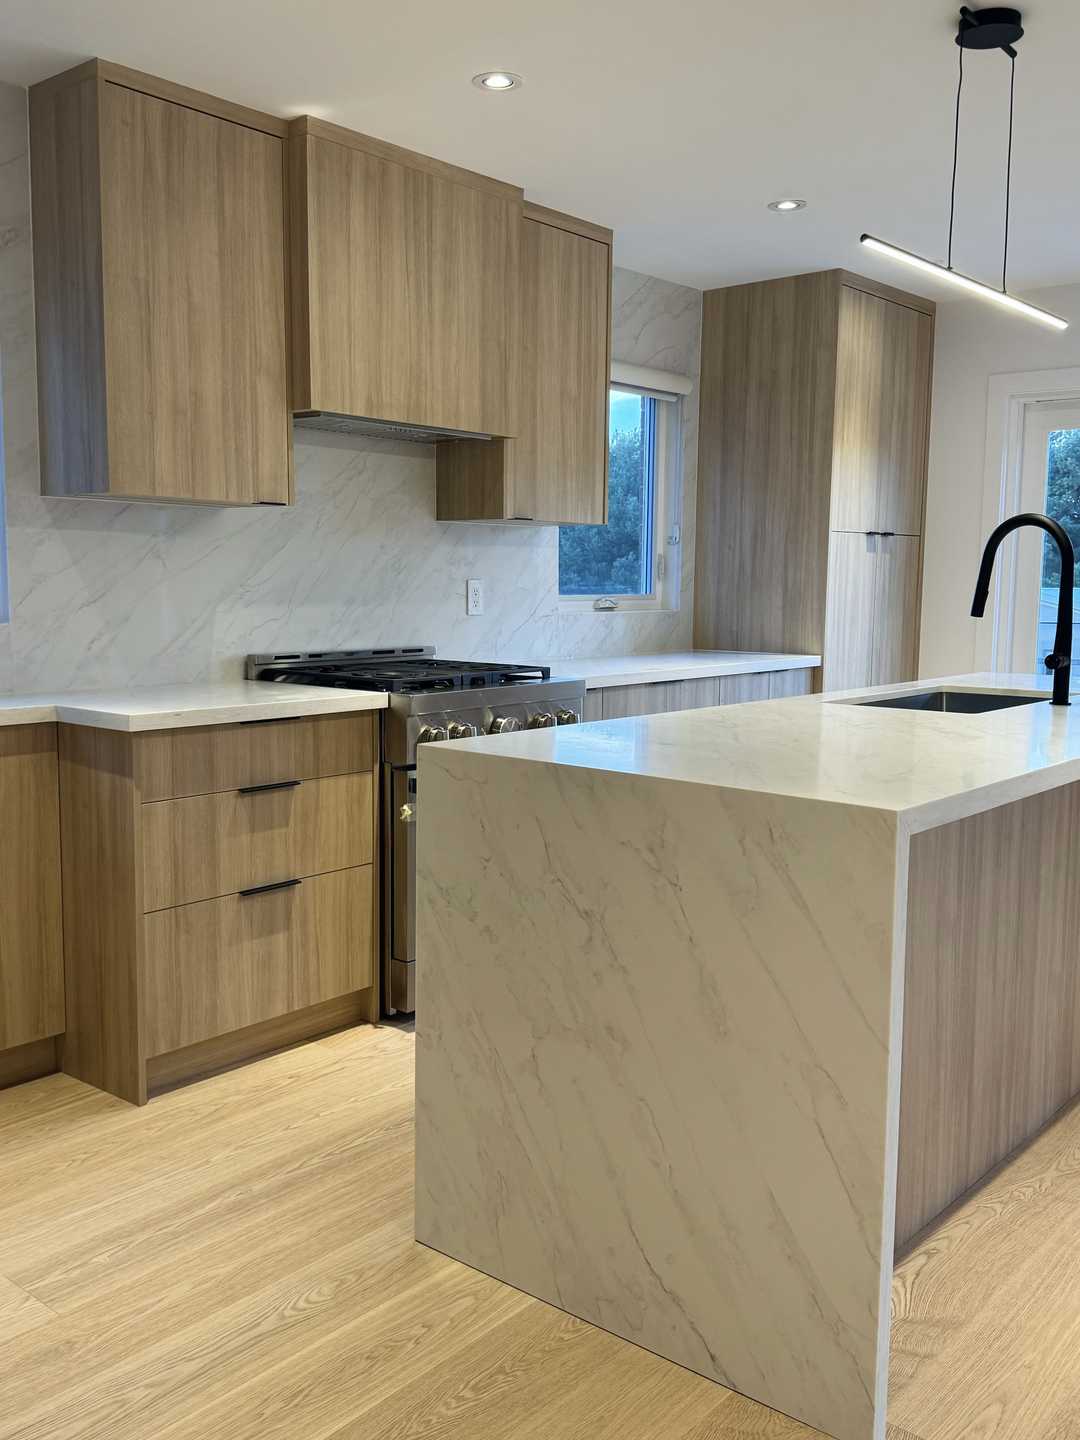
Cabinetry: We specified custom flat-panel cabinets in a rift-cut white oak with a vertical grain. This type of cut provides a clean, linear pattern that feels contemporary and serene. The cabinets were finished with a commercial-grade, low-sheen clear coat to protect the wood while letting its natural colour and texture shine through. For hardware, we opted for minimalist matte black finger pulls, which practically disappear, keeping the focus on the wood grain.
-
Coffee Bar: The striking coffee bar was crafted from solid, fluted MDF panels, which allows for crisp, clean lines. It was professionally sprayed in a durable, satin finish using Benjamin Moore’s “Onyx.” This deep, soft black absorbs light beautifully, highlighting the texture of the flutes. We integrated warm LED strip lighting into the open shelving to illuminate the area and create a cozy glow.
-
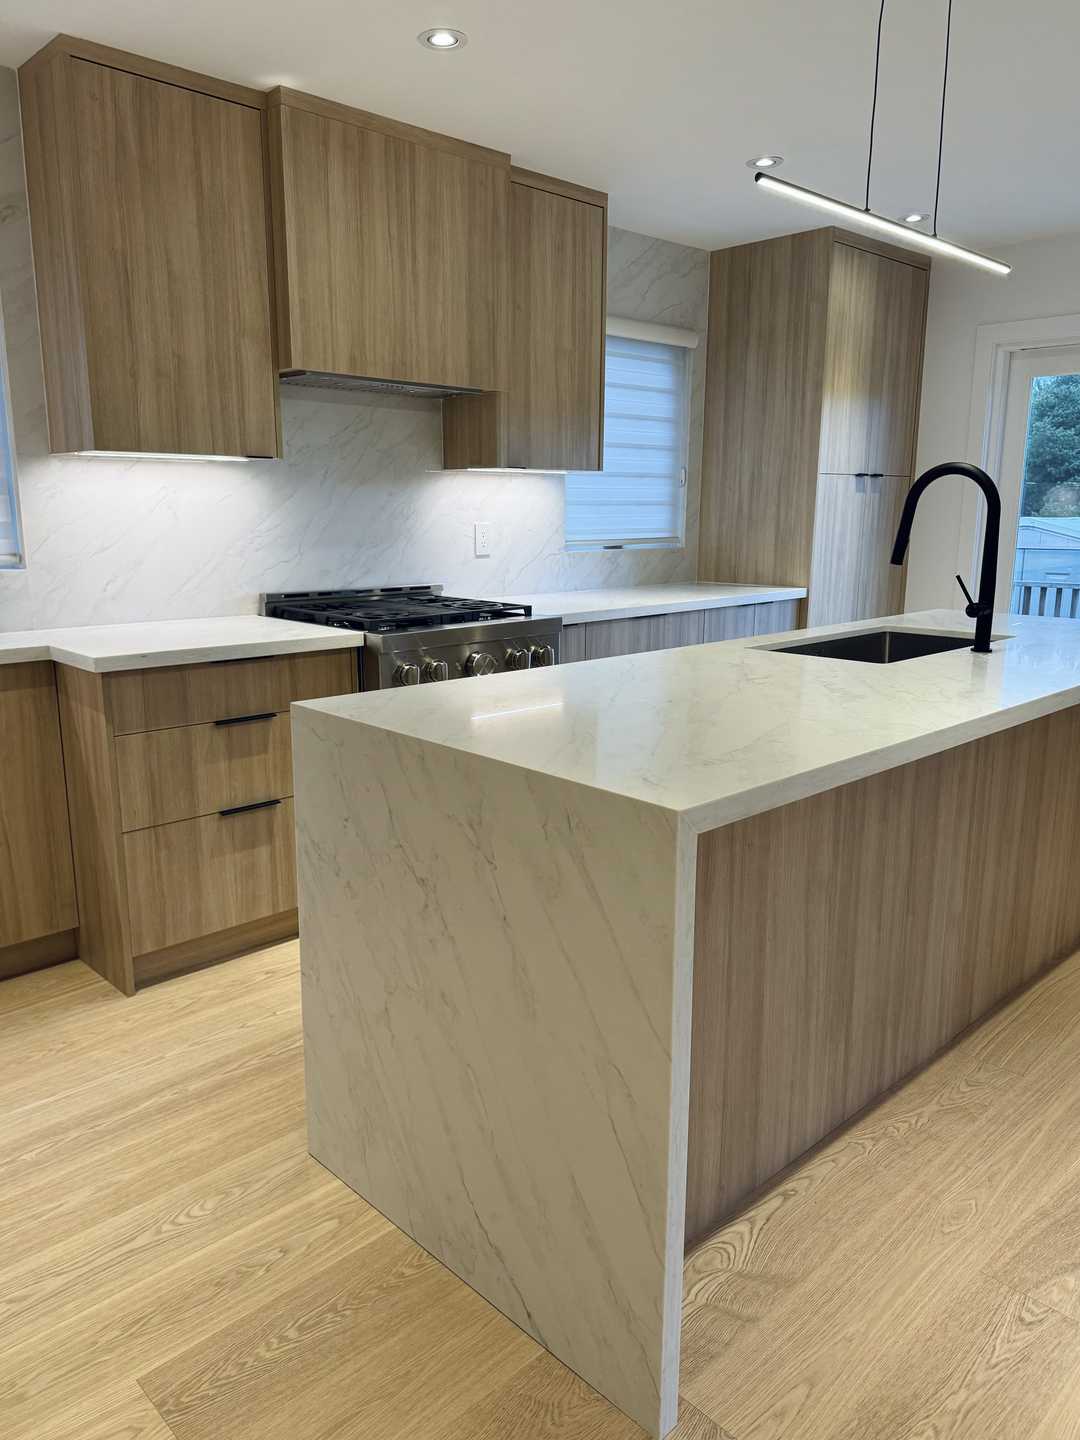
Countertops & Backsplash: For the countertops, island, and backsplash, we chose Caesarstone quartz in “Calacatta Nuvo.” This provided the luxurious look of marble with superior durability and low maintenance. The subtle, sweeping grey veins on a creamy white base complemented the warm oak and bold black perfectly. Extending the quartz up the wall as a full-height backsplash creates a seamless, monolithic look that feels incredibly clean and upscale. The waterfall edges on the island were mitered, meaning the edges were cut at a 45-degree angle to create a continuous, uninterrupted flow of the pattern down the sides.
-
Appliances: To maintain the clean aesthetic, the homeowners invested in a suite of panel-ready appliances. The Fisher & Paykel refrigerator and Bosch dishwasher are completely concealed behind custom oak panels, blending perfectly with the surrounding cabinetry. A sleek Bosch induction cooktop and a wall oven combination complete the high-performance setup.
-
Flooring: The existing hardwood floors were in great condition, so we carefully protected them during the renovation and refinished them in a slightly lighter, natural tone to complement the new cabinetry.
-
Lighting: A multi-layered lighting plan was essential. We installed new dimmable LED pot lights for ambient lighting, under-cabinet LED strips for task lighting, and a stunning, minimalist linear pendant in matte black over the island to serve as a visual centerpiece.
The Process & Timeline: A Diary of Transformation
A project of this calibre requires meticulous planning and execution. Here’s a look at how Kitchen 151 came to life.
Phase 1: Demolition and Preparation The first few days were dedicated to carefully dismantling the old kitchen. Our crew sealed off the area from the rest of the house to contain dust and debris. Old cabinets, countertops, and appliances were removed, and the space was stripped back to the studs. This is a critical stage where we can inspect the “bones” of the room for any hidden issues.
Phase 2: Rough-ins and Inspections With a clean slate, our licensed electricians and plumbers got to work. This involved moving electrical outlets and junction boxes to accommodate the new appliance layout and the powered island. We ran new dedicated circuits for the wall oven and induction cooktop, ensuring everything was up to the strict standards of the Ontario Electrical Safety Code. Plumbing lines were re-routed for the new sink location in the island. Once complete, all the rough-in work was inspected and approved by the city. Getting this stage perfect is crucial for the safety and longevity of the kitchen, and it’s why professional oversight is so important. If you’re planning a similar project, understanding the permit and inspection process is key.
Phase 3: Drywall, Priming, and Flooring Once the walls were closed up, our drywall team took over, creating a flawless Level 5 finish. The room was then primed and the first coat of paint was applied to the ceiling and walls. This is also when the flooring team came in to sand, stain, and seal the hardwood floors, giving them plenty of time to cure before we brought in the new cabinetry.
Phase 4: Cabinet and Island Installation This is the week the vision truly starts to take shape. Our master carpenters began installing the white oak cabinets, starting with the L-shape perimeter. Every piece was laser-levelled and scribed to the walls for a perfect fit. The large island base and the dramatic black fluted coffee bar structure were installed next, instantly defining the space and its key features.
Phase 5: Countertop Templating and Installation With the cabinets in place, the countertop fabricators came to create a precise digital template. A week later, they returned with the massive, expertly cut slabs of quartz. Installing the waterfall island is a delicate process requiring multiple installers to carefully manoeuvre the heavy stone into place and secure the perfectly mitered edges. The seamless backsplash was installed the following day.
Phase 6: The Finishing Touches The final phase is all about details. The backsplash was caulked, the plumber returned to install the faucet and connect the sink and dishwasher, and the electrician installed all the light fixtures, switches, and outlets. The appliances were carefully moved into place, and the custom cabinet panels were fitted. After a final coat of paint and a thorough professional cleaning, the kitchen was ready for its grand reveal.
The Final Look: A Study in Balanced Design
Stepping into the completed kitchen is a truly immersive experience. The first thing you notice is the incredible balance of colour and texture. The warm, vertical grain of the white oak cabinets draws your eye around the room, creating a sense of calm and order. This warmth is perfectly punctuated by the bold, architectural statement of the black fluted coffee bar, which adds depth and a touch of sophisticated drama.
The Calacatta Nuvo quartz island stands as the undisputed centerpiece. Its clean white surface and subtle veining brighten the entire space, while the waterfall edges give it a weight and presence that feels both modern and timeless. It’s not just a workspace; it’s a gathering place, a serving station, and a piece of functional sculpture.
The flow is effortless. The L-shape layout provides ample counter space on either side of the cooktop and sink, making meal prep intuitive. The open plan connects the chef with family or guests seated at the island or in the nearby dining area, creating the social, inclusive atmosphere the homeowners craved.
Design Takeaways for Your Own Renovation
- Embrace Textural Contrast: This project is a masterclass in mixing textures. The smooth coolness of the quartz, the organic warmth of the wood, and the rhythmic pattern of the fluted panels all work together to create a space that is visually rich and interesting without being loud. Don’t be afraid to combine different materials.
- Designate a “Wow” Moment: Whether it’s a dramatic coffee bar, a unique backsplash, or a sculptural island, having one standout feature can elevate your entire kitchen design. The black fluted wall in this project acts as a powerful focal point that makes the entire space feel custom and thoughtfully designed.
- Invest in Integration: Panel-ready appliances are an investment, but they make a world of difference in creating a seamless, high-end look. By concealing the refrigerator and dishwasher, the focus remains on the beautiful cabinetry, allowing the kitchen to feel more like elegant furniture than a purely utilitarian space.
Simple Maintenance for Lasting Beauty
- Oak Cabinets: Wipe spills immediately. For regular cleaning, use a soft, damp cloth with a drop of mild dish soap, then wipe dry with a clean cloth. Avoid abrasive cleaners or scouring pads.
- Quartz Surfaces: Clean daily with a soft cloth and a pH-neutral cleaner or warm, soapy water. While quartz is stain-resistant, wipe up spills like wine, coffee, or oil promptly. Always use trivets or hot pads for pots and pans.
- Fluted Panels: Dust the grooves regularly with a soft brush attachment on your vacuum or a microfiber duster to prevent buildup.
Frequently Asked Questions
What are the main benefits of an L-shape kitchen layout for a suburban Woodbridge home?
The L-shape layout is incredibly popular in many Ontario homes because it’s so efficient. It keeps the primary work zones (sink, stove, fridge) in a compact triangle, reducing steps for the cook. It also naturally opens up the rest of the room, making it ideal for incorporating a dining area or a large central island, which is perfect for the open-concept living many families in Woodbridge desire.
How much does a waterfall island add to the cost of a kitchen renovation?
A waterfall edge is a premium feature. The extra cost comes from two main factors: the additional material required to cover the sides of the island and the significantly increased labour for fabrication and installation. The edges must be mitered perfectly for a seamless look, which requires a high degree of skill. Generally, you can expect a waterfall edge to add 20-30% to the cost of your island countertop, depending on the material and complexity.
Are wood panel cabinets a durable choice for a kitchen with kids?
Absolutely. Modern wood cabinetry, especially when finished with a high-quality, commercial-grade sealant, is extremely durable. Oak is a hardwood, making it resistant to dents and scratches. The key is the finish. A professional, factory-applied finish will protect the wood from moisture, grease, and daily wear and tear far better than a site-applied finish. They are a beautiful and practical choice for a busy family kitchen.
Do I need a permit to renovate my kitchen in Vaughan?
Yes, most likely. In the City of Vaughan (which includes Woodbridge), a building permit is typically required for any kitchen renovation that involves structural changes, or alterations to the plumbing or electrical systems. Since this project involved moving plumbing for the island and running new dedicated electrical circuits, permits and subsequent inspections were mandatory. It’s always best to check with the city’s building department or work with a contractor who handles the permitting process.
This Woodbridge kitchen is more than just a place to cook; it’s a testament to the power of thoughtful design and quality craftsmanship. It’s a space that is both a quiet sanctuary and the vibrant heart of the home.
If this project has sparked some ideas for your own home, we’d love to help you bring them to life. Reach out today for a free quote and let’s start the conversation about your dream renovation.