
Living in the heart of the city often means accepting the footprint of your condo as-is. But for my partner and I, our newly acquired Toronto unit felt like a blank canvas waiting for a story. We knew we wanted to create something that was uniquely us, a space that defied the typical builder-grade aesthetic. Our vision was centered on a bold and sophisticated kitchen transformation, featuring a stunning mix of a walnut wood panel with navy blue fluted kitchen cabinetry. We wanted this dramatic heart of the home to be complemented by beautiful, durable herringbone oak colour vinyl flooring that would flow seamlessly throughout the main living area.
Project at a Glance
- Project: Open-Concept Condo Kitchen & Living Area Remodel
- Location: Toronto, ON
- Category: Condo Renovation
- Key Features: Custom walnut and navy fluted cabinetry, quartz countertops and backsplash, integrated appliances, herringbone luxury vinyl flooring, open-concept layout.
- Duration: 5 weeks
- Completed: July 2025
Our Design Vision: Modern Warmth and Urban Sophistication
When we first saw the condo, it was… fine. It had a functional but completely uninspired U-shaped kitchen, closed off from the living room by a non-structural wall that made both spaces feel smaller than they were. The floors were a dated laminate, and the lighting was harsh. It was a classic Toronto condo layout, but it lacked personality and flow.
Our goal was to create an environment that felt both luxurious and welcoming—a place perfect for quiet nights in and for entertaining friends. We were drawn to a mid-century modern aesthetic, which loves rich wood tones, but we wanted to infuse it with a contemporary, almost dramatic, edge.
The core idea was to create contrast and texture. We fell in love with the idea of pairing the organic, warm grain of flat-panel walnut with the deep, moody elegance of navy blue. To elevate the navy cabinets, we opted for a fluted or reeded profile, which adds incredible texture and plays with light and shadow in a really dynamic way.
Of course, the biggest move was structural. We knew that removing the wall between the kitchen and living room was non-negotiable. This would not only flood the space with natural light from the balcony windows but also create a large, central island that would become the hub of our home. For the flooring, we needed something that could withstand city life—our dog, winter boots, and the occasional spill—without sacrificing style. A classic herringbone pattern in a warm oak-toned luxury vinyl felt like the perfect solution, offering timeless elegance and modern durability.
Materials & Specifications: The Building Blocks of Our Dream
Every single element was chosen with intention, balancing aesthetics, function, and longevity. Working with our design-build team, we curated a palette of high-quality, durable materials.
-
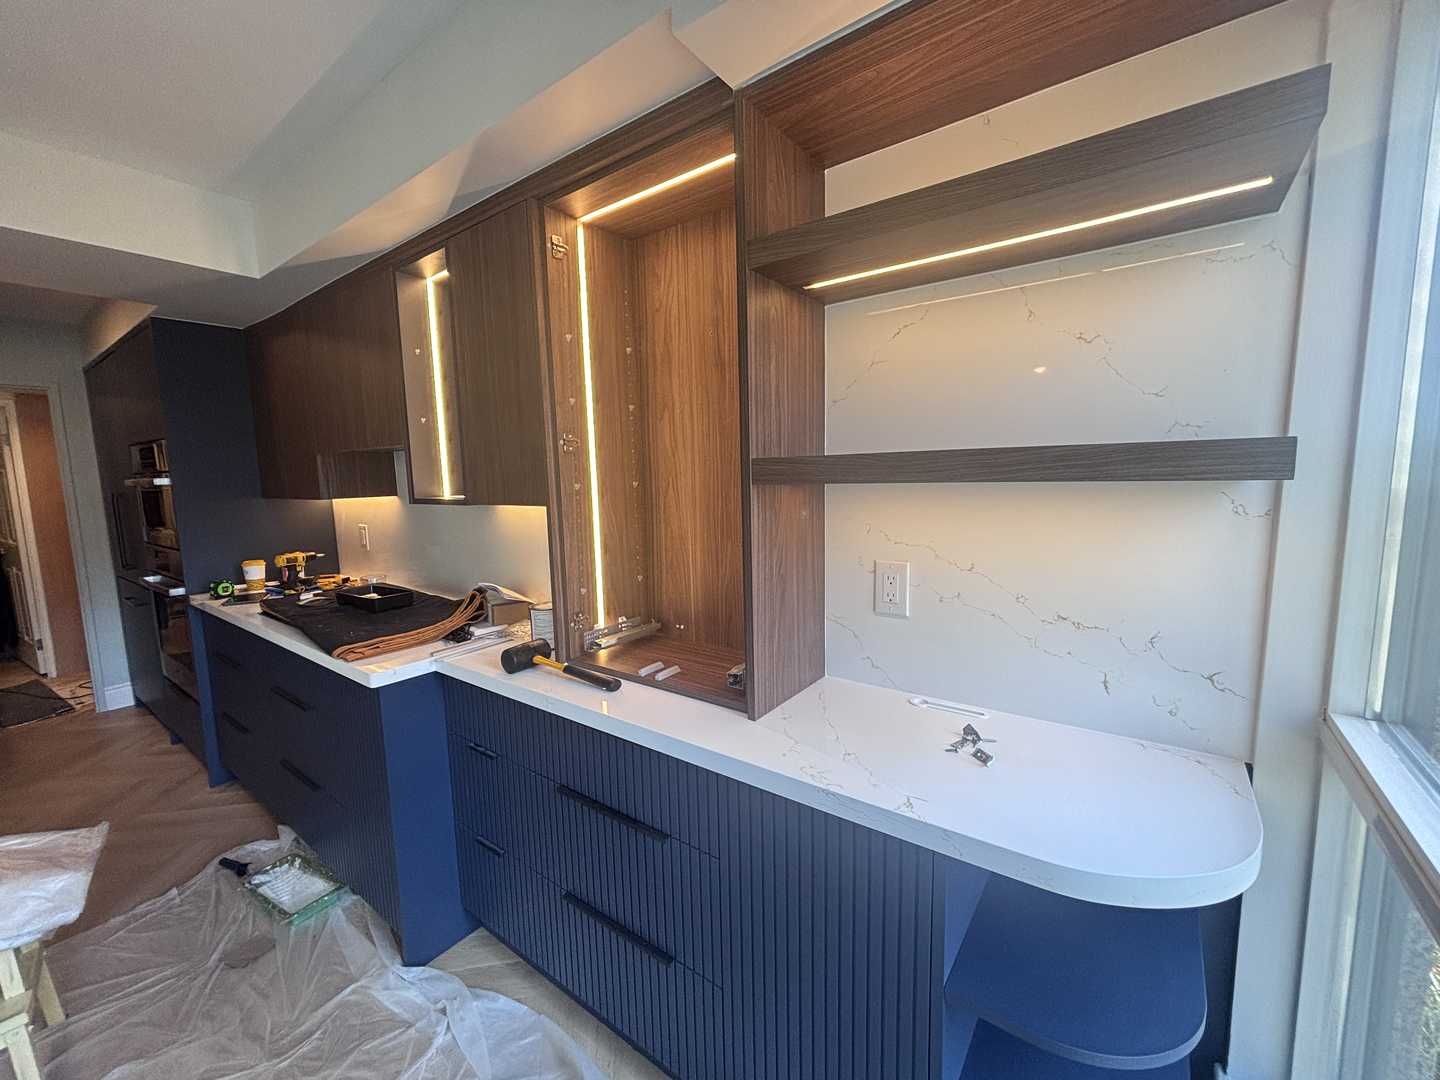
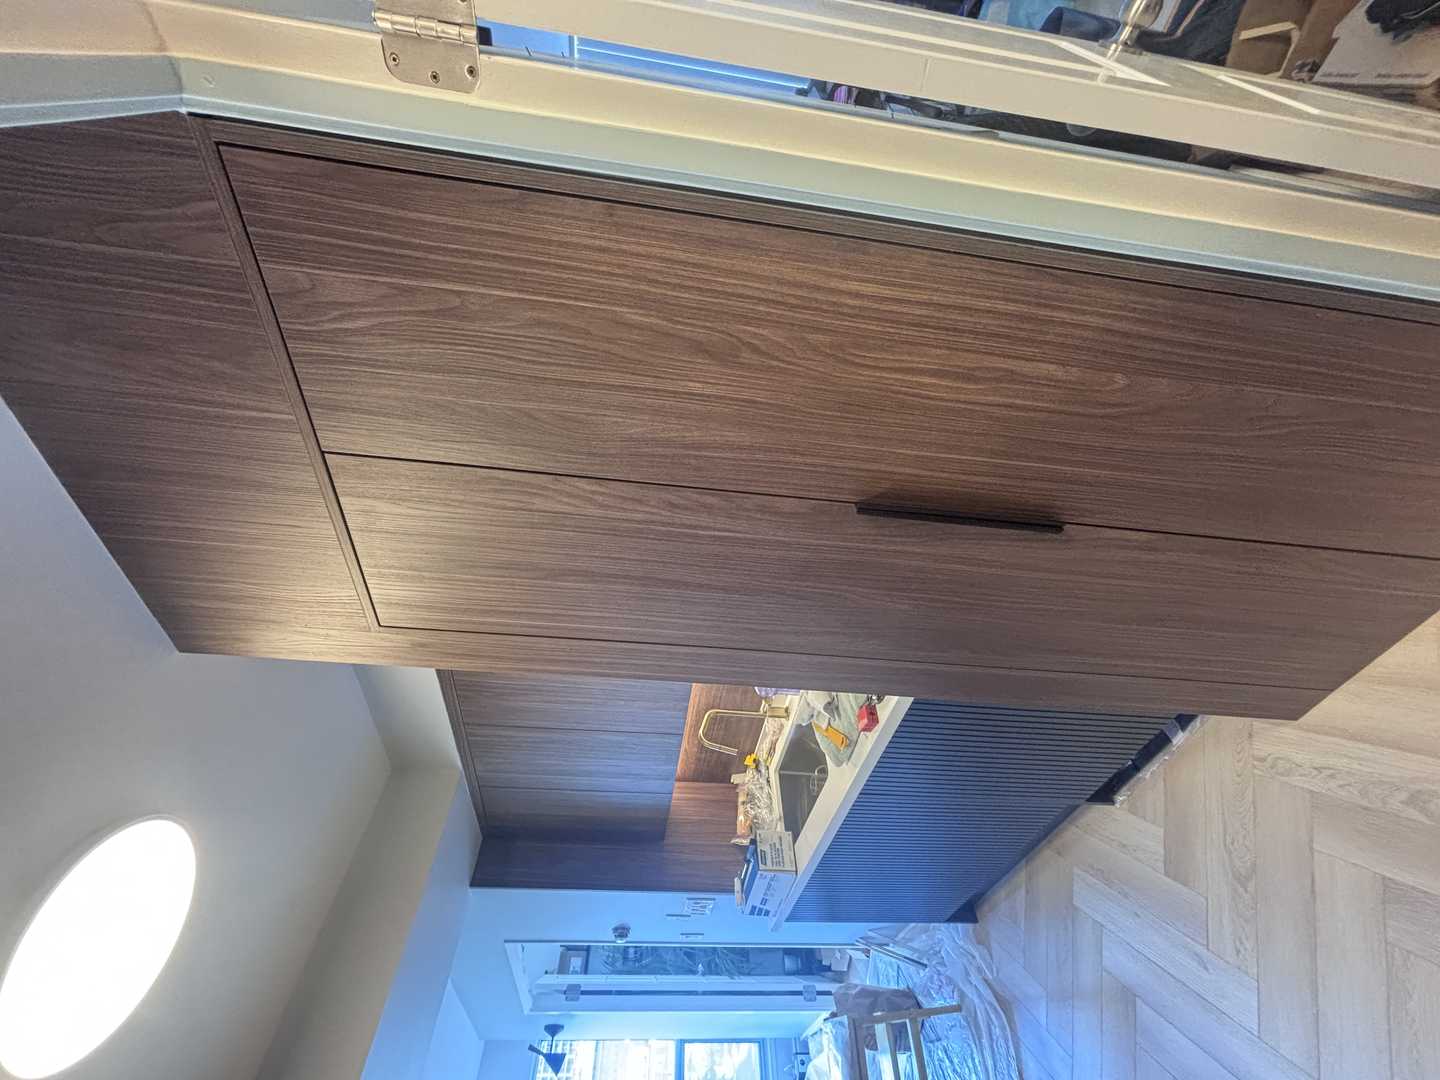
Cabinetry: The final design was a beautiful exercise in balance. The upper cabinets and the full-height pantry surround were finished in a custom flat-panel walnut veneer, bringing natural warmth up to the ceiling. For the lower cabinets and the entire island, we chose a rich navy blue thermofoil with a vertical fluted profile. The thermofoil is incredibly durable and easy to clean, and the seamless look is flawless. All doors and drawers were fitted with high-end soft-close hardware.
-
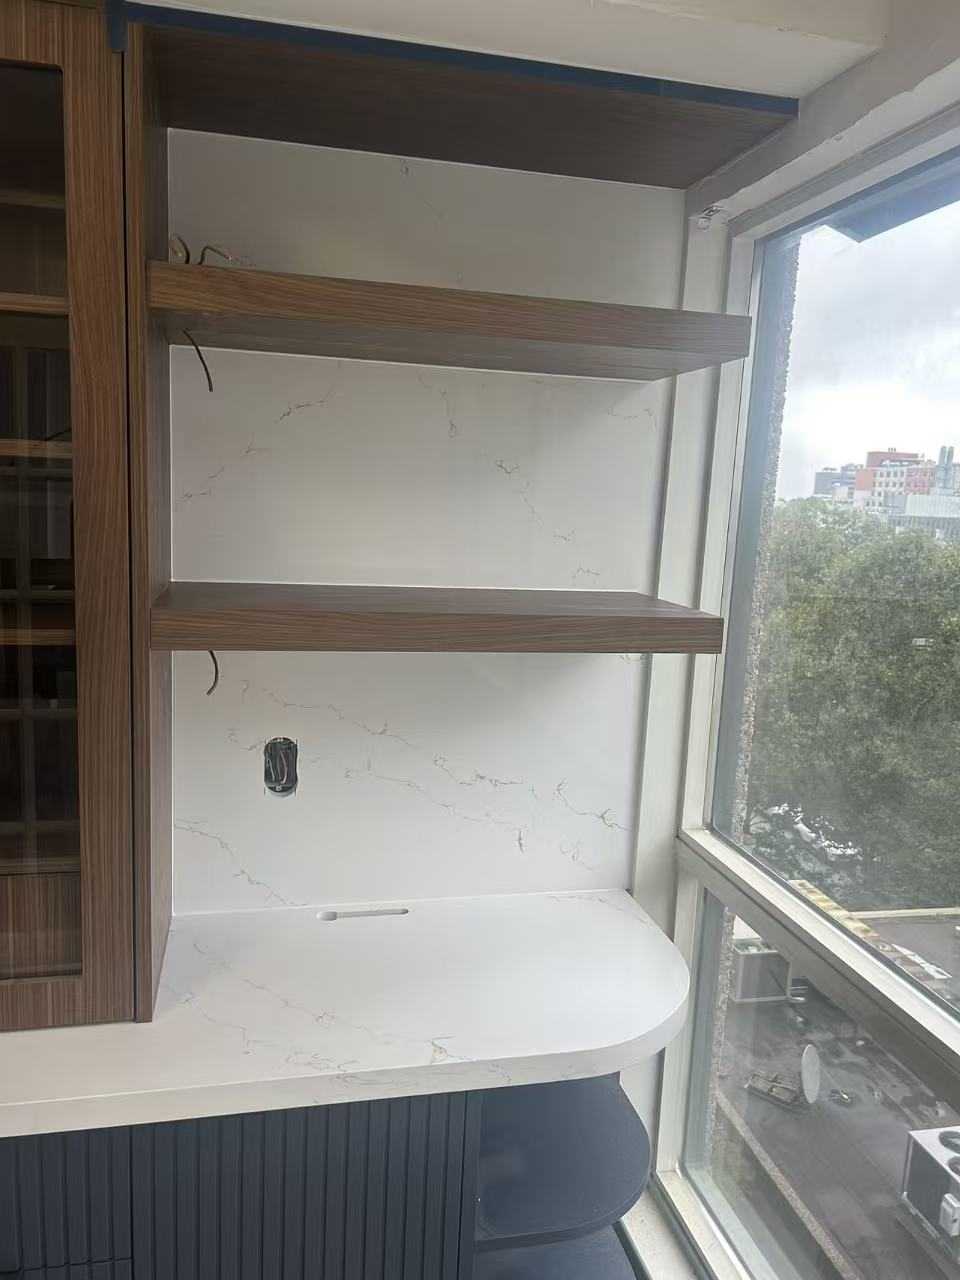
Countertops & Backsplash: To keep the look clean and bright, we selected a durable quartz with a subtle, warm grey vein—reminiscent of Calacatta marble but without the maintenance. We made the decision to run the same quartz slab up the wall as a full-height backsplash. This creates a seamless, high-impact look and means no grout lines to clean behind the cooktop.
-
Flooring: We chose a high-quality Luxury Vinyl Plank (LVP) in a natural oak colour. The planks were specifically sized for a herringbone installation. LVP was a practical choice for our condo building; its acoustic properties help with sound transmission to the unit below, and it’s completely waterproof—a huge plus for a kitchen and living area.
-
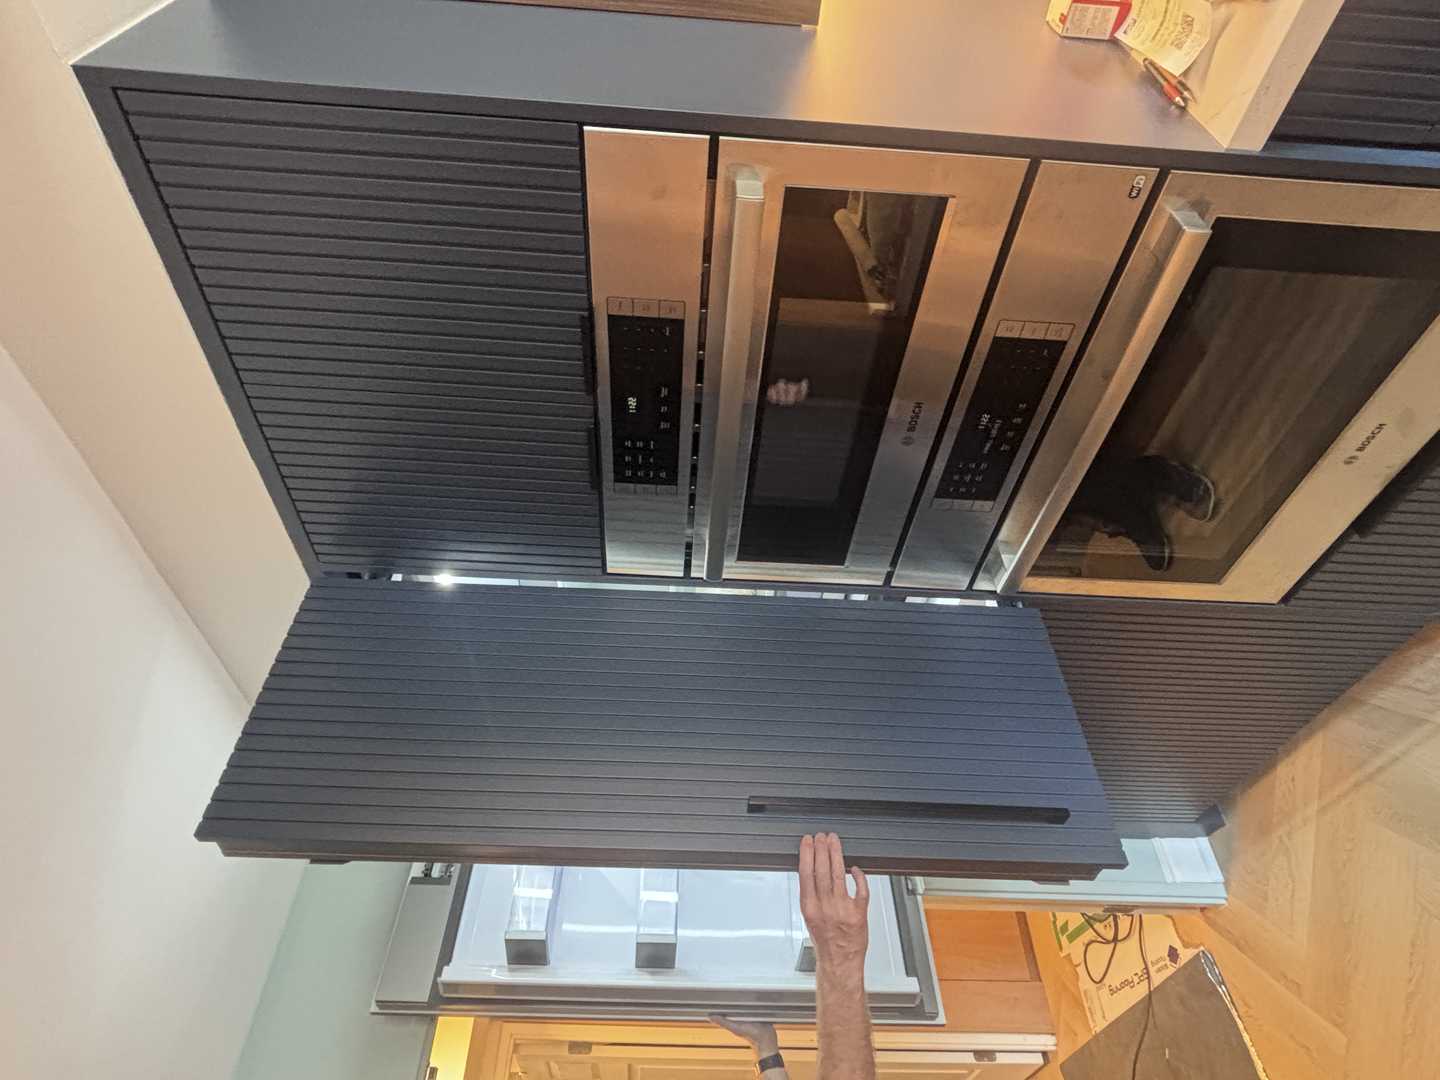
Appliances: To maintain the sleek, uninterrupted lines of the cabinetry, we opted for fully integrated, panel-ready appliances. The refrigerator and dishwasher disappear completely behind the walnut and navy panels. We chose a sleek, black induction cooktop for its efficiency and safety, and a built-in wall oven.
-
Lighting & Fixtures: A layered lighting plan was essential. We installed new recessed pot lights on dimmers for overall ambient light. Under-cabinet LED strips provide excellent task lighting on the countertops. The star of the show is a modern, sculptural pendant light in a brushed gold finish that hangs over the island, tying in with the slim, minimalist cabinet hardware. All electrical work was meticulously planned and executed by a licensed electrician to meet the Electrical Safety Authority (ESA) standards, a critical step for any renovation in Ontario.
The Process & Timeline: Navigating a Condo Renovation
Renovating in a high-rise building in Toronto comes with its own unique set of challenges, and having a team that understood the process was invaluable.
Phase 1: Design & Approvals This was the most cerebral part of the journey. We worked closely with the designers to refine the layout, select every finish, and view 3D renderings that brought our vision to life. Simultaneously, our renovation team prepared a comprehensive package for our condo board. This included detailed architectural drawings, scope of work, proof of insurance, and trade licenses. Getting the board’s approval before any work began was the most important first step.
Phase 2: Demolition & Preparation Once we had the green light, things started moving quickly. The crew was incredibly respectful of our building’s rules, protecting common areas and managing debris removal efficiently. Seeing the old kitchen and the dividing wall come down was a pivotal moment—the space instantly felt twice as big. This phase also involved careful prep work, including plumbing and electrical rough-ins for the new island layout and ensuring the subfloor was perfectly level for the intricate herringbone pattern.
Phase 3: Construction & Installation This is when the new space began to take shape. The flooring went in first, and watching the installers meticulously lay each plank of the herringbone pattern was fascinating. Next came the custom cabinetry, which fit into place like a perfect puzzle. The countertop templating followed, and a week later, the stunning quartz slabs were installed. Every stage felt coordinated and efficient. While every project has its unique timeline, the process felt incredibly structured and well-managed from start to finish.
Phase 4: Finishing Touches The final 10% of the work is what makes the first 90% shine. This included painting, installing baseboards and trim, fitting the integrated appliances, and installing all the new light fixtures and hardware. The final professional clean and a detailed walkthrough with our project manager ensured every last detail was perfect.
The Final Look: A Transformation Beyond aDcor
Walking into our condo now is an entirely different experience. The open layout is a game-changer for how we live and entertain. The kitchen is no longer a cramped workspace but a stunning, functional feature of our home.
The interplay of textures is what we love most. The smooth, rich grain of the walnut provides a beautiful organic contrast to the structured, matte finish of the navy fluted panels. The quartz countertops reflect the light beautifully, and the herringbone floors add a layer of classic pattern and movement that guides you through the space. The island is our command central—we prep meals, eat breakfast, and catch up with friends there, all while enjoying the view of the city. It’s a space that finally feels like a true reflection of our personalities: modern, warm, and thoughtfully designed.
Our Top Design Takeaways
- Embrace Bold Contrast: Don’t be afraid to mix materials, textures, and colours. The success of our design lies in the tension between the dark navy, the warm walnut, and the bright white quartz.
- Invest in the Layout: Changing the floor plan, especially by removing a wall, can have a more significant impact than any decorative choice. If you’re considering an open-concept layout, it’s worth exploring with a professional.
- Function First, Always: Integrated appliances and clever storage solutions (like deep drawers in the island and a pull-out pantry) make the kitchen a dream to use. A beautiful space that doesn’t work for your lifestyle is just a showroom.
- Know Your Building’s Rules: Working within a condo corporation requires careful planning. Partnering with a renovator experienced in Toronto high-rises will save you headaches and ensure a smooth process from approval to completion.
Keeping It Beautiful: Maintenance Tips
Maintaining our new space is surprisingly simple.
- Walnut & Fluted Cabinetry: We wipe them down with a soft, slightly damp microfiber cloth. For the fluted grooves, a soft-bristled brush (like a clean paintbrush) easily removes any dust.
- Quartz Surfaces: A simple solution of warm water and a drop of dish soap is all that’s needed for daily cleaning. While quartz is very durable, we still use trivets for hot pots and cutting boards for knives.
- Herringbone Vinyl Flooring: We vacuum with a hard floor attachment and use a damp mop with a pH-neutral cleaner specifically made for LVP floors. We put felt pads on the bottom of all our furniture to prevent any scratches.
Frequently Asked Questions
How do you handle condo board approvals and building rules in Toronto?
Navigating the rules and regulations of different Toronto condo corporations is a key part of our service. We prepare a comprehensive renovation package for the board that includes our insurance, WSIB clearance, detailed scope of work, and floor plans. We act as the primary liaison with property management to coordinate elevator bookings, work hours, and debris removal, ensuring a smooth process for both you and your neighbours.
Was it difficult to install herringbone flooring in a condo?
Herringbone installation requires a high degree of skill and precision, as each plank must be laid perfectly. Our installers are specialists in this type of intricate work. For condo applications, the most critical component is the underlayment. We use a high-quality acoustic underpad that meets or exceeds the building’s requirements for sound insulation (IIC rating), which is essential for maintaining peace with your neighbours below.
Are custom cabinets like the walnut and navy fluted ones a worthwhile investment?
Absolutely. Custom cabinetry allows you to maximize every inch of your space—a huge benefit in a compact condo kitchen. It also gives you complete control over the style, material, and finish. While there is an investment upfront, the superior quality, perfect fit, and personalized design of custom cabinets add significant long-term value and daily enjoyment to your home.
What should I know about electrical and plumbing work in an older Toronto condo building?
Safety and compliance are non-negotiable. All our electrical and plumbing work is performed by licensed and insured professionals who are well-versed in the Ontario Building Code and the specific challenges of high-rise construction. This can involve anything from upgrading an old fuse box to a modern breaker panel to carefully re-routing plumbing for a new island, all while ensuring proper waterproofing and adherence to building standards.
If our story has inspired you to reimagine your own condo, we encourage you to take the next step. Transforming a space to perfectly suit your life is one of the most rewarding investments you can make. We’d love to help you bring your vision to life. Contact us for a free quote and let’s start the conversation about your home.