

A Scarborough Kitchen Story: From Dated to Dreamy
For years, our kitchen felt more like a hallway than the heart of our home. Tucked away in our beloved Scarborough house, it was a relic of a bygone era—dark, cramped, and completely disconnected from the way our family lives today. A full kitchen reno was no longer a wish; it was a necessity. Our vision was clear and uncompromising: we wanted light, function, and timeless elegance. We dreamed of whole white finishes with brushed nickel fixtures, a classic combination that would feel fresh for decades to come. This is the story of how we turned that dream into our beautiful reality right here in Toronto.
Quick Facts
- Project: Full Kitchen Demolition and Renovation
- Location: Scarborough, Toronto, ON
- Category: Kitchen
- Key Features: Custom shaker cabinetry, quartz countertops and backsplash, central island with seating, integrated lighting
- Finishes: Pure white cabinets, Calacatta quartz, brushed nickel hardware and faucet
- Duration: 3 - 4 weeks
- Completed: July 2024
The Design Vision: Creating a Bright, Familial Hub
Before the renovation, our kitchen was a testament to 1980s design. The honey-oak cabinets seemed to absorb all the natural light, the laminate countertops were showing their age, and the U-shaped layout created bottlenecks that made cooking together impossible. We entertain often, and our kids love to help with meal prep, but the space was actively working against us.
Our primary goal was to create a bright, open, and inviting atmosphere. We knew an all-white palette would be the foundation. White reflects light, making any space feel larger and cleaner. But we were cautious about it feeling too clinical. The key was to layer textures and introduce a metallic finish that felt warm and sophisticated.
That’s where the brushed nickel came in. While polished chrome felt a bit too modern and brass felt too trendy for our long-term vision, brushed nickel struck the perfect balance. It has a soft, satin-like finish that doesn’t show fingerprints easily and provides a subtle, warm contrast against the crisp white.
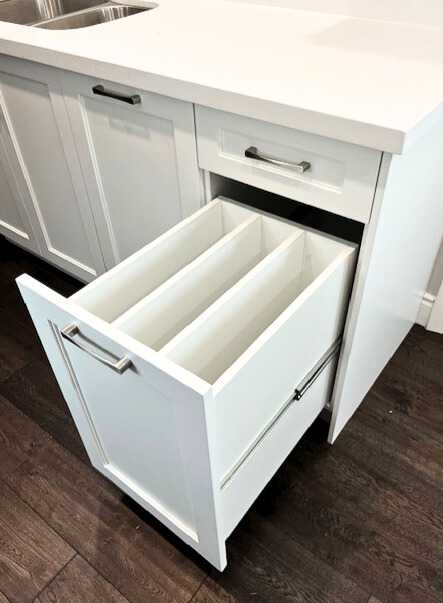
The layout needed a complete overhaul. We decided to remove a non-structural wall separating the kitchen from the dining area, creating a much more open-concept main floor. The centerpiece of the new design would be a large central island—a place for casual meals, homework sessions, and friends to gather with a glass of wine while we cook. Functionality was paramount, so we planned for deep pot drawers, a dedicated pantry cabinet, and clever storage solutions to keep the new, beautiful countertops clutter-free.
Materials & Specifications: The Building Blocks of Beauty
Choosing the right materials was a crucial step. We wanted finishes that were not only beautiful but also durable enough to withstand the rigours of family life.
-
Cabinetry: We opted for custom-built, full-access shaker-style cabinets. The shaker profile is a timeless classic that complements any decor. They were spray-painted with Benjamin Moore’s “Chantilly Lace,” a crisp, clean white that doesn’t have any cool or warm undertones. We invested in quality hardware, including soft-close hinges and full-extension drawer glides, which are small details that make a huge difference in daily use.
-
Countertops & Backsplash: For a seamless and luxurious look, we chose to use the same material for both the countertops and the full-height backsplash. We selected a durable quartz, specifically Caesarstone’s “Calacatta Nuvo.” It provided the pure white base we wanted but with elegant, sweeping grey veins that add depth and character. As a non-porous material, quartz is resistant to stains and bacteria, making it a perfect choice for a busy kitchen.
-
Fixtures & Hardware: This is where our brushed nickel theme truly came to life. We chose a high-arc gooseneck faucet from Moen, which is as much a statement piece as it is a functional tool. The cabinet pulls and knobs are simple, solid-brass pieces with a brushed nickel finish, providing a satisfying weight and feel.
-
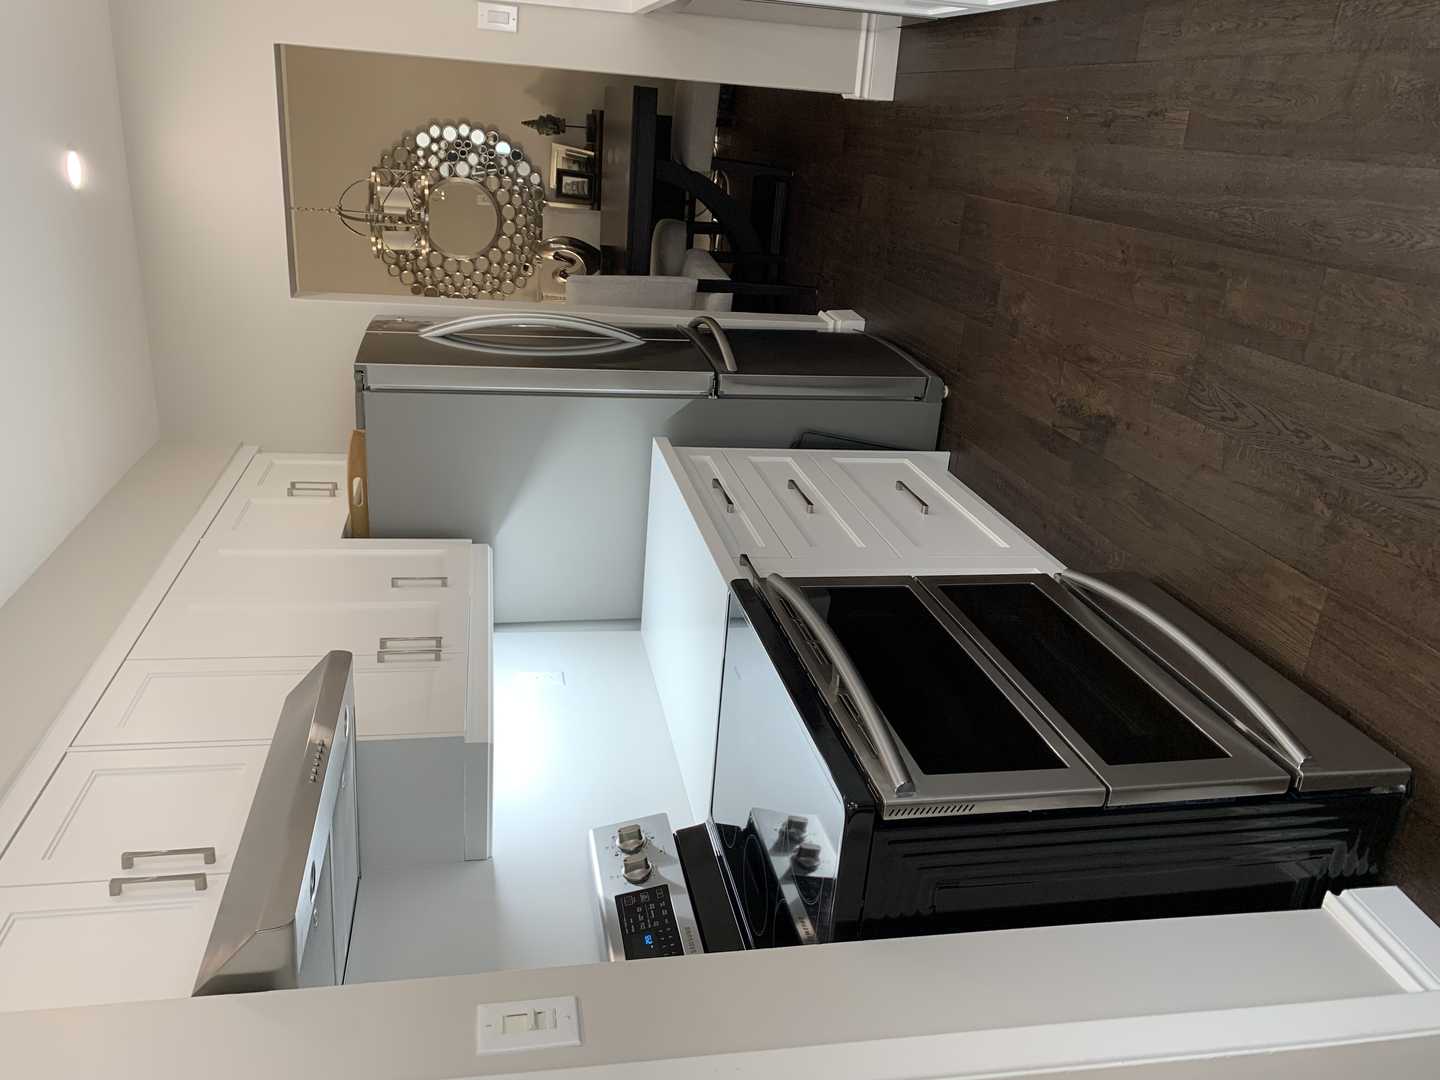
Lighting: A layered lighting plan was essential. We installed recessed pot lights throughout the ceiling for general illumination. Under-cabinet LED strip lighting provides excellent task lighting on the countertops. Finally, two beautiful glass pendant lights with brushed nickel bases hang over the island, defining the space and adding a touch of elegance.
-
Flooring: To add warmth and ground the all-white space, we installed luxury vinyl plank (LVP) flooring in a light, natural oak finish. It runs continuously from the kitchen into the dining and living areas, unifying the entire main floor. LVP is waterproof, scratch-resistant, and comfortable underfoot—an ideal choice for a high-traffic kitchen.
The Process & Timeline: Building the Dream
Seeing your home become a construction zone can be daunting, but our renovation team guided us through every step with professionalism and clear communication.
The process began with a meticulous demolition. The old cabinets, floors, and appliances were removed, taking the room back to the studs. This is when the true potential of the space was revealed.
Next came the critical rough-in stage. This is the work that happens behind the walls, and it’s arguably the most important. Our electricians ran new wiring to accommodate the new lighting plan and appliance layout. They ensured everything was up to the latest Ontario Electrical Safety Code, installing dedicated circuits for the fridge and microwave and adding Ground Fault Circuit Interrupter (GFCI) outlets near the sink for safety. The plumbers re-routed the water and drain lines for the new island sink, ensuring proper venting and slope. Getting these foundational elements right is non-negotiable for a safe and functional renovation.
With the mechanicals in place, the space started to take shape. Drywall was installed, taped, and mudded, creating a flawless canvas. Then came the first coats of paint, and the room instantly felt brighter and twice as large.
The installation phase was the most exciting part. The custom cabinets arrived and were installed with precision. A week later, the quartz templating team came to take exact measurements, and the countertops were installed the following week. The tile setter then meticulously laid the backsplash, creating a stunning feature wall behind the range. Finally, the flooring was laid, appliances were installed, and the finishing touches—the brushed nickel hardware, light fixtures, and final paint touch-ups—were completed.
People always ask about the timeline. The reality of a custom kitchen reno is that the schedule is unique to the project. From coordinating skilled trades to waiting for custom materials, the focus should always be on quality craftsmanship rather than speed. Our team ensured every stage was completed to the highest standard before moving to the next.
The Final Look: A Luminous Transformation
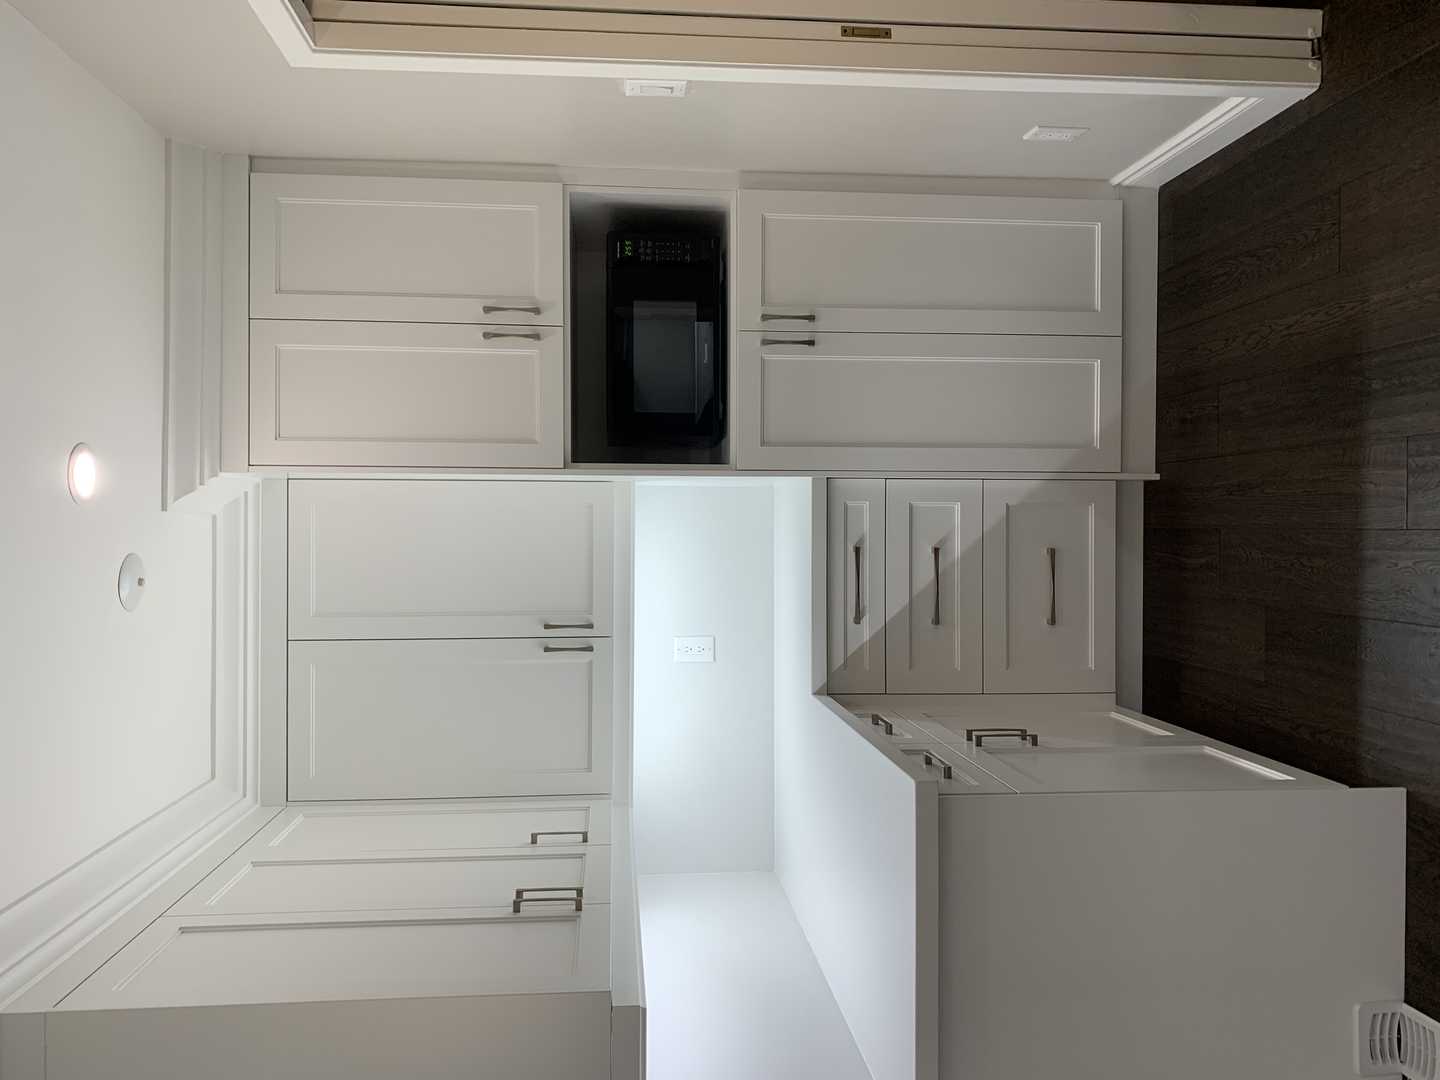
The first time we walked into our completed kitchen, it was an emotional moment. The transformation was staggering. The room was flooded with light, feeling expansive and welcoming. The whole white finishes act as a perfect, neutral backdrop, while the subtle grey veining in the quartz adds a layer of organic sophistication.
The brushed nickel fixtures are the perfect finishing touch. They provide a soft, metallic warmth that elevates the design and prevents the white-on-white scheme from feeling one-dimensional. The island has instantly become the command centre of our home—a place for breakfast, conversation, and connection. The workflow is intuitive, with everything exactly where it needs to be. It’s not just a beautiful space; it’s a machine for better living.
Design Takeaways for Your Renovation
Through this process, we learned a few valuable lessons that might help you on your own renovation journey.
- Embrace the Power of a Palette: Committing to a tight colour and finish palette (like our white and brushed nickel) creates a cohesive and high-end look. It simplifies decision-making and ensures a harmonious result.
- Texture is Your Friend: In a monochromatic space, texture is essential. We used the glossy finish of the backsplash, the subtle veining of the quartz, and the matte finish of the cabinets to create visual interest.
- Don’t Underestimate Lighting: A good lighting plan is transformative. A combination of ambient, task, and accent lighting makes a kitchen more functional and allows you to set the mood for any occasion.
- Invest in What You Can’t See: The quality of the work behind the walls—the electrical, the plumbing, the insulation—is the true foundation of your investment. Working with certified professionals who adhere to Ontario’s building codes is paramount. Thinking about your own project? It’s always a good idea to get a professional quote to understand the full scope.
Keeping It Pristine: Maintenance Tips
- Quartz Surfaces: Clean daily with a soft cloth, water, and a mild, pH-neutral soap. Avoid abrasive cleaners or scouring pads which can dull the surface.
- White Cabinets: Wipe up spills immediately. For regular cleaning, use a microfiber cloth dampened with water. For greasy fingerprints, a solution of warm water and a few drops of dish soap works wonders.
- Brushed Nickel: This finish is quite durable. Simply wipe with a soft, dry cloth to remove water spots and fingerprints. Avoid harsh chemicals or abrasive polishes.
Frequently Asked Questions
How much does a kitchen renovation like this typically cost in the Scarborough area?
The cost of a kitchen renovation in Toronto varies widely based on the size of the space, the quality of materials, and the scope of work. A full gut renovation like ours, involving custom cabinetry, quartz surfaces, and changes to the layout, can range from $60,000 to $100,000+. The best way to get an accurate number for your specific project is to get a detailed estimate.
Do I need a permit for a kitchen reno in Toronto?
It depends on the scope. If you are simply replacing cabinets and countertops in the same location (a “rip and replace”), you typically don’t need a permit. However, because our project involved moving a wall and altering plumbing and electrical layouts, a building permit was required. The City of Toronto requires permits for any project that involves structural, plumbing, or significant electrical changes to ensure the work is done safely and to code.
Why did you choose brushed nickel over other popular finishes like matte black or brass?
While we love the look of matte black and brass, we wanted a finish that was truly timeless. Brushed nickel has been a staple in high-end design for decades because it’s so versatile. It complements both warm and cool tones, doesn’t go out of style, and its soft lustre is elegant without being overly flashy. It was the perfect choice for the classic, long-lasting look we wanted to achieve.
Ready to start planning the kitchen you’ve always dreamed of? We would be delighted to help you bring your vision to life. Contact us today for a free, no-obligation quote and let’s build something beautiful together.