Welcome back to the site diary! This week, we’re taking you inside a stunning transformation in North York, Toronto. Our clients wanted to upgrade their dated bathroom into a sleek, modern oasis, and the final result is a masterclass in high-contrast design. The central features driving this project were a striking black frame LED mirror and perfectly fitted custom shower glass, turning a functional space into a genuine showpiece. This project proves that with meticulous planning, a dramatic overhaul is possible in a surprisingly short time.
Project Quick Facts
- Location: North York, Toronto, ON
- Category: Primary Bathroom Renovation
- Key Features: Custom frameless shower enclosure with black hardware, large format porcelain tile, wall-mounted vanity, matte black fixtures, black frame LED mirror.
- Duration: 1 week
The Design Vision: High-Contrast Modernism
The original bathroom was a product of a bygone era—a standard builder-grade setup with a bulky acrylic tub/shower insert, a dated oak vanity, and poor lighting that made the space feel cramped and dim. The homeowners, a young professional couple in North York, craved a space that felt clean, open, and aligned with their minimalist aesthetic.
Their vision was clear: a bold, high-contrast palette grounded in black, white, and warm grey tones. They wanted a walk-in shower that felt spacious and integrated, not an afterthought. The two non-negotiable elements on their wishlist were the statement black frame LED mirror to serve as a functional focal point and custom shower glass to create a seamless, open-concept feel without sacrificing water containment.
Our design goal was to maximize both perceived and actual space. We planned to achieve this by:
- Replacing the tub with a curbless-entry shower: This immediately opens up the floor plan and improves accessibility.
- Using large format tiles: Fewer grout lines create a more monolithic, expansive look on floors and walls.
- Installing a wall-mounted “floating” vanity: Exposing the floor underneath makes the room feel larger and easier to clean.
- Leveraging integrated lighting: The LED mirror would provide perfect, shadow-free task lighting for the vanity area, eliminating the need for bulky sconces.
The entire design hinged on precision and the interplay of light and shadow, with the matte black fixtures and frames providing sharp, graphic lines against the softer, textured tiles.
Materials & Specifications
A high-end finish relies on high-quality materials. For this North York bathroom, we sourced a curated selection of products designed for both beauty and longevity.
- Wall & Floor Tile: 24”x48” large format porcelain tiles with a subtle concrete texture. This durable, non-porous material is ideal for wet environments and the large size minimizes grout lines, which are often the first place to show wear.
- Shower System: We installed a full Schluter-KERDI waterproofing system. This is our standard for all bathroom renovations in Ontario. It involves a sheet-applied membrane over the shower walls and floor pan, creating a completely sealed and watertight enclosure that far exceeds basic building code requirements. The linear drain adds to the sleek, modern aesthetic.
- Vanity: A 48-inch wall-mounted vanity with a clean white finish and soft-close drawers provided ample storage while maintaining the “floating” design concept.
- Fixtures: We used a coordinated suite of matte black fixtures, including the shower head, handheld wand, vanity faucet, and towel bars. The matte finish is excellent at hiding water spots and fingerprints compared to polished chrome.
- Lighting & Mirror: The star of the show was a 36” round black frame LED mirror. It featured adjustable colour temperature (from warm to cool white) and an anti-fog function, all hardwired by our licensed electrician to a dedicated GFI-protected circuit, as required by Ontario’s Electrical Safety Code.
- Shower Glass: The custom shower glass was 10mm tempered glass, measured and cut to precisely fit the space after the tile was installed. We opted for a fixed panel with a minimalist door, using matte black hinges and a sleek ladder-pull handle to match the other fixtures.
The Process & Timeline: A One-Week Transformation
Executing a full bathroom gut and remodel in just one week requires military-grade coordination. Every material was ordered and on-site before Day 1, and our multi-skilled team worked in a carefully choreographed sequence.
Day 1: Demolition and Rough-ins
The week began with a flurry of controlled chaos. The team arrived early to lay down floor protection throughout the home’s access routes. By mid-morning, the old tub, toilet, vanity, and tiles were completely removed, taking the room back to the studs. This revealed the “bones” of the space, allowing our plumber and electrician to get to work. The plumbing was re-routed for the new wall-mounted vanity and the curbless shower drain. Simultaneously, our electrician ran new wiring for the LED mirror’s dedicated circuit and relocated the main vanity light box.
Day 2: Waterproofing and Preparation
With the rough-ins complete and inspected, the focus shifted to the most critical step: waterproofing. We installed new moisture-resistant drywall throughout. Then, our certified Schluter installer meticulously applied the KERDI membrane to the entire shower enclosure, overlapping all seams and sealing every corner and valve opening. This process is non-negotiable for ensuring a leak-proof shower that will last for decades.
Day 3 & 4: Tiling and Grouting
This is when the new design truly starts to take shape. Our tiling expert began laying the large format porcelain tiles, starting with the shower floor and moving up the walls. The size of these tiles requires specialized tools and techniques to ensure they are perfectly level and have minimal lippage. By the end of Day 4, all the tile was set, and the space was grouted with a high-performance, stain-resistant epoxy grout in a complementary charcoal colour.
Day 5: Major Installations
The room was now a tiled, waterproofed shell, ready for its new furniture. The team carefully mounted the floating vanity to reinforced blocking within the wall. The new one-piece toilet was installed, and the plumber connected the matte black faucet and shower fixtures. The transformation was dramatic—the room was starting to look and feel like a bathroom again.
Day 6: The Finishing Touches
This was the day the key design elements arrived. The custom shower glass enclosure was professionally installed, its crisp lines and black hardware instantly defining the shower area. Next, the black frame LED mirror was mounted and connected. The moment we switched it on, the room was bathed in a perfect, even glow, and the homeowners, who stopped by to see the progress, were absolutely ecstatic.
Day 7: Final Details and Handover
The final day is all about perfection. The painters applied a final coat of moisture-resistant paint to the ceiling and walls. All fixtures were sealed with silicone, baseboards were installed, and the entire space was given a thorough, professional cleaning. We conducted a final walkthrough with the homeowners, demonstrating how to use the new fixtures and the mirror’s features. Seeing their joy made the intense week of hard work completely worth it.
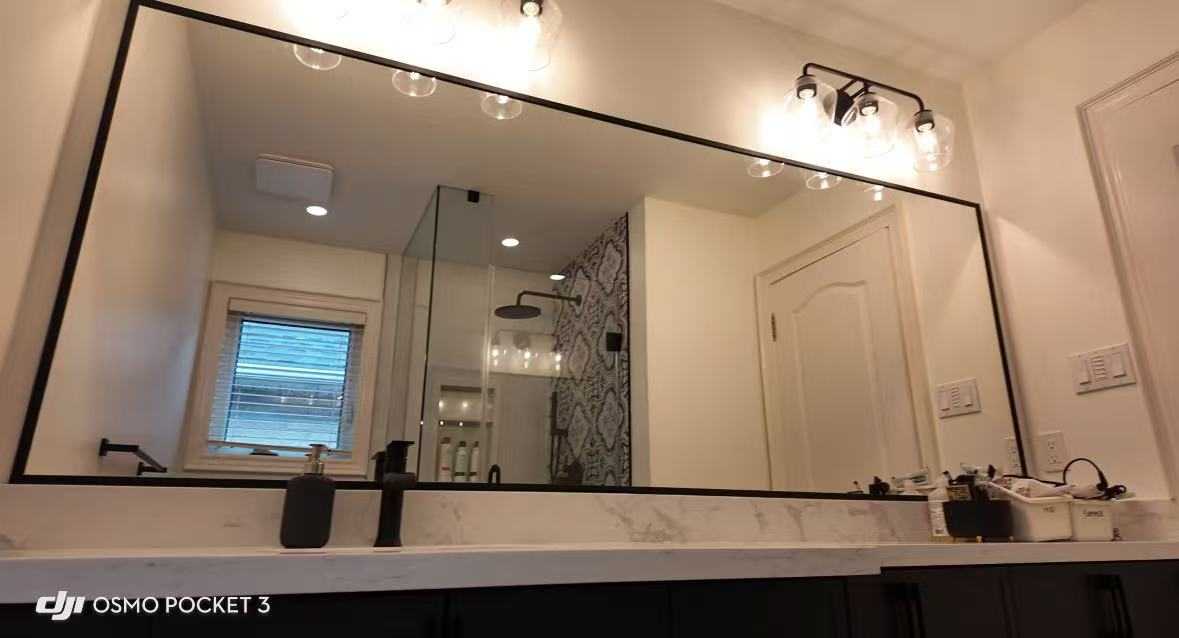
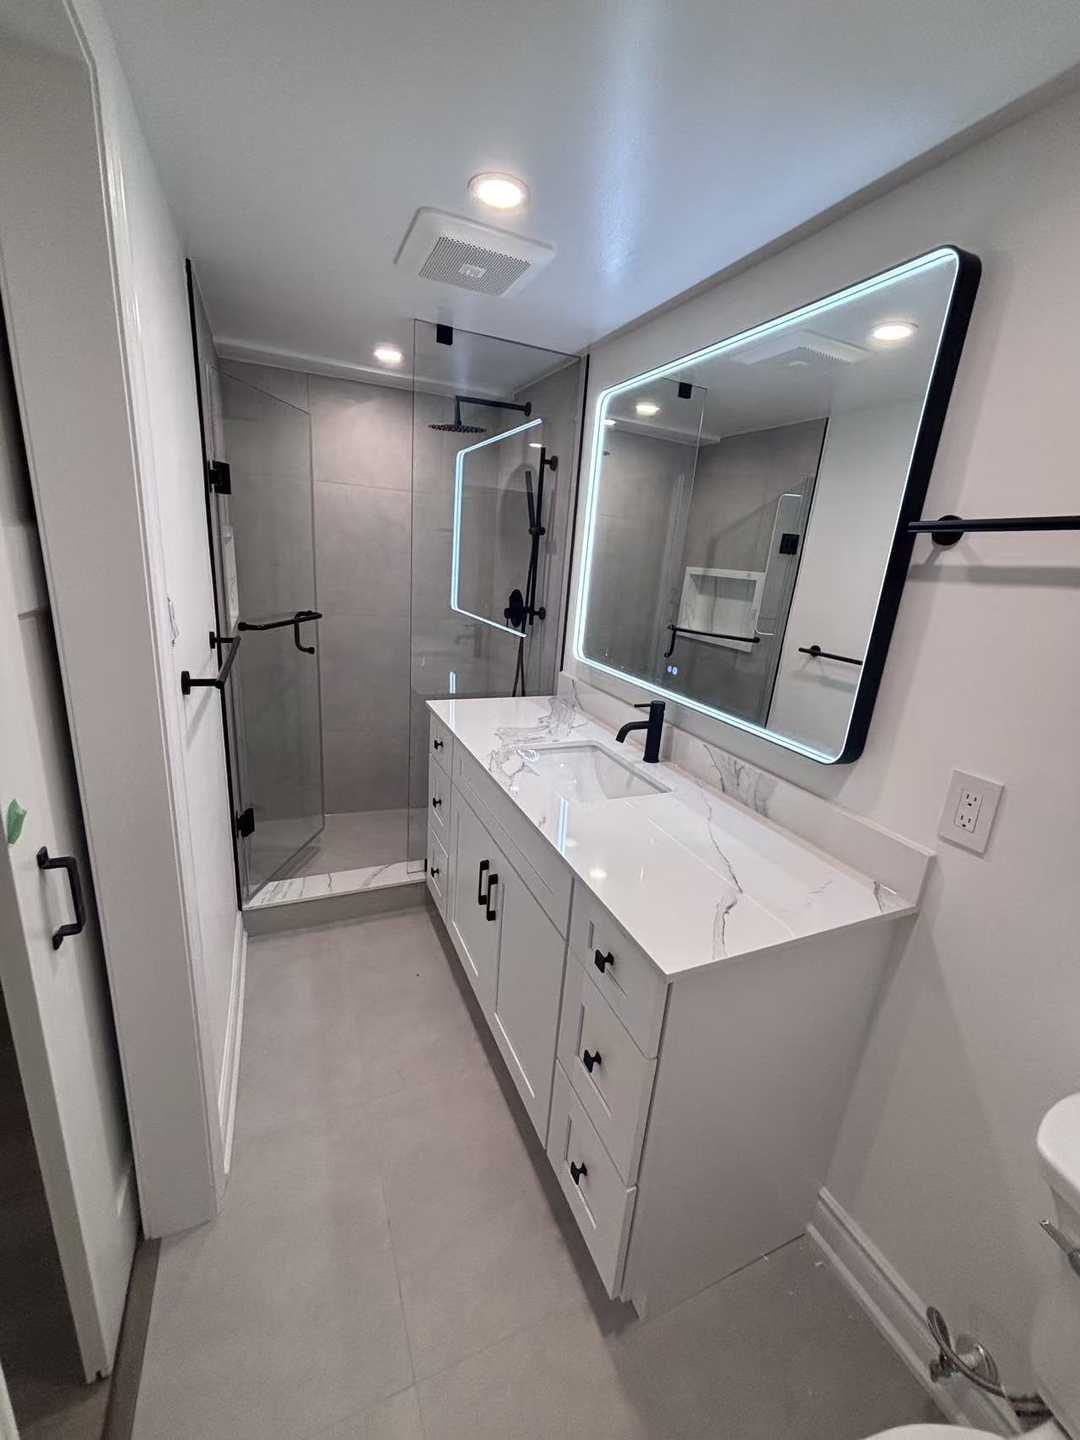
The Final Look
Stepping into the completed bathroom is like entering a boutique hotel spa. The large format tiles create a serene, unified backdrop. The floating vanity enhances the sense of space, while the matte black fixtures provide a sophisticated, grounding contrast.
But the undeniable focal points are the mirror and shower. The black frame LED mirror emits a soft, flattering light that makes the entire room glow, its round shape a perfect counterpoint to the linear tiles and vanity. The custom shower glass is so clear and minimally framed that it almost disappears, making the entire room feel like one large, open space. The effect is cohesive, luxurious, and deeply personal—a perfect reflection of the homeowners’ modern style.
Design Takeaways for Your Renovation
- Invest in a Focal Point: A statement piece like an LED mirror can elevate an entire room from functional to fabulous. It combines form and function, providing excellent lighting while acting as a piece of art.
- Custom is Worth It: Off-the-shelf shower doors often result in compromises. Custom-measured glass ensures a perfect fit, maximizes space, and provides a much cleaner, high-end look.
- Don’t Underestimate Waterproofing: The most beautiful tile job is worthless if the substrate fails. Insist on a comprehensive waterproofing system like Schluter-KERDI; it’s the best insurance policy for your investment.
- Plan for Lighting: Think about lighting in layers. The ambient light from the ceiling, combined with the direct, shadow-free task lighting from an LED mirror, creates a space that’s both functional and atmospheric.
Maintaining Your New Bathroom
To keep this North York bathroom looking pristine for years to come, we provided the homeowners with a few simple tips:
- Shower Glass: Use a squeegee after every shower to prevent hard water spots and soap scum buildup. Once a week, clean with a simple solution of white vinegar and water.
- Matte Black Fixtures: Clean with a soft, damp cloth. Avoid abrasive cleaners or harsh chemicals, which can damage the finish.
- Grout: Although we used stain-resistant epoxy grout, it’s still wise to clean it periodically with a pH-neutral cleaner to keep it looking fresh.
Frequently Asked Questions
Can a full bathroom renovation really be done in one week in Toronto?
Yes, but it requires immaculate planning and an experienced, coordinated team. All materials, from tiles to the custom vanity, must be selected and delivered to the site before work begins. The schedule is incredibly tight, with different trades (plumbing, electrical, tiling) working in a seamless sequence. It’s a premium service designed to minimize disruption for the homeowner.
How much does custom shower glass cost compared to a standard door from a big-box store?
Custom glass is typically more expensive upfront, but it offers significant value. You get a perfect fit for your unique space, higher quality 10mm glass, and a choice of hardware finishes to match your design. For a modern, frameless look, especially in non-standard-sized showers common in older Toronto homes, custom is often the only way to achieve a truly professional and watertight result.
What are the electrical requirements for an LED mirror in Ontario?
In Ontario, any electrical fixture in a bathroom, especially near a water source like a sink, must be protected by a Ground Fault Circuit Interrupter (GFCI). For a hardwired LED mirror like the one in this project, a licensed electrician must run a dedicated circuit to the mirror’s location and ensure it’s connected to a GFCI breaker. This is a critical safety requirement under the Ontario Electrical Safety Code.
Ready to start planning your own bathroom transformation? Whether you’re dreaming of a spa-like retreat or a sleek, modern update, our team is here to bring your vision to life. Contact us today for a free, no-obligation quote and let’s build something beautiful together.