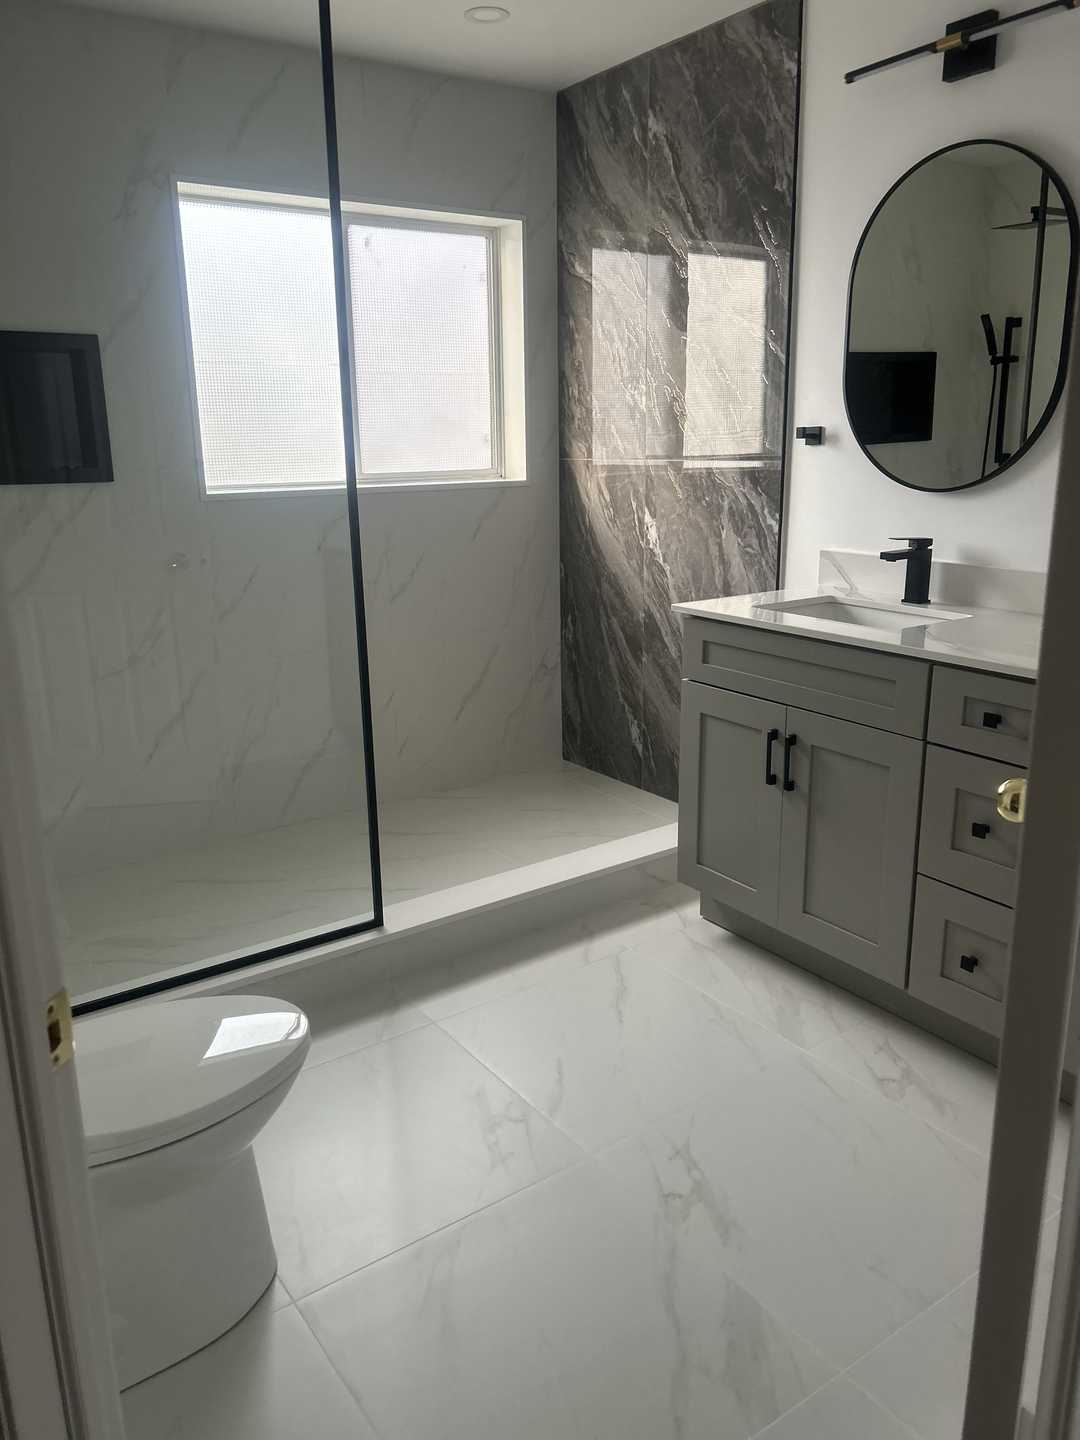
Transforming a dated bathroom into a modern sanctuary is one of the most rewarding home renovation projects. For this family in Whitby, Ontario, the goal was clear: create a sophisticated, highly functional space that felt both luxurious and calming. This project masterfully combines a textured grey vanity with black Kodaen fixtures and a stunning custom black U-shaped groove glass shower enclosure. The foundation of white base tile with a grey accent wall provides a timeless canvas for these dramatic details, proving that a monochromatic palette can be incredibly dynamic.
Project at a Glance: Quick Facts
- Location: Whitby, Ontario (Greater Toronto Area)
- Project: Full Primary Bathroom Renovation
- Key Features: Custom U-shaped groove glass shower, floating grey vanity, matte black Kodaen fixtures, heated porcelain floors, full-height textured accent wall.
- Style: Contemporary, high-contrast, minimalist.
- Duration: 2 weeks
- Timeline: Spring 2025
The Design Vision: Modern Sophistication in Whitby
The original bathroom was a product of a bygone era—a standard builder-grade space that lacked personality and efficient storage. The homeowners craved a clean, spa-like retreat that would serve as a peaceful start and end to their day. Our design process began by focusing on a palette that was both modern and enduring.
Our collaborative vision centered on a few key principles:
- Texture Over Colour: Instead of relying on bold colours for impact, we decided to create interest through a variety of textures. The reeded texture of the U-shaped groove glass, the subtle grain of the grey vanity, and the rough-hewn feel of the accent tile would work together to add depth and sophistication.
- High-Contrast Accents: A monochromatic scheme of white and grey can feel flat without a strong anchoring element. We chose matte black for all fixtures and hardware. The Kodaen series, known for its sleek lines and durable finish, provided the perfect graphic punch, turning functional items like faucets and showerheads into sculptural features.
- An Illusion of Space: To make the bathroom feel larger and more open, we incorporated a floating vanity, a curb-less shower entry, and large-format tiles. These design choices minimize visual clutter and create long, uninterrupted lines, enhancing the sense of spaciousness.
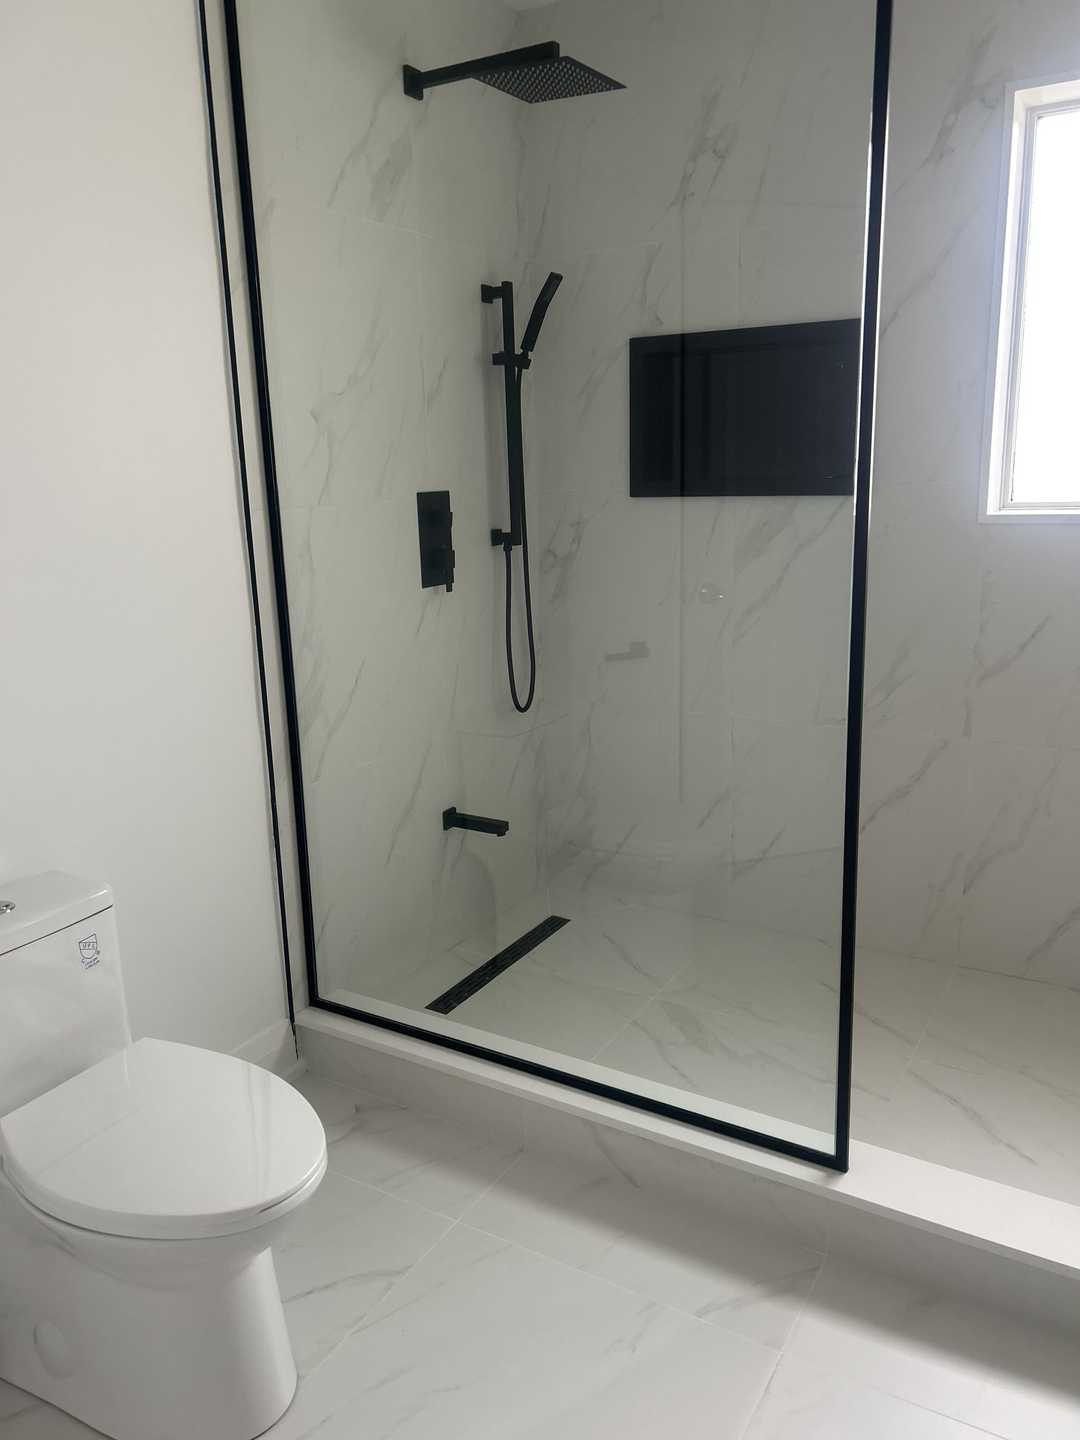
The custom U-shaped groove glass (often called fluted or reeded glass) was the star of the show. It offers a perfect balance of privacy and light, obscuring just enough while allowing light to filter through, preventing the shower from feeling like a dark box. This single element elevated the entire design from standard to statement.
Materials & Specifications: A Checklist for Quality
Achieving a high-end look that lasts requires a commitment to quality materials. Every selection for this Whitby bathroom was made with durability, aesthetics, and ease of maintenance in mind.
- Vanity: A custom-built, wall-mounted floating vanity in a textured grey laminate finish. Floating the vanity not only creates a modern look but also makes cleaning the floor underneath effortless.
- Countertop: A 2-inch thick slab of pure white quartz with a matte, honed finish. Quartz is non-porous, making it exceptionally resistant to stains, bacteria, and scratches—a perfect choice for a busy bathroom.
- Fixtures: The complete Kodaen collection in a matte black finish was used throughout. This included the single-hole faucet, the pressure-balanced shower valve with a rain head and handheld wand, and all coordinating towel bars and robe hooks.
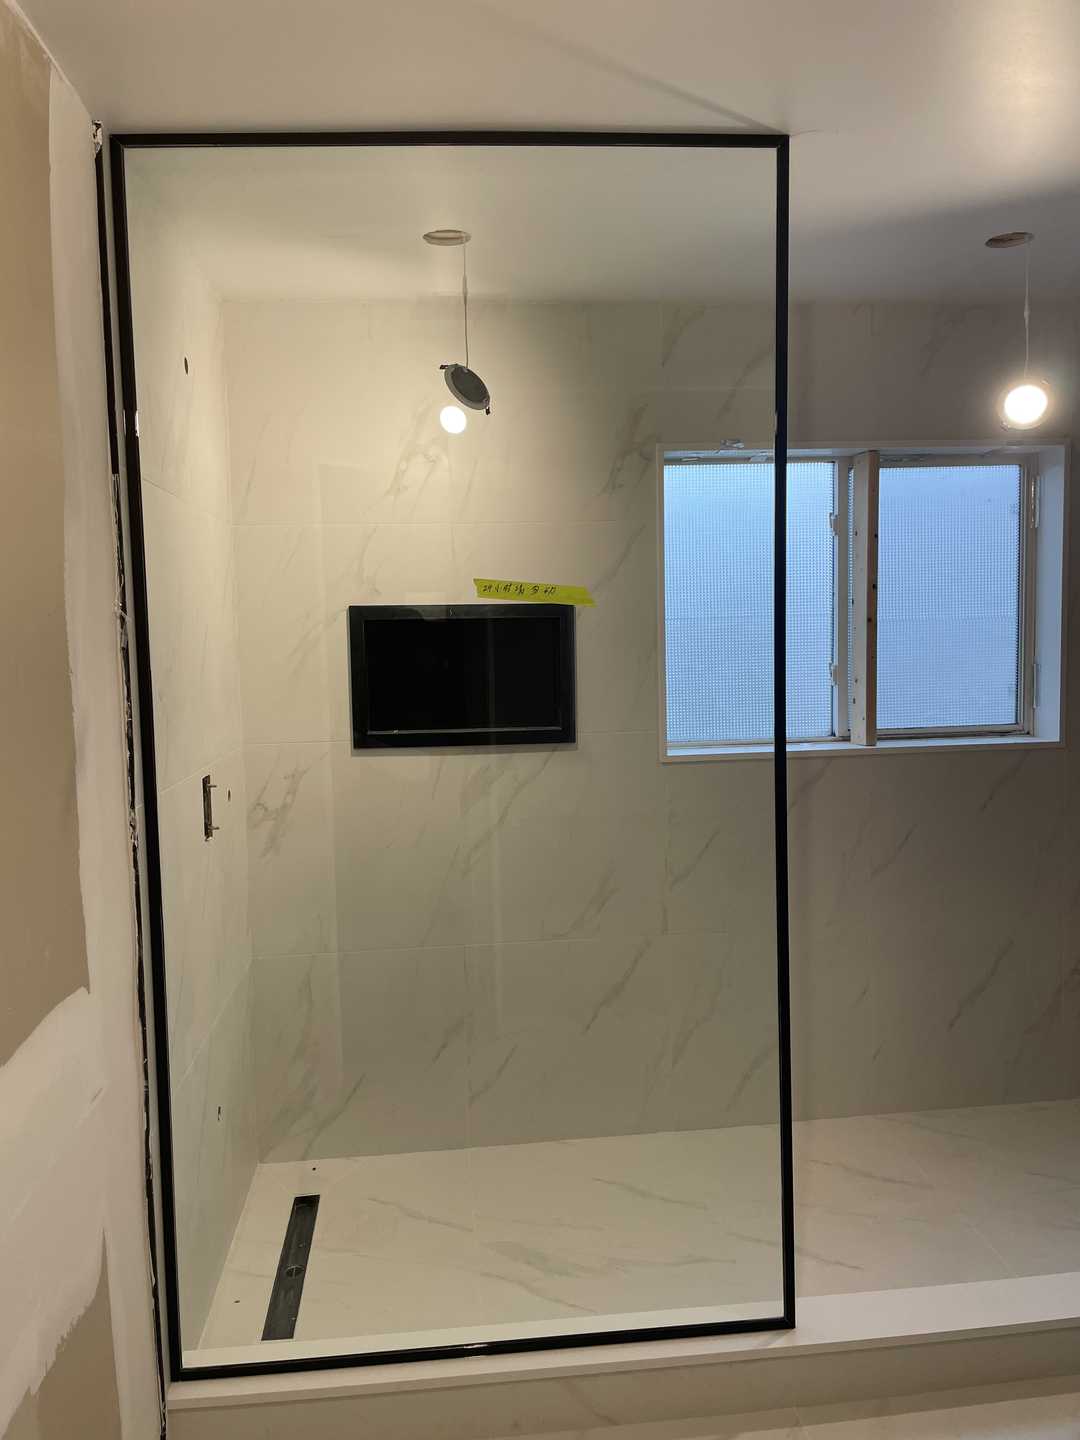
- Shower Enclosure: The centerpiece is a custom-fabricated 10mm tempered glass screen featuring a vertical U-shaped groove texture. It’s set in a slim, matte black U-channel and features a matching ladder-pull handle.
- Wall Tiles: For the main walls, we used oversized 24” x 48” polished white porcelain tiles. The large format and rectified edges mean fewer, thinner grout lines, creating a clean, almost seamless appearance.
- Accent Wall Tile: A dramatic floor-to-ceiling accent wall behind the vanity was created using 12” x 24” textured grey porcelain tiles laid in a stacked bond pattern. This draws the eye upward and adds significant visual weight.
- Floor Tiles: The floor features 24” x 24” matte white porcelain tiles, providing a safe, non-slip surface. Underneath, a programmable in-floor heating system offers unparalleled comfort, a true luxury during cold Ontario winters.
- Lighting: A layered lighting plan was essential. We installed four 4-inch LED pot lights on a dimmer switch for ambient light, supplemented by a sleek vertical LED sconce beside the mirror for even, shadow-free task lighting.
- Paint: The ceiling and non-tiled walls were painted with Benjamin Moore’s Aura Bath & Spa paint, which is specifically formulated to withstand humidity and prevent mildew growth.
The Process & Timeline: A Seamless 2-Week Transformation
A successful renovation is built on a foundation of meticulous planning and expert execution. Our two-week timeline for this project was ambitious but achievable because every detail was coordinated before the work began.
Week 1: Demolition, Rough-ins, and Preparation
- Day 1-2: Demolition and Disposal. Our crew carefully gutted the entire bathroom down to the studs. Old fixtures, tile, drywall, and the bulky tub were removed and responsibly disposed of.
- Day 3-4: Plumbing and Electrical Rough-ins. With the walls open, our licensed plumbers and electricians got to work. Plumbing lines were adjusted for the new wall-mounted vanity and the repositioned shower controls. New electrical wiring was run for the pot lights, sconce, heated floor system, and a new GFCI outlet, all performed to meet the stringent standards of the Ontario Building Code and the Electrical Safety Authority (ESA).
- Day 5-7: Insulation, Boarding, and Waterproofing. After insulating exterior walls, we installed new moisture-resistant drywall. The most critical step of this phase was the waterproofing. In the shower area, we installed a complete Schluter-KERDI membrane system over the walls and shower base. This creates a fully sealed, watertight envelope that is essential for preventing leaks and mould—a non-negotiable step for any modern bathroom renovation.
Week 2: Finishes and Final Installation
- Day 8-10: Tiling and Grouting. Our tile setters began by installing the in-floor heating membrane, followed by the floor tiles. They then moved to the walls, meticulously laying the large-format white porcelain and the textured grey accent tiles. Precision is key here to ensure perfect lines and minimal grout joints.
- Day 11: Vanity and Countertop Installation. The custom floating vanity was securely mounted to the wall framing, followed by the precise installation of the quartz countertop and undermount sink.
- Day 12: Fixture Installation and Final Glass Measurement. The plumber returned to install the matte black Kodaen faucet, shower trim, and toilet. At this stage, with all the tile in place, we took final, precise measurements for the custom U-shaped groove glass.
- Day 13: Painting and Final Electrical. The painter applied the final coats of mildew-resistant paint. Our electrician then completed the final hookups, installing the light fixtures, switches, and the heated floor thermostat.
- Day 14: Glass Installation and Final Touches. The custom glass shower panel was delivered and professionally installed. We completed all final silicone work, installed the mirror and accessories, and performed a deep clean of the entire space before a final, detailed walkthrough with the delighted homeowners.
The Final Look: A Study in Texture and Tone
The completed bathroom is a testament to the power of a well-executed design. It feels double its original size, with an airy, bright atmosphere that is simultaneously calming and invigorating. The cool tones of the grey vanity and accent wall are perfectly balanced by the warmth of the heated floors.
The matte black fixtures stand out as bold, artistic statements against the clean white backdrop. But it’s the U-shaped groove glass that truly captivates. As you move through the space, it plays with light in a dynamic way, creating shifting patterns and offering a sense of privacy without sacrificing openness. This Whitby bathroom is no longer just a functional room; it’s a carefully curated experience. Achieving a look like this requires careful planning and execution. If you’re inspired by this transformation, let’s discuss your project.
Design Takeaways: Lessons from this Whitby Bathroom
This project offers several key insights for anyone planning a bathroom renovation in the Toronto area:
- Invest in the Unseen: The most important elements of this renovation are the ones you can’t see. Professional-grade waterproofing, proper electrical work, and in-floor heating are investments in your home’s safety, comfort, and long-term value.
- Texture is a Powerful Tool: When working with a neutral palette, texture is your best friend. The interplay between the smooth quartz, reeded glass, and rough tile creates a rich, layered look that feels custom and luxurious.
- Customization Elevates the Space: Off-the-shelf solutions are good, but a custom piece like the floating vanity or the unique shower glass can transform a project from standard to spectacular. It allows you to perfectly tailor the space to your style and functional needs.
- Lighting is Everything: A well-designed, layered lighting plan is crucial. Combining dimmable overhead lighting with targeted task lighting at the vanity ensures the bathroom is functional and atmospheric at any time of day.
Maintenance Tips for Your Modern Bathroom
Keeping this beautiful space looking pristine is straightforward with the right care.
- Grooved Glass: Use a squeegee after each shower to prevent hard water spots. For deeper cleaning, a soft cloth with a 50/50 solution of white vinegar and water works wonders.
- Matte Black Fixtures: The key is to avoid abrasive cleaners or cloths, which can scratch the finish. A simple wipe-down with a microfiber cloth and mild soap is all that’s needed.
- Porcelain and Grout: Porcelain tile is incredibly durable and easy to clean. We recommend sealing the grout lines once a year to prevent staining and make cleaning even easier.
- Quartz Countertop: While highly stain-resistant, it’s best to wipe up spills from things like makeup or hair dye promptly. Use a pH-neutral cleaner for daily maintenance.
Frequently Asked Questions
How important is waterproofing for a bathroom renovation in Ontario?
It’s not just important; it’s mandatory under the Ontario Building Code. Proper waterproofing is the single most critical factor in ensuring the longevity of your bathroom. We use premium, multi-layer systems like Schluter-KERDI to create a fully sealed “tank” in all wet areas. This prevents water from penetrating your walls and subfloor, which can lead to catastrophic mould, rot, and structural damage.
I live in the Durham Region. Can you source unique materials like that U-shaped groove glass?
Absolutely. We have long-standing relationships with a wide network of suppliers, artisans, and fabricators across the Greater Toronto Area. For this Whitby project, we worked directly with a specialty glass manufacturer to create the custom enclosure to our exact design specifications, ensuring a perfect fit and finish.
A two-week timeline seems fast. How do you ensure quality isn’t compromised?
A swift timeline is the direct result of meticulous pre-planning and project management. Before we pick up a single hammer, every material is selected, ordered, and on-site. The design is finalized and approved, and our dedicated team of licensed trades—from plumbers to electricians to tile setters—is scheduled in a seamless sequence. This eliminates costly downtime and ensures that the project flows efficiently without ever cutting a single corner on quality or craftsmanship.
Inspired to create your own bathroom sanctuary? Whether you’re in Whitby, Pickering, or anywhere across the GTA, our team is ready to bring your vision to life. Contact us today for a complimentary quote and let’s start planning your dream renovation.