
Welcome to the site diary for one of our latest projects, a multi-bathroom transformation in a beautiful Woodbridge, ON home. This renovation involves three distinct spaces: a dramatic powder room, a serene master ensuite, and a functional shared family bathroom. Our goal is to infuse each with its own personality while maintaining a cohesive, high-end feel throughout the home. This project is a masterclass in using custom millwork, from a striking custom black vanity to a warm custom walnut floating vanity, to maximize both style and function.
Project Quick Facts
- Project Name: The Woodbridge Trio Bathroom Renovation
- Location: Woodbridge, ON
- Category: Multi-Bathroom Renovation (Master, Powder Room, Shared)
- Key Features: Custom vanities, accent tile walls, floating millwork, LED mirrors, modern black fixtures
- Project Start Date: October 2024
- Duration: 2 weeks
The Design Vision: Three Bathrooms, Three Personalities
When our Woodbridge clients approached us, they had a clear goal: to update three key bathrooms, each with a unique purpose and aesthetic. Instead of a one-size-fits-all approach, we collaborated on a design story for every room.
The Dramatic Powder Room
For the main floor powder room, the goal was pure impact. This is the bathroom guests will use, so it needed to be a conversation starter. The vision was dark, moody, and sophisticated. We centered the design around a full-height accent tile mirror wall, creating depth and reflecting light in an otherwise intimate space. A dark grey wall colour provides a rich, enveloping backdrop, setting the stage for the star of the show: a bold, custom black vanity.
The Spa-Like Master Bathroom
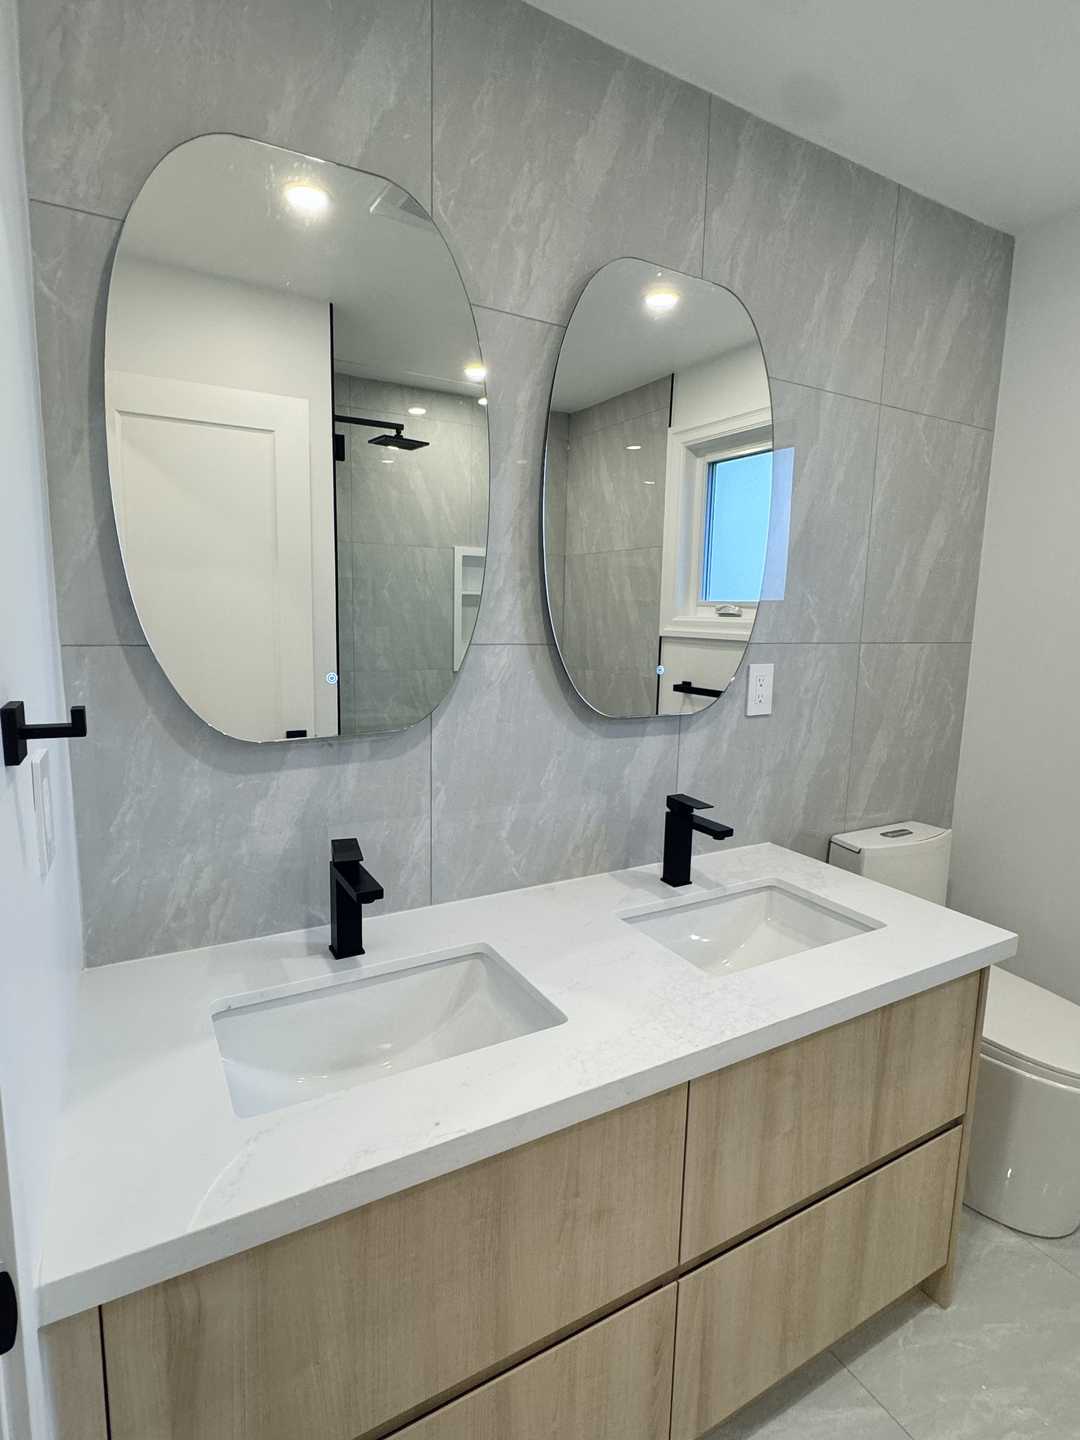
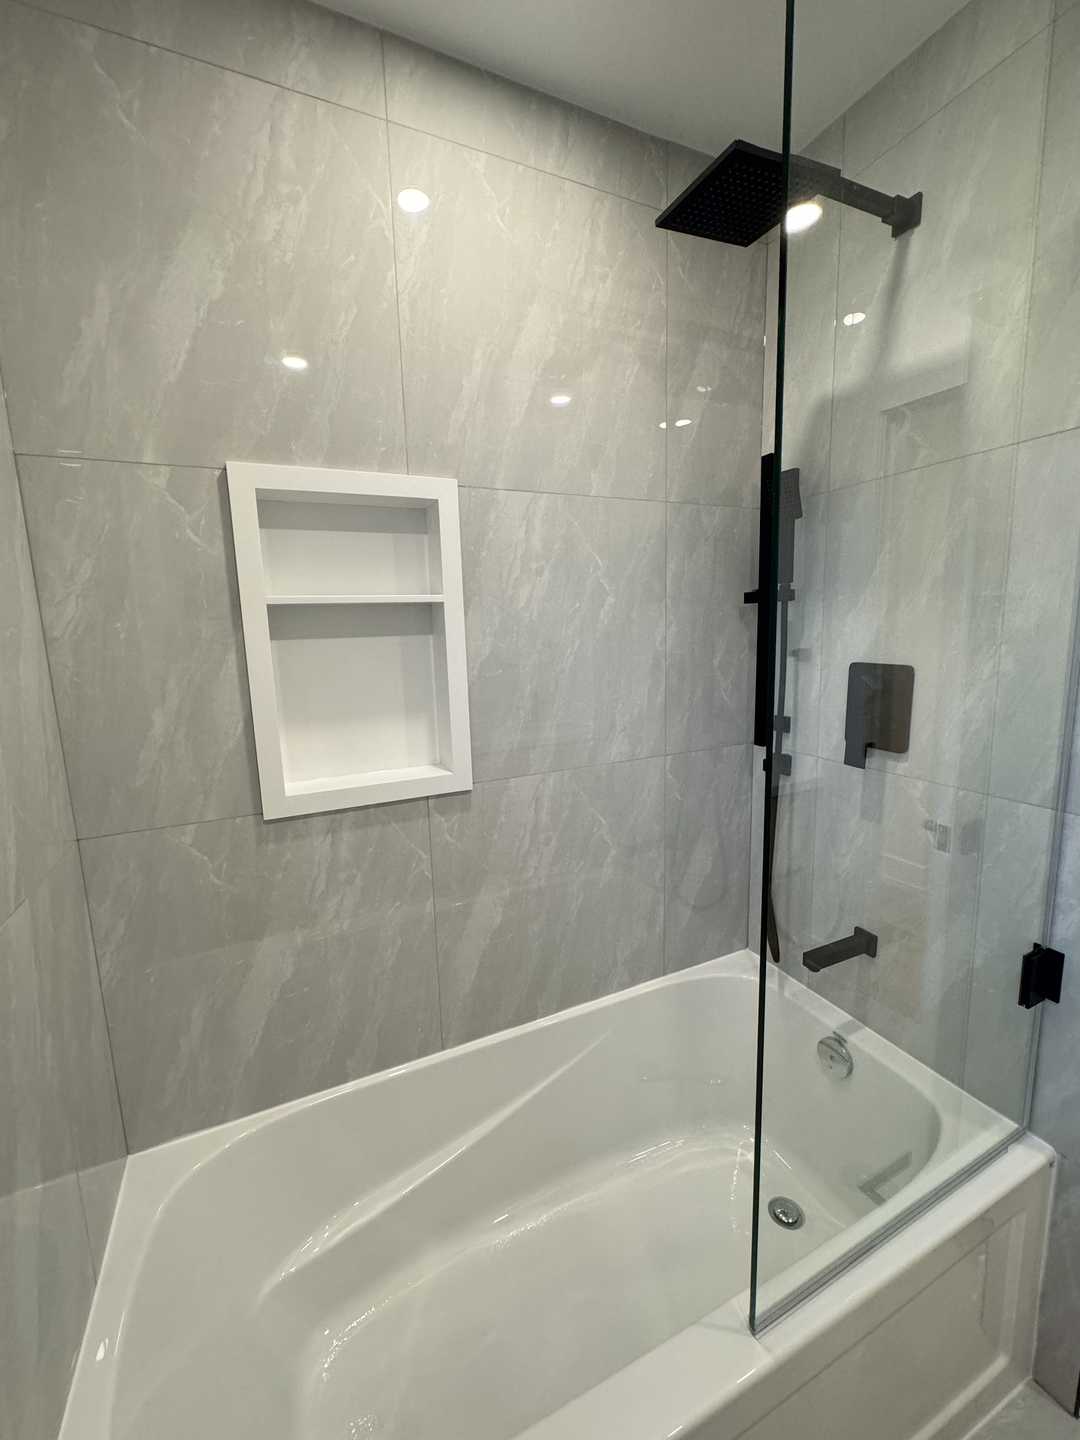
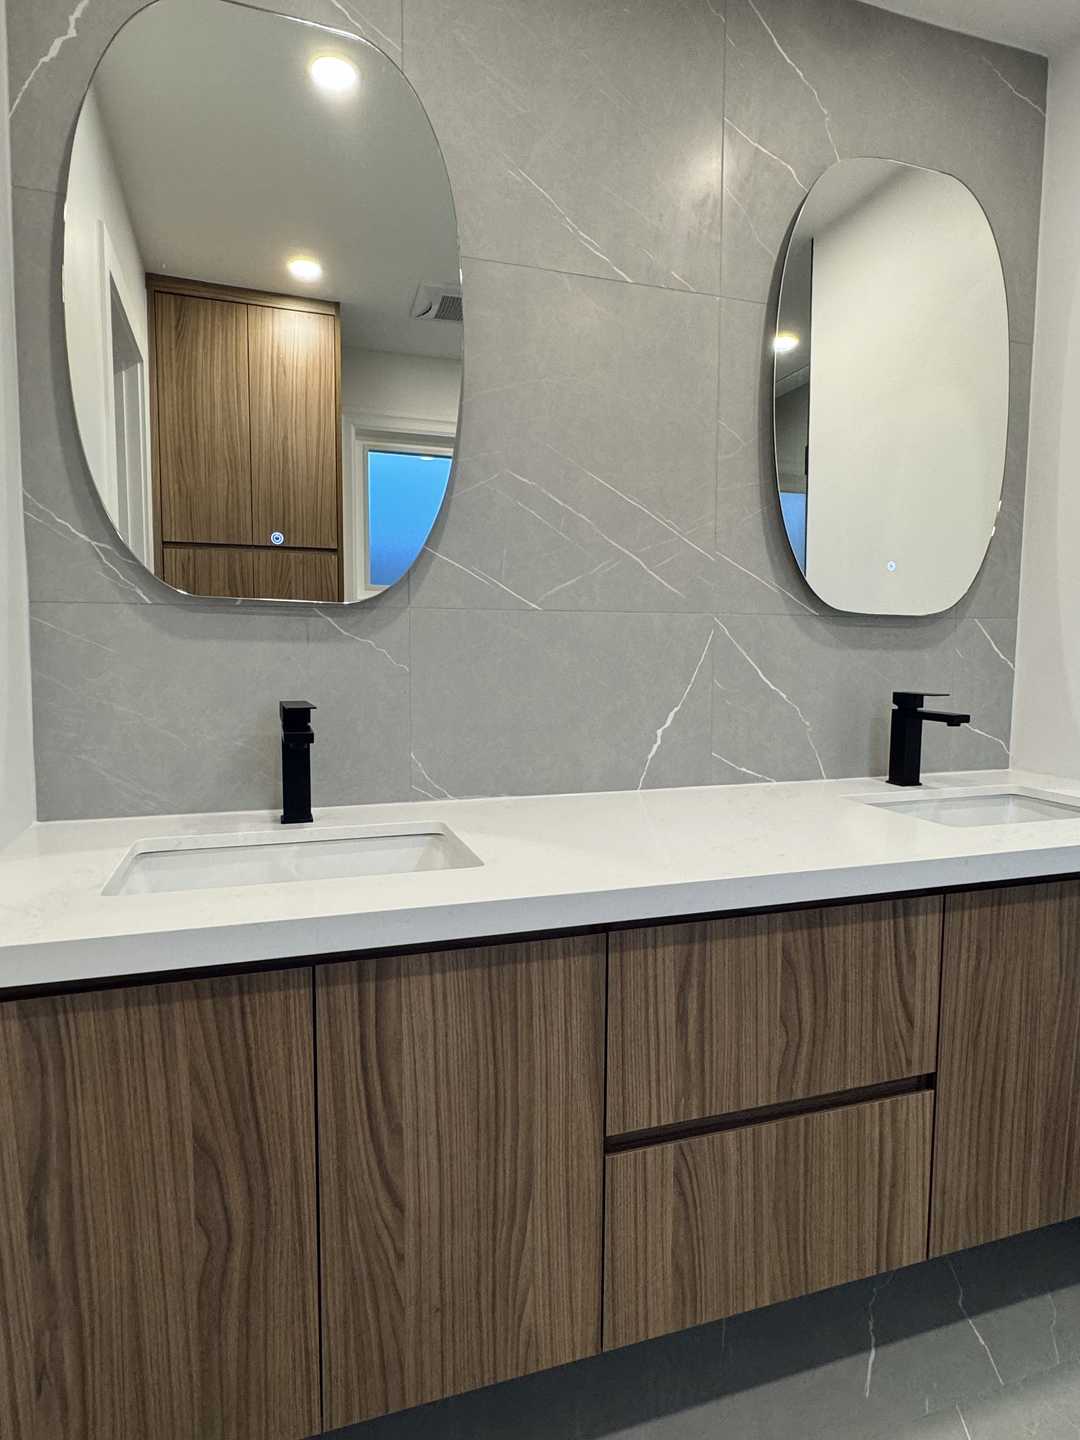
The master ensuite was envisioned as a private retreat—a place to decompress and recharge. The aesthetic here is warm minimalism, blending natural textures with sleek, modern technology. The focal point is a beautiful custom walnut floating vanity, which not only adds an organic, earthy feel but also makes the room feel larger and easier to clean. This warmth is contrasted with sharp, contemporary black shower fixtures and a frameless glass enclosure. To complete the spa experience, we planned for a double LED mirror system, providing perfect, shadow-free lighting for daily routines.
The Functional & Stylish Shared Bathroom
The third space is the hardworking shared bathroom, used by family and overnight guests. The vision here was to balance durability, storage, and style. The palette is lighter and more neutral, creating a bright and welcoming atmosphere. We designed a custom double wood panel vanity to provide ample storage and counter space for multiple users. The design is elevated by a stunning floor-to-ceiling beige grey mirror wall, which visually doubles the size of the room and adds a touch of understated luxury.
Materials & Specifications
The success of a design lies in the quality and cohesion of its materials. For this Woodbridge project, we specified a palette that balances luxury with practicality.
-
Vanities:
- Powder Room: The custom black vanity is crafted from solid maple with a matte black lacquer finish for durability. The design features two custom U-shape drawers, a brilliant solution that allows for maximum storage capacity while cleverly accommodating the plumbing drain and P-trap.
- Master Bathroom: The custom walnut floating vanity is made with a furniture-grade walnut veneer, book-matched to ensure a continuous, beautiful grain across the drawer fronts. It’s sealed with a water-resistant finish to protect it from the bathroom’s humidity.
- Shared Bathroom: The custom double wood panel vanity features a rift-cut white oak with a light stain, providing a durable surface that hides minor wear and tear, perfect for a high-traffic bathroom.
-
Countertops & Sinks: For all three vanities, we selected a durable, non-porous quartz in a soft white with subtle grey veining. This provides a clean, consistent look and is incredibly easy to maintain. Undermount sinks were chosen to maximize usable counter space and create a seamless look.
-
Tile & Wall Finishes:
- Powder Room: The accent tile mirror wall features a textured, charcoal-coloured porcelain mosaic that catches the light beautifully. The remaining walls are painted in a deep, matte grey (Benjamin Moore’s “Kendall Charcoal”).
- Master Bathroom: Large-format 24”x48” porcelain tiles in a Calacatta marble look are used for the floors and shower walls, minimizing grout lines for a clean, expansive feel.
- Shared Bathroom: The star here is the beige grey mirror wall, which is actually a back-painted glass panel system, offering a sleek, grout-free, and easy-to-clean surface behind the vanity.
-
Fixtures & Lighting:
- Matte black shower fixtures, faucets, and hardware are used in the master bathroom for a bold, graphic contrast against the walnut and light tiles.
- The double LED mirror in the master provides integrated task lighting with adjustable colour temperature and a built-in anti-fog feature.
- Chrome fixtures were chosen for the shared and powder rooms for a classic, timeless appeal that complements their respective designs.
The Process & Timeline: A Site Diary
As this project kicked off in early October 2024, our team has been meticulously working through each phase. While the final completion date is still unfolding, our process is structured to ensure efficiency, quality, and adherence to the Ontario Building Code every step of the way.
Phase 1: Demolition and Assessment The first week was dedicated to careful demolition. We stripped all three bathrooms back to the studs. This is a critical step, as it allows us to inspect the existing plumbing, electrical, and framing. In the master bathroom, we discovered a minor framing issue that needed reinforcement to properly support the new, heavier glass shower enclosure—a simple fix at this stage that prevents major problems down the road.
Phase 2: Mechanical Rough-ins With a clean slate, our licensed trade partners got to work.
- Plumbing: The plumbing was re-routed to accommodate the new floating vanity in the master and the precise dimensions of the custom vanities in the other two rooms. All supply lines were upgraded, and new drains were set with the correct slope, ensuring perfect function for years to come.
- Electrical: Our electrician ran new wiring for the master bathroom’s double LED mirror and installed new GFCI-protected outlets next to each vanity, a mandatory safety requirement under the Ontario Electrical Safety Code. We also mapped out the placement for new, energy-efficient LED pot lights in each bathroom ceiling.
Phase 3: Waterproofing and Preparation This is where the behind-the-scenes magic happens. In the master and shared bathrooms, we installed a comprehensive waterproofing system. We use top-tier products like the Schluter-KERDI system, applying a waterproof membrane to the shower walls, floor, and curb. This creates a fully sealed, watertight envelope that protects the home’s structure from moisture and mould—a non-negotiable step for any high-quality bathroom renovation. Following this, drywall was installed, taped, and mudded to a Level 5 finish, creating a flawless canvas for paint and tile.
Phase 4: Finishes and Installation (In Progress) This is the most exciting phase, where the design vision truly starts to come to life. Our tiling experts have begun laying the large-format porcelain in the master ensuite. Next, the custom-built vanities will be delivered from our millwork shop and installed. The precision required to install a floating vanity is immense, ensuring it is perfectly level and securely anchored to the wall framing. Once the vanities are in, the quartz countertops will be templated and installed, followed by the final plumbing and electrical hookups.
The Final Look
As we move toward completion, the distinct character of each bathroom is becoming clear. The powder room will be a dark jewel box, with the tiled wall shimmering behind the sleek black vanity. The master ensuite is shaping up to be a light-filled, serene sanctuary where the warmth of the walnut vanity will be the undeniable focal point. The shared bathroom will be bright, practical, and effortlessly chic, with the mirrored wall creating an incredible sense of space. Each room, while unique, will share a common thread of expert craftsmanship and thoughtful design.
Design Takeaways
This Woodbridge project offers several valuable lessons for any homeowner planning a bathroom renovation:
- Embrace Custom Millwork: Custom vanities, like the custom black vanity with its U-shape drawers or the custom walnut floating vanity, solve specific storage and style challenges that off-the-shelf options can’t. They are an investment that pays dividends in both functionality and aesthetic appeal.
- Don’t Be Afraid of Bold Choices in Small Spaces: The powder room is the perfect place to experiment with dark colours and dramatic features like an accent tile mirror wall. These choices can make a small room feel intentionally cozy and luxurious.
- Function First in Shared Spaces: The custom double wood panel vanity in the shared bathroom prioritizes storage and durability without sacrificing style. In a high-traffic area, practicality should always be a key design driver.
- Floating Elements Create Space: The custom walnut floating vanity in the master bathroom is a perfect example of how lifting furniture off the floor can make a room feel significantly larger and more open.
Maintenance Tips
To keep these new bathrooms looking pristine, we provided the clients with a few key care instructions:
- Walnut & Wood Vanities: Clean with a soft, damp cloth and a mild pH-neutral cleaner. Avoid abrasive sponges or harsh chemicals that can damage the wood’s finish.
- Matte Black Fixtures: These are best cleaned with a microfiber cloth and a 50/50 solution of water and white vinegar to prevent water spots. Avoid wax-based cleaners, which can cause buildup.
- Quartz Countertops: Simply use soap and water or a gentle, non-abrasive household cleaner. While highly stain-resistant, it’s best to wipe up spills from things like makeup or hair dye promptly.
- Grout-Free Surfaces: The back-painted glass wall in the shared bathroom can be cleaned with any standard glass cleaner, making it one of the easiest surfaces to maintain.
Frequently Asked Questions
Do I need a permit for a bathroom renovation in Woodbridge, Ontario?
It depends on the scope of your project. If you are simply replacing a vanity or toilet in the same location, a permit is typically not required. However, if you are changing the plumbing layout, altering framing, or doing significant electrical work—all of which were part of this project—a building permit from the City of Vaughan is absolutely necessary. We handle the entire permit application process for our clients to ensure everything is fully compliant with the Ontario Building Code.
What is the advantage of a custom vanity with U-shape drawers?
A standard vanity drawer is a simple box, which means it can’t close if a plumbing P-trap is in the way. This often leads to “dummy” or non-functional top drawers. A custom black vanity with U-shape drawers, like the one in this project’s powder room, features drawers with a cutout in the middle. This clever design allows the drawer to slide closed around the plumbing, maximizing every inch of available storage space.
How do you ensure a floating vanity is secure?
A custom walnut floating vanity requires robust support. We install solid wood blocking between the wall studs during the framing stage. The vanity is then mounted directly to this reinforced structure using heavy-duty hardware. When done correctly by experienced professionals, a floating vanity is just as strong and secure as a traditional floor-mounted cabinet.
Ready to transform the bathrooms in your home with thoughtful design and expert craftsmanship? Let’s discuss your vision. Contact us today for a free, no-obligation quote and start your renovation journey.