


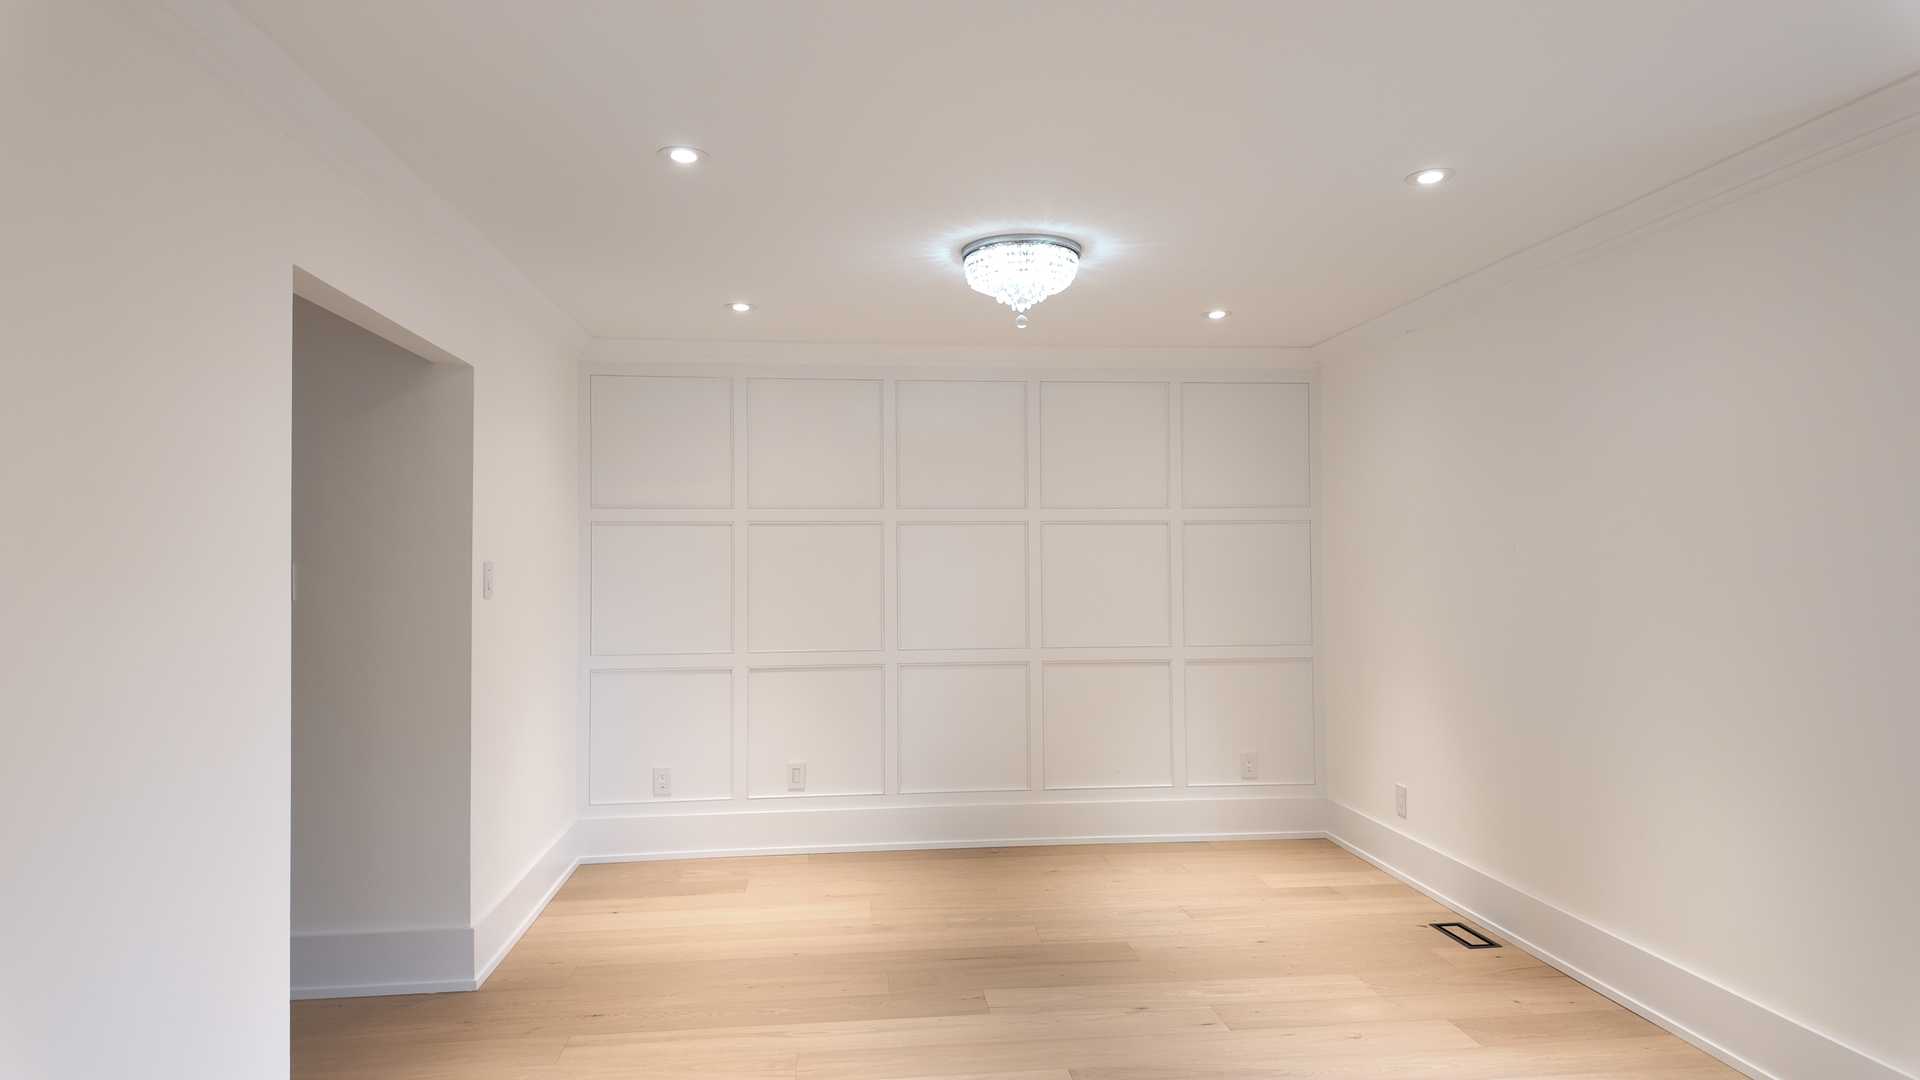
When a standard room feels a little too, well, standard, architectural details are the key to unlocking its hidden potential. For this Toronto living room, the goal was to create a dramatic and inviting focal point that felt both modern and timeless. We achieved this with a stunning combination: a sophisticated waffle ceiling matching the square trim wall for cohesive geometry, and a warm, textured brick accent TV wall to ground the space. This project is a masterclass in how layered textures and thoughtful design can completely transform a room from builder-basic to bespoke.
Project at a Glance
This project was all about creating a powerful visual anchor in the main living area of a beautiful Toronto home. The clients wanted to move beyond a simple painted accent wall and invest in a feature that added depth, character, and a sense of custom craftsmanship.
Quick Facts
- Project: Living Room Feature Wall & Ceiling
- Location: Toronto, ON
- Key Features: Custom square panel trim wall, matching waffle ceiling, integrated thin brick veneer TV wall, recessed LED lighting.
- Duration: 1 weeks
- Completed: September 2025
The Design Vision: A Conversation with Our Lead Designer
To understand the “why” behind the design, we sat down with our lead designer, Elena, who spearheaded this incredible one-week transformation.
Q: What was the homeowner’s initial request for their living room?
Elena: They came to us with a common challenge we see in many Toronto homes: a lovely, open-concept living space that lacked a central focus. It was a blank canvas, but almost too blank. Their main pain points were the unsightly TV wires and the feeling that the room lacked personality. They wanted something that would say “wow” when you walked in, but that also felt warm and functional for everyday family life.
Q: The combination of clean trimwork and rustic brick is striking. How did you land on this specific concept?
Elena: The concept was born from the idea of “structured warmth.” We started with the square panel moulding, or trim wall. It’s a classic look that adds instant architectural elegance and a sense of order. The real magic happened when we decided to extend that same grid pattern onto the ceiling. Creating a waffle ceiling matching the square trim wall makes the design feel immersive and intentional. It envelops the space, drawing the eye upwards and making the room feel grander.
But all that clean, white geometry needed a counterpoint. That’s where the brick came in. By creating a recessed niche for the television with a thin brick veneer, we introduced a completely different texture. The brick adds a touch of industrial heritage, a nod to Toronto’s historic Distillery District, and provides the perfect warm, textured backdrop for the TV. It stops the screen from being a black void on a white wall and instead makes it part of a deliberate, rustic feature. The contrast is what makes the whole design sing.
Materials & Specifications
Achieving a high-end look like this comes down to selecting the right materials and executing with precision.
- Wall & Ceiling Trim: We used 1x4” Primed MDF (Medium-Density Fibreboard) for all the gridwork. MDF is an ideal choice for this application because it’s dimensionally stable, free of knots, and provides an exceptionally smooth surface for painting.
- Paint: The entire feature, including the wall, ceiling, and trim, was painted in Benjamin Moore’s “Chantilly Lace” OC-65 in a satin finish. This is a crisp, clean white that isn’t sterile. The satin finish has a subtle sheen that beautifully catches the light, highlighting the shadows and dimensions of the trimwork without being overly glossy.
- Brick Veneer: To get the authentic look of brick without the immense weight and cost, we used a high-quality thin brick veneer. The specific product was a panelized system with a distressed red finish, which offered subtle variations in colour for a more realistic appearance. It was installed with a light grey, almost white, pre-mixed mortar to create a clean, contemporary look.
- Electrical & Lighting: This is a critical component that often gets overlooked in DIY projects. To ensure safety and a professional finish, all electrical work was completed by our licensed electrician.
- Hidden Wiring: We installed a new recessed electrical box behind the TV mount to house power and data (HDMI, Ethernet) connections, ensuring no visible cables.
- Outlet Relocation: Existing outlets on the wall were carefully moved forward to sit flush with the new trimwork for a seamless look.
- Recessed Lighting: New 4-inch slim LED pot lights were installed within the coffers of the waffle ceiling. These are on a dimmer switch, allowing the homeowners to control the ambiance, from bright and airy during the day to a soft, moody glow in the evening.
- Compliance: All electrical modifications were done in accordance with the Ontario Electrical Safety Code, and an ESA (Electrical Safety Authority) certificate was issued upon completion. This is a crucial step for any renovation in Ontario, ensuring the work is safe, compliant, and covered by home insurance.
Process & Timeline: A One-Week Wonder
Executing a project with this level of detail in just one week requires meticulous planning and coordination. Here’s how our team made it happen:
-
Day 1: Demolition, Layout & Electrical Rough-In The first day was about preparation. The area was cleared, and floors and adjacent walls were carefully protected with drop cloths and plastic sheeting. Using laser levels, our team precisely mapped out the grid for both the wall and ceiling. Simultaneously, our electrician ran the new wiring for the TV box and pot lights.
-
Day 2-3: Construction & Installation This was when the vision started to take physical form. The MDF boards were cut to size and expertly installed on the wall, followed by the construction of the waffle ceiling grid. On the TV wall section, the brick veneer panels were meticulously fitted and applied.
-
Day 4: Finishing & Detailing The difference between good and great is in the details. This day was dedicated to filling every nail hole, caulking all the seams where the MDF meets the walls and each other, and sanding everything to a flawless finish. This painstaking process is what ensures the final paint job looks like a single, cohesive unit.
-
Day 5: Prime & Paint With all the prep work done, it was time for paint. The entire structure was first coated with a high-adhesion primer. After drying, two top coats of the Benjamin Moore satin finish were applied using a combination of rollers and sprayers for a perfect, brush-stroke-free surface. The brick was carefully masked to maintain crisp, clean lines.
-
Day 6-7: Final Electrical, Cleanup & Reveal The electrician returned to install the pot lights, receptacles, and light switches. We then removed all protective coverings, performed a final round of touch-ups, and conducted a thorough site cleanup. The project concluded with a final walkthrough with the thrilled homeowners, handing them the remote to a living room that was now truly their own.
The Final Look
The result is a space that is both dramatic and harmonious. The geometric lines of the trimwork create a sophisticated rhythm that flows from the wall up across the ceiling, making the room feel taller and more expansive. The play of light and shadow across the panels changes throughout the day, adding dynamic visual interest.
The brick accent TV wall acts as the heart of the feature, its warm tones and rough texture providing a beautiful organic contrast to the crisp white grid. With all the wires concealed and the TV perfectly framed, the entertainment area is no longer a cluttered afterthought but a curated, integrated part of the home’s design.
Design Takeaways
We asked Elena for her key takeaways from this Toronto accent wall project.
Q: For homeowners inspired by this, what’s one design principle they should remember?
Elena: Embrace the power of repetition and contrast. We repeated the square grid from the wall to the ceiling, which is what gives the design its cohesive, high-impact feel. But we also introduced a strong contrast in texture with the brick. That balance is everything. If it were all just white trim, it would be elegant but could feel cold. If it were all brick, it could feel heavy. The combination of the two is what creates a perfectly balanced, dynamic space.
Q: Any final advice for someone considering a feature wall?
Elena: Think beyond just one wall. Consider how that wall interacts with the ceiling, the floor, and the lighting. A truly successful feature doesn’t just sit in a room; it defines the room. And never underestimate the importance of professional electrical work. Properly integrated lighting and hidden cables are what elevate a good idea into a flawless, functional reality.
Long-Term Maintenance
A beautiful feature like this is surprisingly easy to maintain:
- Painted Surfaces: Dust regularly with a soft microfiber cloth or duster. For any scuffs or marks, a magic eraser or a soft cloth with a mild soap and water solution works wonders. We always leave our clients with a small amount of labelled touch-up paint for any future needs.
- Brick Veneer: The brick is incredibly durable. Simply vacuum it with a soft brush attachment every so often to remove any dust. It requires no special sealants or cleaners.
- LED Lighting: The LED pot lights we install have a lifespan of 25,000-50,000 hours, meaning you won’t have to think about changing a bulb for many years.
Frequently Asked Questions
Do I need a permit for an accent wall in Toronto?
For a purely cosmetic project like applying trim or veneer, a building permit is typically not required. However, the moment you modify, add, or move electrical wiring—for pot lights, a new TV outlet, or relocating a switch—the work must be done by a Licensed Electrical Contractor. They will file a notification with the Electrical Safety Authority (ESA), which is a mandatory requirement in Ontario to ensure the work is safe and to code.
How much does a custom waffle ceiling and trim wall cost?
The investment for a project of this nature varies significantly based on the size of the room, the complexity of the grid pattern, the specific materials chosen, and the extent of electrical work required. A feature that combines a detailed waffle ceiling matching the square trim wall with a secondary material like a brick accent TV wall is a premium, custom installation. The best approach is to get a detailed, itemized quote based on your specific space. We can help with that.
Is real brick or brick veneer better for an interior TV wall?
For an interior feature wall in a Toronto home, we almost exclusively recommend a high-quality thin brick veneer. It provides an indistinguishable look and feel from full-sized bricks but has several major advantages: it’s significantly lighter (no need for structural floor reinforcement), much thinner (it doesn’t eat into your valuable floor space), and is far more cost-effective and faster to install. It’s the perfect solution for achieving that authentic masonry look indoors.
A well-designed feature wall is more than just decoration; it’s an architectural statement that can redefine your entire living space. It’s an investment in your home’s character and your family’s daily enjoyment.
Ready to transform a room in your home with a custom feature that truly reflects your style? Let’s talk about the possibilities. Contact us today for a free quote and let’s start designing the room you’ve always dreamed of.